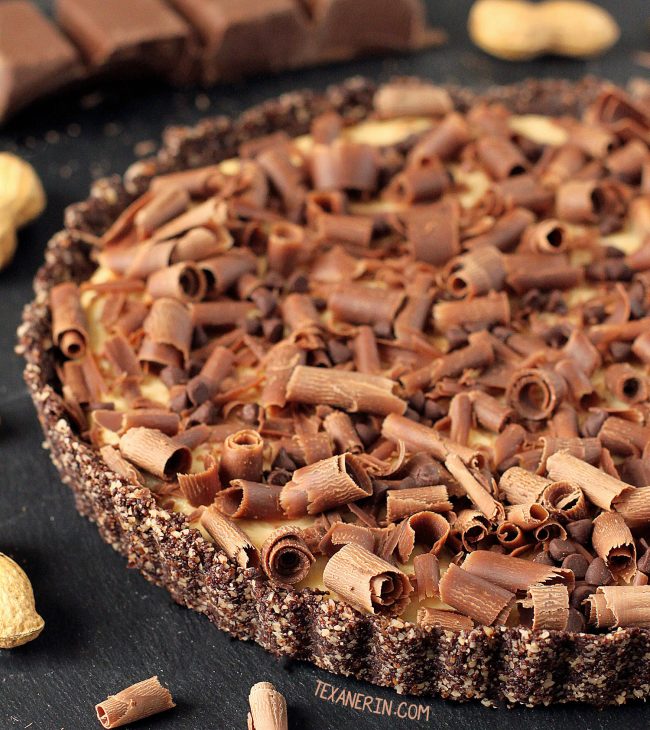
This healthier peanut butter pie is made better for you with natural peanut butter, just a little honey and a grain-free chocolate crust!
I’m super excited to be sharing this with you today! Like, ridiculously, almost-peeing-in-my-pants excited.
Peanut butter pie has always been my favorite pie but I didn’t think it could be made healthier and still actually be tasty. I’m not a fan of natural peanut butter in baked goods and for some reason, I didn’t think it’d be good in pie but I was very happy to be proven wrong!
I also had major doubts about naturally sweetening a peanut butter pie but only three tablespoons of honey was enough to nicely sweeten the entire filling. And there wasn’t any honey aftertaste!
The crust is also naturally sweetened with dates and honey. There are three tablespoons of chocolate chips in the dough but we needn’t even think about them. ;) If you really want to, you can omit them.

Instead of regular whipped cream, I used whipped coconut cream. You refrigerate a can of coconut milk overnight, scoop out the cream that forms on top, and whip it.
That’s all it is! Super easy but requires a little planning. You can also use regular whipped cream if you prefer.
This is the perfect dessert for when you need some peanut butter and chocolate goodness but don’t want to turn on the oven! You normally have to bake the crust of a peanut butter pie, but this one is totally no-bake and raw.
The grain-free crust is adapted from my chocolate hazelnut fudge bites. I subbed almonds for the hazelnuts but you could definitely use peanuts if you prefer! I just went almonds because they’re supposed to be more healthy than peanuts.
The crust isn’t crisp like a regular crust, and with a day in the refrigerator, it’s quite soft. If that bothers you, spread a layer of ganache over the crust.
I’d make about half of this recipe. I’m kicking myself that I didn’t do that myself! If you have any leftover, you can always drizzle it on top.
And yes, this is technically a tart. I don’t have any non-fluted pie pans and this no-bake crust just wouldn’t have done well in one of those.
If you want to use a regular pie pan and have a little too much crust, just roll the dough into balls and refrigerate! That is, after all, how that dough was intended to be eaten. ;)
I used cream cheese in this because peanut butter pie just isn’t peanut butter pie without cream cheese. So sorry to my vegan and dairy-free friends!
Though I suppose this homemade vegan and paleo cream cheese work work just fine. I’m not promising anything, though. ;)
Make sure to use agave instead of honey for a vegan version of the pie filling. For a peanut free version of this pie, replace the peanut butter in the topping with almond butter!
The only annoying thing is that this recipe doesn’t use the entire can of coconut milk. It just uses the cream part, and not even all of it (though it would if you want to use cream as a garnish!)
I didn’t add as much whipped cream as a regular peanut butter pie because I didn’t want to taste the coconut at all. A coconut peanut butter pie sounds amazing, but that’s not what I was going for here.
With the store brand coconut cream I used, I didn’t detect the slightest bit of coconut flavor and I’m hoping that this will be true for all brands. But I still wouldn’t bother making this pie if you hate coconut just because there’s a chance your pie could taste a little coconut-y.
As for the leftover coconut milk, I used it in this raspberry coconut smoothie.

Every brand of coconut milk I’ve tried has separated without problem, but I’ve read that some people have issues with certain brands.
I haven’t tried it myself, but the Whole Foods brand of coconut milk is highly recommended. Thai Kitchen is, too, if you don’t mind BPA.
See this post for brand comparisons and for step-by-step photos on how to whip coconut cream!
For the chocolate curls, I just used a block of milk chocolate and a potato peeler. Super simple!
Though it took quite a while – about 10 minutes. Here’s a video that shows you how to make them.
This pie needs to be refrigerated or frozen and not left at room temperature for more than 15 minutes or so. It starts to soften quite quickly because of the runny natural peanut butter and honey.
So this is not what you want to bring to a picnic! Unless you have a cooler. Then you can impress all your friends with your fancy healthier peanut butter pie. :D
And if this just looks too healthy for you, try this more traditional Chocolate Peanut Butter Pie!
I hope you’ll enjoy this pie if you try it. If you do, I’d love for you to leave some feedback below. Thanks!
Grain-free and Raw Healthier Peanut Butter Pie
- Prep Time:
- Cook Time:
- Ready in:
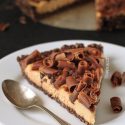
- Yield: 8-12 slices
Ingredients
- 1 cup (145 grams) almonds or peanuts
- 66 grams dates (this is about 10 regular sized dates)
- 2 teaspoons honey
- 4 teaspoons Dutch process cocoa powder
- 3 tablespoons chocolate chips
- 1 teaspoon vanilla extract
- 1/8 teaspoon salt
- 1/3 cup (100 grams) coconut cream from a chilled can of full fat coconut milk (or regular heavy cream)
- 3/4 cup (198 grams) natural peanut butter (see here for a simple homemade version)
- 1/8 teaspoon salt if your peanut butter is unsalted
- 2 teaspoons vanilla
- 3 tablespoons (60 grams) honey
- 8 ounces (225 grams) cream cheese1
For the crust:
For the filling:
Directions
- In the bowl of a food processor fitted with an S-blade, pulse the almonds until finely ground, almost like almond meal. Be careful not to process too long as it'll start to turn into almond butter.
- Remove the almonds from the food processor and set aside.
- Add the dates to the food processor and process until a paste-like mass forms. It won't break down into a liquid paste, but should be spreadable.
- Add the remaining ingredients (except the ground almonds) and pulse until fully combined.
- Add the ground almonds and process until it comes together. It might be necessary to scrape the sides of the bowl to get the date paste fully combined.
- Press the mixture onto the bottom and up the sides of an ungreased 9" tart pan.
- Place this in the refrigerator while preparing the filling.
- Carefully scoop out 1/3 cup of coconut cream from the chilled can of coconut milk. If you want to use whipped coconut cream as garnish, go ahead and whip the entire layer of coconut cream.
- Using an electric hand mixer, beat the coconut cream for 1-2 minutes or until light and creamy. If you just used the 1/3 cup of cream, you should now have about 1/2 cup whipped coconut cream (a little bit more or less won't hurt). Set this bowl aside.
- In a medium mixing bowl, beat together the peanut butter, salt if using, vanilla, honey and cream cheese until well combined and no lumps remain. Taste and add more honey or salt, if necessary.
- Gently fold in the whipped coconut cream.
- Remove the crust from the refrigerator and scoop and spread the filling over the crust.
- For the chocolate curls, use a potato peeler and a block of chocolate. See the post for a link to a video tutorial.
- Cover and refrigerate the pie for 3 hours before serving.
- Can be refrigerated for up to 4 days. It can also be frozen. Let it thaw for 5-10 minutes before serving.
For the crust:
For the filling:
Notes
- If you don't live in North America, you probably don't have bricks of cream cheese. You probably have the kind which is spreadable and meant for toast. For this recipe, take 300 grams of cream cheese and put it on the center of a cheesecloth or a thin kitchen towel which won’t leave behind a bunch of fibers. Squeeze out enough of the liquid so that it resembles brick cream cheese. You should now have 225 grams of cream cheese.
Join over 12,400 readers and sweeten up
your inbox with new posts for free!
This subscription is free of charge and can be canceled at any time.


53 comments on “Healthier No-bake Peanut Butter Pie (grain-free)” — Add one!
This filling was really good! The only thing I did differently for the filling was that I didn’t whip the coconut cream but I just added all of the cream from one can of coconut milk once all the other ingredients were mixed together. This seemed to work well for me. I also like it better with the crust from your chocolate cream pie recipe!! So good thank you!!
I’m happy that you enjoyed it! And I’ll have to try this with the chocolate cream pie crust, too. I much prefer that one over no-bake crusts. :) Thanks a bunch for sharing your tips and for your comment!
Um yes, I am peeing my pants excited over this one too Erin!!
Hi- Do you think the crust might be crispy if it were baked first before adding the filling?
I haven’t tried it but I’m pretty sure that wouldn’t work. I think it’d come out rubbery. Sorry about that!
I am making this for Thanksgiving!! Question: for the crust do you think I could use actual almond meal rather than grinding my own almonds or would it be too finely ground? My food processor doesn’t do nuts very well :(
I think it’d work but since I haven’t tried it myself, I can’t guarantee it! I hope you’ll enjoy it. :)
This looks amazing.I do have a question though,can I replace honey for maple syrup?My little guy is allergic to honey.Thanks.
I haven’t tried it but I think it’ll work! But as maple syrup is thinner than honey, the filling will be thinner and not as firm. I hope you all will enjoy it if you try it! :)
This looks so delicious – would love to try it for a family bbq coming up but one of the guests are allergic to nuts – do you think this would work with almond butter?
It’d be great with almond butter! I hope you all will enjoy it. :)
Can you suggest a healthy ganache to put over the crust?
This is my favorite ganache and definitely classifies as healthier but I’ve had a few people say that their ganache doesn’t come out like in the picture. I make that ganache all the time, following the recipe exactly, so I think differences in Greek yogurt or honey must be the issue. I hope it works out for you! :)
I love the fact that you add dates to this crust! I love peanut butter and chocolate, but I try not to keep too much in the house since I have little (read no) self control :P I’m going to have to get some coconut cream and make this soon!!
Haha. I have the same self control issue. ;) This is a nice recipe because you can easily halve it. And if you’re worried about buying peanut butter, you could always make your own and just make enough for the recipe. Then you can’t overeat. :D I hope you’ll enjoy the recipe if you try it and thanks for your comment!
I just wanted to let you know that I did make this and loved it! I actually didn’t have any chocolate chips laying around, but I substituted them with M&Ms and it turned out amazing! I think it was actually better the next day. I’ll definitely be making this again!
I’m so happy that you made it and enjoyed it! M&Ms sound much more fun than plain chocolate chips. And awesome that you liked it even more the second day! Thank you so much for coming back to leave feedback. :)
What a great recipe for those who need gluten free! I have a niece who does, and she would love this recipe…thanks for sharing!
Thanks, Jodee! I hope your niece will enjoy the recipe if she gets to try it. :)
I know you will be appalled but I don’t like cream cheese, could you recommend a substitute?
Thanks!
Juli
Haha. I’m not appalled. :) I wasn’t sure about a cream cheese sub but I found these two articles that talk about cottage cheese, yogurt, and ricotta. Common Ingredients Substitutions and cream cheese substitutes. I hope that helps and that it works well in the recipe! :)
Giiiiiirl! This looks insanely amazing! And you say it’s healthier, eh? Slice please!!!
Here you go! :D
You are a GENIUS! I could just hug you. This looks incredible!
Oh, why, thank you! ;)
A crust that is made from natural sweeteners and nuts is always the cherry (or in this case the Peanut Butter) on top!
Haha. Agreed! As much as I love Oreo crusts… they’re just so bad for you. :(
great crust. looks delish!
Thanks, Dina! :)
This looks fantastic! I love the addition of the whipped coconut cream, so clever!
Thank you, Annie! :)
I am positively drooling! I am a peanutbutter-holic and love the ingredients you use to make it sweet. I’ve come over from Allergy Free Wed. If you’re interested, I’d be thrilled if you included this in Naturally Sweet Tuesday for this week! http://livingfree.aubreecherie.com/2014/05/introducing-naturally-sweet-tuesday-new-blog-carnival-link-up/
All the best, ~Aubree
Thanks so much, Aubree! I’ll definitely check it out. :)
Sounds rich and looks yummy! I already developed several variants of the recipe in my head. Will try.
I can’t wait to see what you come up with! :)
Peanut butter pie is a staple in our family, and I love these ideas of making it healthier!
Haha. A staple. Love it! :)
“I used cream cheese in this because peanut butter pie just isn’t peanut butter pie without cream cheese.” SO TRUE!
I am in love with all things chocolate and pb (my hubby isn’t – SO WEIRD. but he also ate 13 waffles so…) so I need this. I just discovered the amazing-ness that is coconut cream and now I am putting it on ALL THE THINGS.
face included.
Pinned! :D
Haha. Thanks for pinning! And your husband not liking peanut butter is very unfortunate. My prefers veggies over sweets. So I understand. ;)
What a gorgeous piece of MMmm!!!
Thank you! :)
Mmm, that looks so good right now! Love how it is no-bake, looks like something that would be awesome in the hot weather. :)
YES! Exactly. It doesn’t have to get too hot for me to not want to bake (with no air conditioning!)
I am in love with these photos! And those chocolate curls…. guuuurl! This is amazing :D
Haha. Hi, Carla! :D
Oooh, I totally want this for breakfast!
Good idea! :)
I’m definitely looking to expand my range of no-bake desserts this summer (I may be a little optimistic based on how much it’s raining at the moment…) and this sounds perfect!
Yes to no-bake desserts! I’m betting you don’t have AC in London, either. Someone who understands how miserable it can be baking with no AC. ;)
GIMMMEEEE. I’ve been waiting fot this since I saw it on Instagram! It’s cute that you say not to leave it out at room temp for more than 15 minutes, do you really think it would last that long?? I tihnk I’d inhale this in like 4 minutes, tops.
Haha. Nice. :D I normally inhale pie but this was just too filling to do that! ;)
What a great recipe! This cake looks yummy and the best part is that it’s healthier
Thanks a bunch! :)