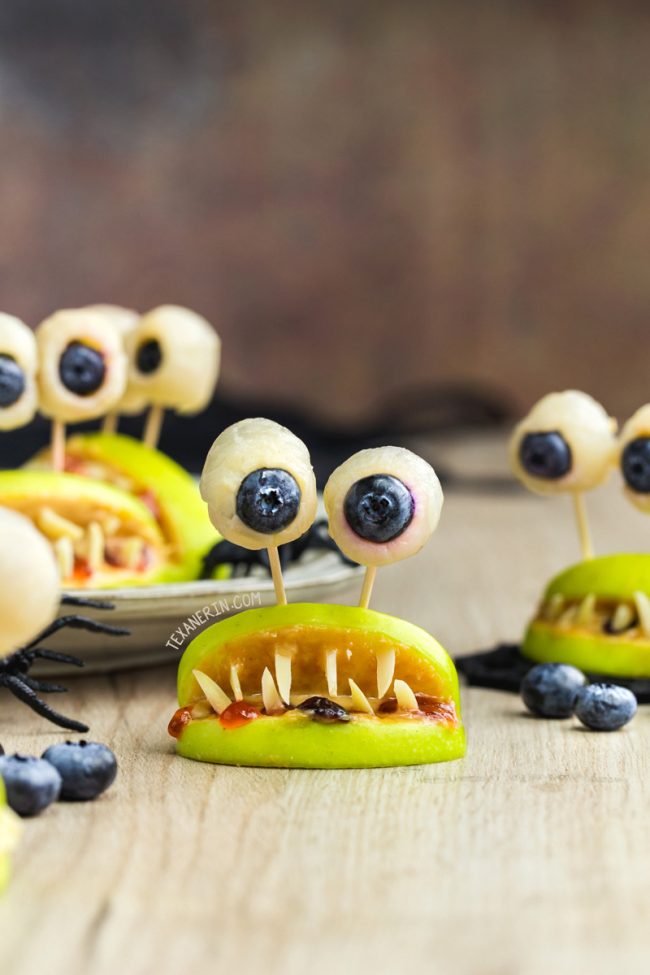
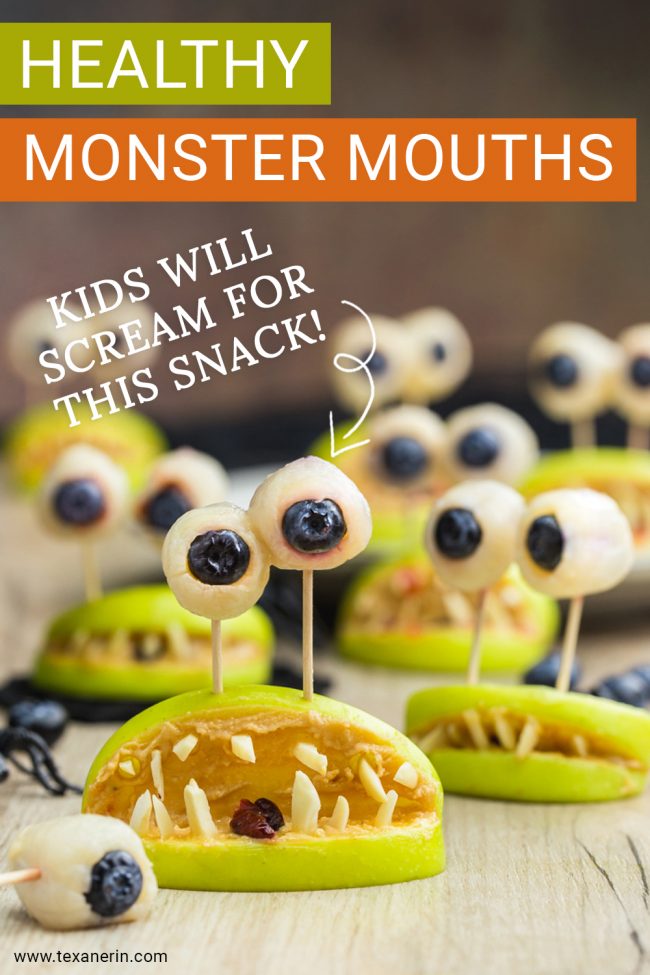
These monster mouths are perfect healthy Halloween treats and just use fruit, strawberry jam, nut butter, and almonds / sunflower seeds. Naturally paleo, vegan, nut-free, grain-free, gluten-free and dairy-free.
I’ve been trying to come up with healthy Halloween treats free of processed junk and it’s pretty difficult. It seems like all the cute stuff is full of candy or food coloring. Then I got the idea for these!
I’d seen these kind of Halloween monster mouths before but they contain candy, usually marshmallows, and sometimes red food coloring. And none of them had cool eyes!
Or bloody mouths. Or were munching away on flies (dried cranberries).
Since the whole point of making these was to offer something free of processed food and junk in general for Halloween, I had to come up with something different. We came up with these:
- Blackberries – Too expensive unless they’re on sale.
- Romanesco broccoli – Looks really neat but I’ve only seen this a few times in my life (not that I ever actively look for it).
- Blueberries or raspberries – I’m guessing the blueberries would be too small and raspberries are again too expensive.
- Olives – Nope. Not going to happen. These are for kids! Maybe that’d turn them off? Or maybe that’s just me.
- Physalis – I don’t even know if these are common in the US, where most of you live, so… no.
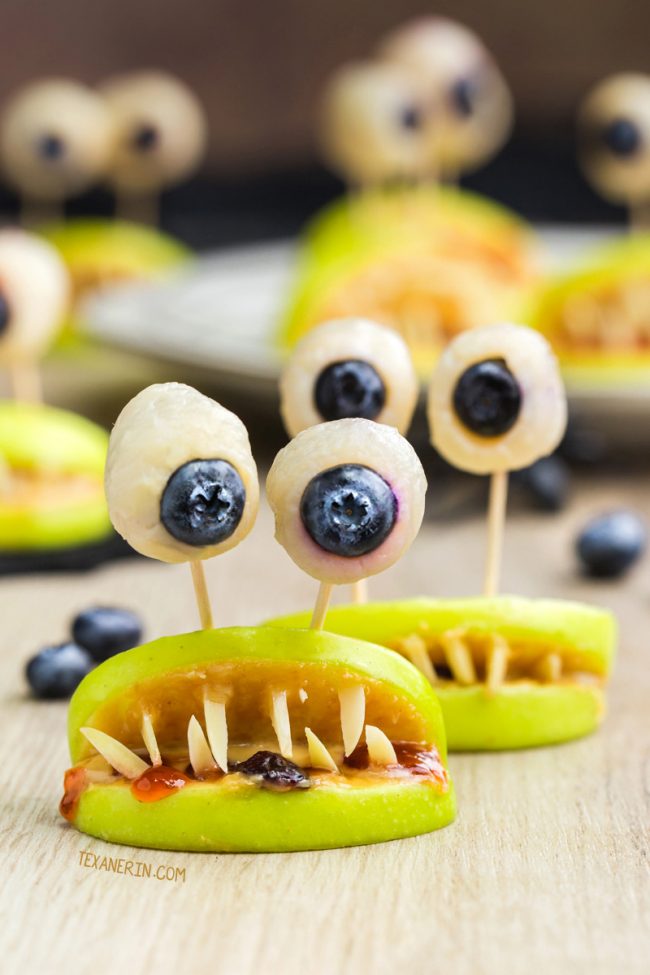
- 10/14/14 update: I just saw this idea on Pineapple & Coconut for lychees and blueberries. Check out Shanna’s creepy eyeball martini to see how she did it. This is, by far, the best creepy eye idea!
- 10/30/15 update: One reader, Cymbre, used purple carrots for the eyes. They look great!
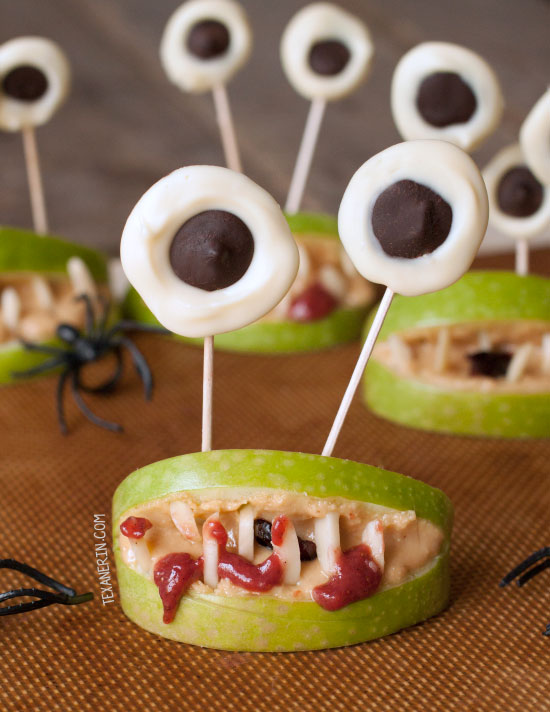
Figuring out the blood was easy. Homemade strawberry jam sweetened with just honey. I used strawberry jam for blood in these witch finger cookies and it looks and tastes great.
The most difficult part about these is cutting the wedge out of the apple slice to make room for the mouth but it wasn’t all that difficult. You could have an extra apple around as a practice apple, just in case. I got 5 monster mouths out of 1 apple, making this, in my opinion, an economical Halloween treat. :)
I used slivered almonds for the teeth in these monster mouths and they were perfect. Just make sure to poke a hole with a sharp paring knife where you want to place the teeth to make it easier to stick the almonds in. And when inserting the upper teeth, flip the apple wedge upside down to make it easier.
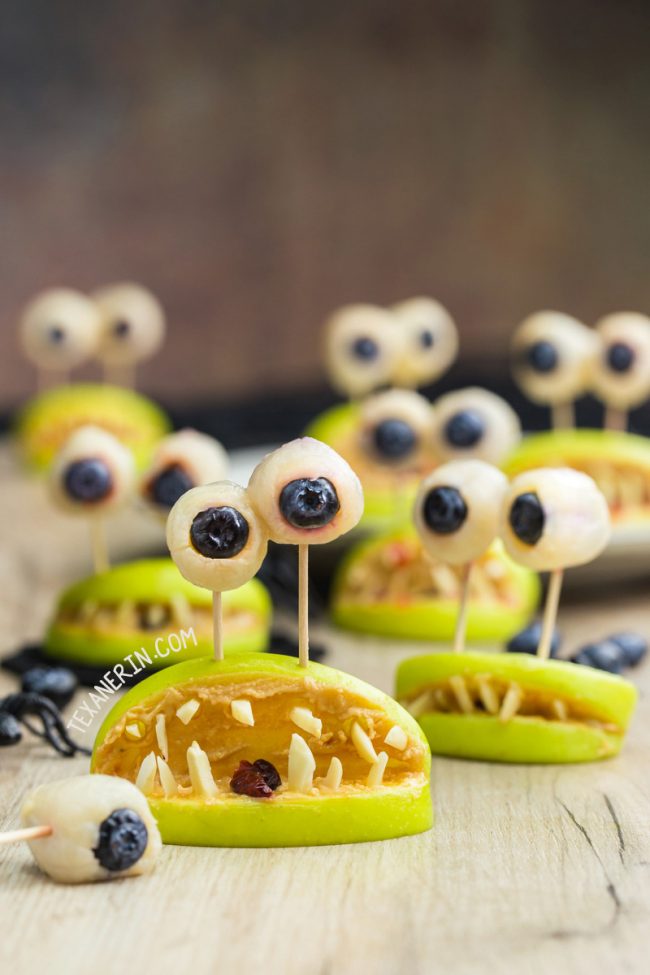
And because these are just fruit, nut butter and chocolate, if you choose, these monster mouths are super allergy-friendly. They’re naturally paleo, grain-free, gluten-free, dairy-free + vegan (be careful of the jam and chocolate you use) and can be nut-free if you use Sun Butter and sunflower seeds for the teeth.
For something less healthy, try my spider cupcakes, which also have grain-free, gluten-free and whole wheat options!
For another whole wheat option, these healthier Halloween sugar cookies are awesome!
Pictures updated in August 2018! Here’s an old one for reference.
Healthy Halloween Monster Mouths (paleo, vegan, nut-free options)
- Prep Time:
- Cook Time:
- Ready in:
- Yield: 18 mouths
Ingredients
- 36 toothpicks
- lemon juice
- 4 large apples
- natural peanut butter (I used this homemade peanut butter but you can use any kind of nut butter or Sun Butter)
- strawberry jam (I used this homemade honey sweetened strawberry jam)
- dried cranberries or other dried berries
- slivered almonds
- 36 lychees (I used canned - you might need 2 cans) + 36 blueberries (you need 2 of each for each mouth)
Directions
- Core the apples and cut into 4-5 pieces (it'll depend on the size of your apples). Try to cut them at such an angle that they stand easily on their own.
- Cut out a wedge for the mouth. Try not to have the bottom half of the wedge be at a downward angle so that the peanut butter doesn't seep out. Also try to make the wedge large enough so that you can easily add the teeth.
- Use a pastry brush or dip the backs and bottoms of the apples in the lemon juice. This is to prevent the apples from browning. There's no need to use lemon juice on the inside mouth part since that'll be covered up with peanut butter.
- Spread on a little bit of peanut butter.
- If you want to add strawberry jam do that now. You can also do it after adding the teeth but it's a little more difficult then.
- Toss in a dried cranberry.
- Use a sharp knife to stab the parts where you want to add the teeth. There's no need to dig a hole. This will be inserting the teeth easier.
- Insert the teeth on the bottom. Flip the mouth over, stab the parts where you want to add the teeth, and insert the teeth. Turn back over.
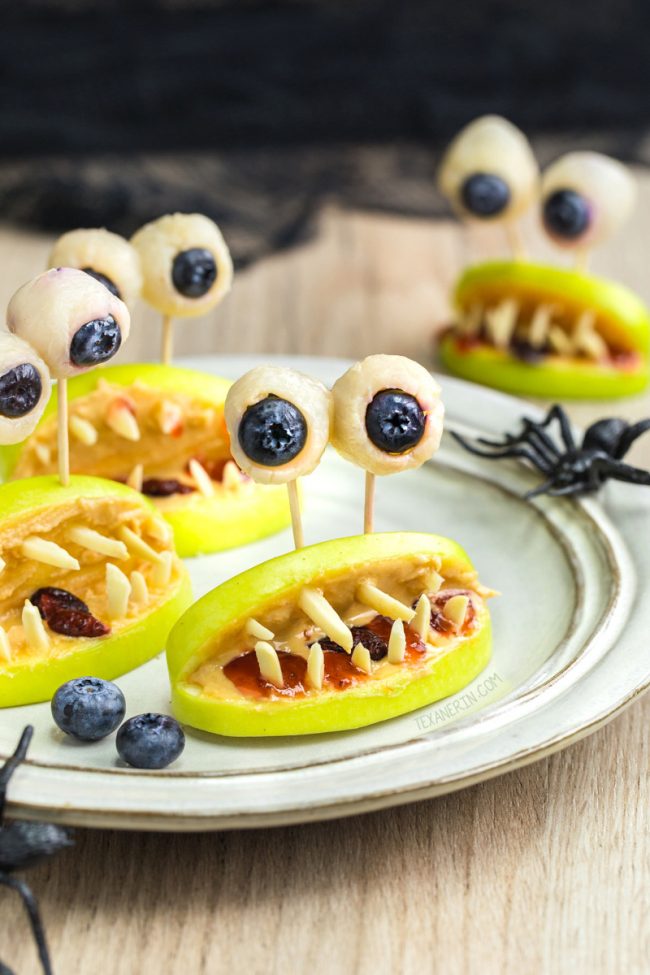
- Place the mouths on the serving plate.
- Rinse the lychees and pat them dry with paper towels. Place a blueberry in the center of the lychee and place on a paper towel-lined plate until all the eyeballs are ready.
- Serve! If using lemon juice, these stay at room temperature for at least 8 hours without browning.
Notes
- Please see the last paragraph of the post for allergy-friendly notes!
I did a backwards date search to try to find who came up with the original apple mouth idea. It appears to be from Family Fun magazine in 2008 but I can't find anything on their website to link to.
As an Amazon Associate, I earn from qualifying purchases. For more info, see my disclosure.
Join over 12,400 readers and sweeten up
your inbox with new posts for free!
This subscription is free of charge and can be canceled at any time.


48 comments on “Healthy Halloween Treats – Monster Mouths (paleo, vegan)” — Add one!
2 comments are awaiting moderation!
Thank you for this post! messiest part was the piping as I’m new to it. My Halloween contribution was a healthy success and everyone loved them! Needless to say, they’re all gone:)
Hey there! I’m so glad that everyone enjoyed them. :) Piping does take a little time to get used to! I try to avoid it at all costs. :D Thanks for your comment and sorry for my slow reply!
The candy googly eyes are made of Royal Icing which consists of powdered sugar, water, flavorings like vanilla and almond extract, and egg whites. If you are striving for a vegan diet, these are probably not for you. If a treat that consists mostly of egg whites doesn’t sound bad to you, there are many recipes for Royal Icing and tutorials for making these eyes, but at the cost of a couple bucks, I’d get the store-bought eyes or if my budget were really tight, i’d just use Necco Wafers or smarties and a food-safe marker to make eyes. With Necco Wafers, which are bigger and a red and black marker you could draw all kinds of expressive eyes: winking eyes, blood-shot eyes, kind eyes, etc. The amount of red dye you would get from a marker is minimal, so I wouldn’t sweat it.
Thanks for the tip! I sometimes use the store-bought kind and then just recommend people remove them. ;) The ones I have access to where I live contain a whole lot of nasty stuff in addition to the not-so-bad-sounding ingredients you listed. I’d never heard of Necco wafers before! What a fun idea. Thanks for your comment!
So stinkin’ cute!! I LOVE it!!
Thanks, Colleen! :)
Soooo creative!
Thanks!
These are so cute. I mean scary. I mean cute. Okay, scary and cute.
Haha. My husband kept looking at them, giggling, and saying, “They’re not scary!” But whatever. I’m fine with cute. :)
I love the grapes for the eyeballs! They are perfect for the healthy spooky snacks
To be honest, the grapes kind of disturb me. ;)
These are brilliant Erin! I swear – the creativity is amazing and I love that they are not full of processed stuff. Fabulous job!
Thanks, Aly! :)
AHHH! I just love these! I love them because they are so adorable!! Also, because they are healthy! I don’t know about anyone else but I hate feeding my kids junk. My husband basically bribes them with marshmallows all day long …. ugh. It would be wonderful if I could make these and they loved them just as much as I do! Great Job!!
Aww, thanks so much for your comment! I hope you do get to try them and your little ones will like them just as much as you do! :)
These are so fun!
Thanks, Sarah! :)
So adorable! My daughter is only 2 and I’ve been holding off on introducing her to candy for as long as possible. These are a perfect alternative!
Yay! So happy that your daughter can now have something Halloween-y for Halloween. :)
How cute are these?!? I always dreaded Halloween when my daughter was little because it was a non-stop sugar fest for days afterward. Something really cute like this would have been so, so much better.
Thanks, Lana! And while I don’t have kids, if I do one day, I’m going to be prepared with stuff like this (even if they prefer the sugary stuff!) :)
My kids would love these. I will just sub sunbutter instead of peanutbutter because of an allergy!
Great idea! I hope they’ll like them. :)
These are so much fun! I was totally going to suggest grapes before you mentioned them, too…they’re so creepy as eyeballs when you peel them. My kids will get a kick out of making these this month!
I know! I should have peeled them. I only realized that while writing up the post. Darn! I hope your kids will enjoy them. :)
I love everything about these, but the blood is freaking me out a little bit. Loving the oogly googley eyes though!
Haha. Sorry. But it’s for Halloween! :D
This is so stinkin adorable. My kids would love to make these.
But you do the cutting part! I might have almost injured myself a few times. ;)
This is the first healthier “scary” Halloween treat I’ve seen this year! I love this idea. Too cute!
Thanks, Ashley! :)
FINALLY! A super creepy awesome halloween treat that isn’t pure junk! Love these, Erin!
YAY! And yeah, that’s the only reason I made them. Gotta have something healthy for Halloween. :D
kiddos will love this
It was fun for me, too. ;)
This is such a cute idea! This would actually be the perfect thing to make at a Halloween party, with the kids jumping in to make their own monsters.
Ooh, that’s a great idea! I guess as long as someone prepares the actual apple part beforehand, it’d work out really well! The lemon juice kept the mouths from browning for as long as I kept them out (8 hours).
My kids LOVE olives but I wasn’t sure on how to totally make them look like eyeballs since they like the black ones and not the green and the green make better eyeballs. Plus for my drinks I needed a sweet food for eyeballs not savory, and thanks for sharing my drinks!! I can’t WAIT to make these for my kids for after school snack this week. They are going to be so surprised!
I hope they’ll like them! And that my directions make sense. I think I spent 6 hours writing this up (I’m the slowest writer ever) and by the time it came to the directions I was pretty tired. ;) And haha. I love that we’re discussing what makes for better edible eyeballs. :)
I love these!!! When trick or treaters come to my house (which is rare here in Australia) I only ever have fruit to offer or really old stale lollies that Ive hidden from the kids months before!!
Thank you, Lisa! And haha. I love that you give them stale lollypops. :)
An excellent idea my girls will be excited. Thanks
I hope they’ll enjoy them! :)
This is a totally adorable idea!
Thanks, Kelly! :)
This is so awesome–you rock! Those pink eyeballs are pretty creepy, but I think I’d go for the chocolate ones. I think kids will love this.
Thanks! My husband kept laughing at them. “These aren’t scary at all!” But I think they’re neat. :D