

Spiderweb Brownies
These spiderweb brownies are super fudgy when refrigerated, gooey at room temperature, and topped off with chocolate ganache and white chocolate spiderwebs. They can be made traditionally with all-purpose or whole wheat flour, but there are also several well-tested gluten-free options. They’re also easy to make dairy-free, if desired.

They were adapted from my Gluten-Free Brownies. They use cocoa powder rather than melted chocolate in the batter, and it couldn’t be any easier to make. For another easy Halloween brownie idea, try my Mummy Brownies, which use a similar fudgy brownie base with white chocolate bandages and candy eyes.
I think that they look like they require some decorating skills, but they really don’t. And this is coming from someone who isn’t good at decorating sweets.
Another reason to love them: they don’t require any food coloring! So many Halloween desserts use all kinds of artificial stuff. The only processed ingredient in these brownies is chocolate. But I can live with that.

Ingredients
Please scroll down for the full recipe. These are just notes on select ingredients.
For the Brownies
- Flour – I’ve tested this recipe with 8 types of flour. See the different flour options below.
- Cocoa powder – I like Dutch-process cocoa, but you can use regular natural cocoa like Hershey’s. The brownies might not be as chocolaty and may turn out cakier. I know some readers have used regular cocoa powder without complaints, but I haven’t tried it myself.
- Oil or butter – I always use refined coconut oil, and the brownies won’t taste like coconut. They’ll taste 100% normal. You can also use a liquid oil like canola or vegetable oil. I’ve used extra-virgin olive oil, and you can definitely taste it, so I recommend a lighter-tasting olive oil with a more neutral taste. You can read more in my Olive Oil Brownies. Butter also works.
- Granulated sugar or coconut sugar – liquid sweeteners won’t work because there’s no liquid in the recipe to reduce to compensate. The less sugar you use, the cakier and less gooey the brownies will be, and they’re more likely to fall apart because sugar acts as a binder. One commenter mentioned reducing the sugar to almost nothing while still getting a gooey result, but that’s not possible. I suppose our definitions of “gooey” differ. You might be able to reduce the sugar by 1/4 cup, but don’t be surprised if the brownies look different from the pictures.
- Eggs – I’ve tried egg replacers so many times in this recipe and failed. My Paleo Vegan Brownies are my egg-free adaptation of this recipe. They use almond flour, and you definitely can’t tell that they’re vegan.
For the Decoration
- Semi-sweet chocolate – you can use chocolate chips or chopped chocolate. Dark chocolate also works, but I wouldn’t use milk chocolate because it would be too sweet in combination with the brownies.
- Heavy cream – you can also use light whipping cream. For dairy-free, use canned full-fat coconut milk.
- White chocolate – if you’re dairy-free, make sure to use dairy-free white chocolate. Enjoy Life makes dairy-free white chocolate chips, and they’re super yummy. Your semi-sweet chocolate should also be dairy-free, but that’s pretty easy to find.
Different Flour Options
You’ve got so many choices with this recipe.
Traditional Options
- All-purpose flour
- Whole spelt flour
- White whole wheat flour
- Regular whole wheat flour

Gluten-Free Options
- Gluten-free 1:1 baking flour – Bob’s Red Mill Gluten-Free 1-to-1 Baking Flour and King Arthur Flour Measure for Measure Gluten-Free Flour both work great. Commenters have said that Pillsbury, Namaste and several other brands have also worked great for the brownie base.
- Teff flour – teff comes in different varieties, from white to ivory to dark. The dark variety is earthier and tastes a lot like buckwheat. I’ve used both white and dark teff flour, and I don’t think you can detect any difference in these brownies. The Dutch-process cocoa powder does a great job of hiding that earthy/healthy flavor!
- Light buckwheat flour – this is what I always use. I live in Germany and buy the baking blends from Bob’s Red Mill and King Arthur from the US, so I save them for recipes where that light type of flour is really the only option, like this Christmas Tree Cake and this Matcha Cake. Buckwheat flour is easy to find, cheap and great in these brownies. Just as tasty as the other options. If you need the brownies to be gluten-free, make sure the buckwheat flour is labeled gluten-free.
- Dark buckwheat flour – I’ve also used dark buckwheat flour, but that adds a bit of grittiness that I don’t like. That’s why I recommend light buckwheat flour.
If you taste the gluten-free brownies while warm, the buckwheat and teff versions might have a bit of a weird texture, but once they cool, they’re perfect.

How to Make Them
It’s a basic brownie recipe. You just mix the dry ingredients together in one bowl, the wet ingredients in another, and then fold the dry mixture into the wet.
The only way to really mess them up is if you overmix or overbake them.

If you’ve never baked brownies before, please note that brownies don’t look like cake when they’re done. They’re still going to be SUPER gooey and wet! They shouldn’t look like totally liquid batter, though.
A few commenters have said that they bake the brownies much longer than recommended. I’ve made these brownies over 50x since posting them. The baking time is correct.

If you bake them much longer than recommended, they’ll be cakey. If you do bake them much longer than recommended, and they’re not dry, then I would highly recommend using an oven thermometer to check your oven’s temperature.
Also, be sure to let the brownies cool completely before you cut into them! They’re easiest to cut neatly once they’ve chilled in the fridge.
If you just want to eat them from the pan, that’s understandable. Just wait a few minutes so you don’t burn yourself. :)

The photo labeled as Step 9 above is actually incorrect. While you can make concentric circles, like you see above, I think it’s much easier to make a spiral.
Then you don’t have to keep picking up the piping bag and moving it, risking making a mess.
Doubling the Recipe
Yes, you can double the recipe and use a 9″×13″ pan. The baking time is slightly longer than that of a single batch, so just keep a close eye on the brownies.

Make Ahead & Storage
These brownies already need some advance time before decorating: let them cool for about 1 hour at room temperature and then chill them for another hour. Chilling also makes them much easier to cut neatly.
Once the brownies are decorated and the chocolate has firmed up, cover and refrigerate them for up to 5 days. They also freeze great for up to 3 months, so they’re a good Halloween dessert to make ahead.

More Spider Halloween Desserts
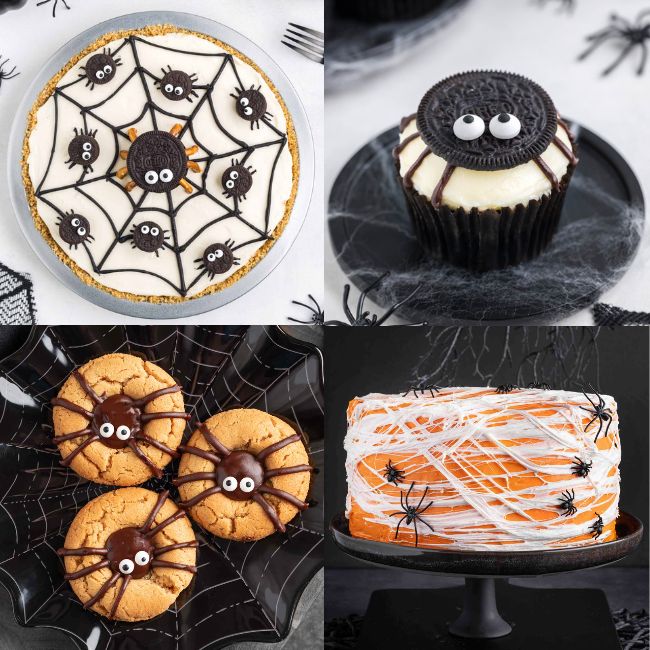
For more spider-themed Halloween desserts, try my Spider Cupcakes, Spider Pie, Spiderweb Cake or Spider Cookies.
I hope you’ll enjoy these spiderweb brownies! Please let me know in the comments if you try them out. Thanks! :)

Spiderweb Brownies
Ingredients
Brownies:
- 1 cup (125 grams) flour see notes
- 3/4 cup (86 grams) Dutch-process cocoa powder
- 1/4 teaspoon salt
- 3/4 cup + 2 tablespoons (196 grams) refined coconut oil or butter, melted and cooled slightly
- 1 1/2 cups (300 grams) granulated sugar or coconut sugar
- 1 tablespoon vanilla extract
- 3 large eggs 50 grams each out of shell, room temperature
Topping (see notes for dairy-free):
- 1 cup (170 grams) semi-sweet chocolate chips or chopped chocolate
- 1/2 cup (120 ml) heavy cream or whipping cream or full-fat canned coconut milk
- 1/2 cup (85 grams) white chocolate chips or chopped white chocolate
Instructions
Brownies:
- Preheat the oven to 350 °F (175 °C) and line an 8″×8″ (20cmx20cm) pan with parchment paper.
- In a medium mixing bowl, stir together the flour, cocoa powder, and salt. Set aside.1 cup (125 grams) flour, 3/4 cup (86 grams) Dutch-process cocoa powder, 1/4 teaspoon salt
- In a large mixing bowl, stir together the melted coconut oil or butter, sugar, and vanilla extract. Once combined, add the eggs one at a time, and stir just until combined.3/4 cup + 2 tablespoons (196 grams) refined coconut oil, 1 1/2 cups (300 grams) granulated sugar, 1 tablespoon vanilla extract, 3 large eggs
- Add the dry mixture to the wet and stir just until almost no streaks of flour remain. Do not overmix!
- Bake for 15-20 minutes. A toothpick inserted into the center will come out wet. A toothpick inserted into the sides will come out with some moist crumbs on it, but not totally raw batter. The brownies will continue to bake as they sit in the pan and will firm up as they cool.
- Let cool completely, about 1 hour at room temperature and then chill for another hour. Cut into 16 brownies.
Decoration:
- Make the ganache. Put the chopped chocolate in a heatproof bowl. Place the heavy cream in a small saucepan over medium heat. Heat until it’s hot and steamy but not bubbly. Do not let it boil!1/2 cup (120 ml) heavy cream
- Pour the hot cream over the chocolate. Let it sit for 10 minutes. Do not cover. After 10 minutes, stir until the chocolate is smooth.1 cup (170 grams) semi-sweet chocolate chips
- Meanwhile, melt the white chocolate in a microwave-safe bowl at half power in 30 second increments, stirring after every 30 seconds. Or melt in a small saucepan over low heat.1/2 cup (85 grams) white chocolate chips
- You have to decorate the brownies one by one. Spread the semi-sweet chocolate on a brownie or dip the brownie into the chocolate.
- Transfer the melted white chocolate to a piping bag fitted with Wilton Tip 2 or something similar. Starting from the center and working towards the edge of the brownie, pipe the white chocolate over the glaze in a spiral.
- Use a toothpick to drag the white chocolate from the center of the spiral to the edge of the brownie. Do this multiple times in order to create a spiderweb.
- Clean the tip of the toothpick between each brownie.
- Let the chocolate firm up, cover, and refrigerate for up to 5 days. They freeze great for up to 3 months.
Notes
- If you’re gluten-free, use one of the following flours. You can use 1 cup (158 grams) teff flour or 1 cup (125 grams) light buckwheat flour that’s labeled as gluten-free or 1 cup (138 grams) Bob’s Red Mill Gluten-Free 1-to-1 Baking Flour or 1 cup (125 grams) King Arthur Flour Gluten-free Measure for Measure Flour. I’ve had dozens of commenters use other gluten-free baking blends that are meant as a 1:1 sub for all-purpose flour, and they all seem to work.
- If dairy-free, make sure to use oil and not butter in the brownies and dairy-free chocolate. Enjoy Life makes dairy-free white chocolate and dairy-free semi-sweet chocolate is pretty easy to find. Also use canned full-fat coconut milk in place of the heavy cream.
- The nutrition information provided is calculated as a courtesy and is only an estimate. I am not a licensed nutritionist or dietitian. For the most accurate nutritional data, consult a professional or use your preferred calculator.




I used all-purpose flour and love how they came out! They really are the fudigest brownies I ever remember having. My husband decorated them for kicks and giggles and they still look great. THANKS!
I’m so glad you enjoyed them! And fun that your husband decorated them. Sounds like a fun project. :D Thanks for your comment!
These are so fun! I want to make them with our nieces in October, but decided to give the recipe a test run now and just wanted to tell you how incredibly delicious these brownies are! Our nieces will get a kick out of the spider web design, but my husband and I are just excited to eat these brownies again!
Aww, yay! I’m so glad to hear that they came out well. :) I hope that your nieces will enjoy them closer to Halloween! I love that you did a test run already. :) Thanks for your feedback!
These came out wonderfully with buckwheat flour and I love that I now have another recipe to use it in. It’s hard to find the “right” recipe for buckwheat but brownies seem to be it! I have zero artistic skills but even I was able to manage the spiderwebs on these, super cute!
I agree! Buckwheat is so great in brownies. And I also don’t have any decorating skills! And even I can do these. ;) Thanks a bunch for your feedback!
These turned out so cute! I am not the best baker but the instructions were easy to follow and I’m super happy with how they looked AND tasted!
Woohoo! That is awesome to hear. :) I’m thrilled that you like the recipe! Thanks a bunch for your feedback. :)
These brownies turned out perfect! They were fudgy and chewy, just the way I like ’em. The spider webbing was really easy to do and they look so cute!
Oh, that’s great! I’m glad that you found them easy to make and you liked the texture. :) Thanks for your feedback!
The spiderwebs came out great and they were delicious! Cant wait to make them again on my birthday which falls on Halloween!
I’m so glad that they came out well! Thanks for the feedback and I hope you have a great birthday. :)