

Cocoa Pecan Pie (Chocolate Pecan Pie with Cocoa Powder)
This cocoa pecan pie is a rich chocolate pecan pie with an amazingly flaky, buttery crust and a gooey filling made with cocoa powder, chocolate and plenty of pecans. You can make it with all-purpose or gluten-free flour.
It also freezes well, which is useful if you want to make it ahead. If you want the same chocolate-pecan combination in bar form, try my Chocolate Pecan Pie Bars. For a classic version without chocolate, see my corn syrup-free Gluten-Free Pecan Pie.

This recipe is based on that pecan pie filling, but I reduced the maple syrup and increased the brown sugar to make it a little less expensive. I also reduced the overall sweetener because of the chocolate and increased the butter to account for the cocoa powder so the filling wouldn’t turn out dry or crumbly.
Use semi-sweet, bittersweet or dark chocolate here. Milk chocolate would make the pie much too sweet.

Ingredients
Please scroll down for the full recipe. These are just notes on select ingredients.
For the crust:
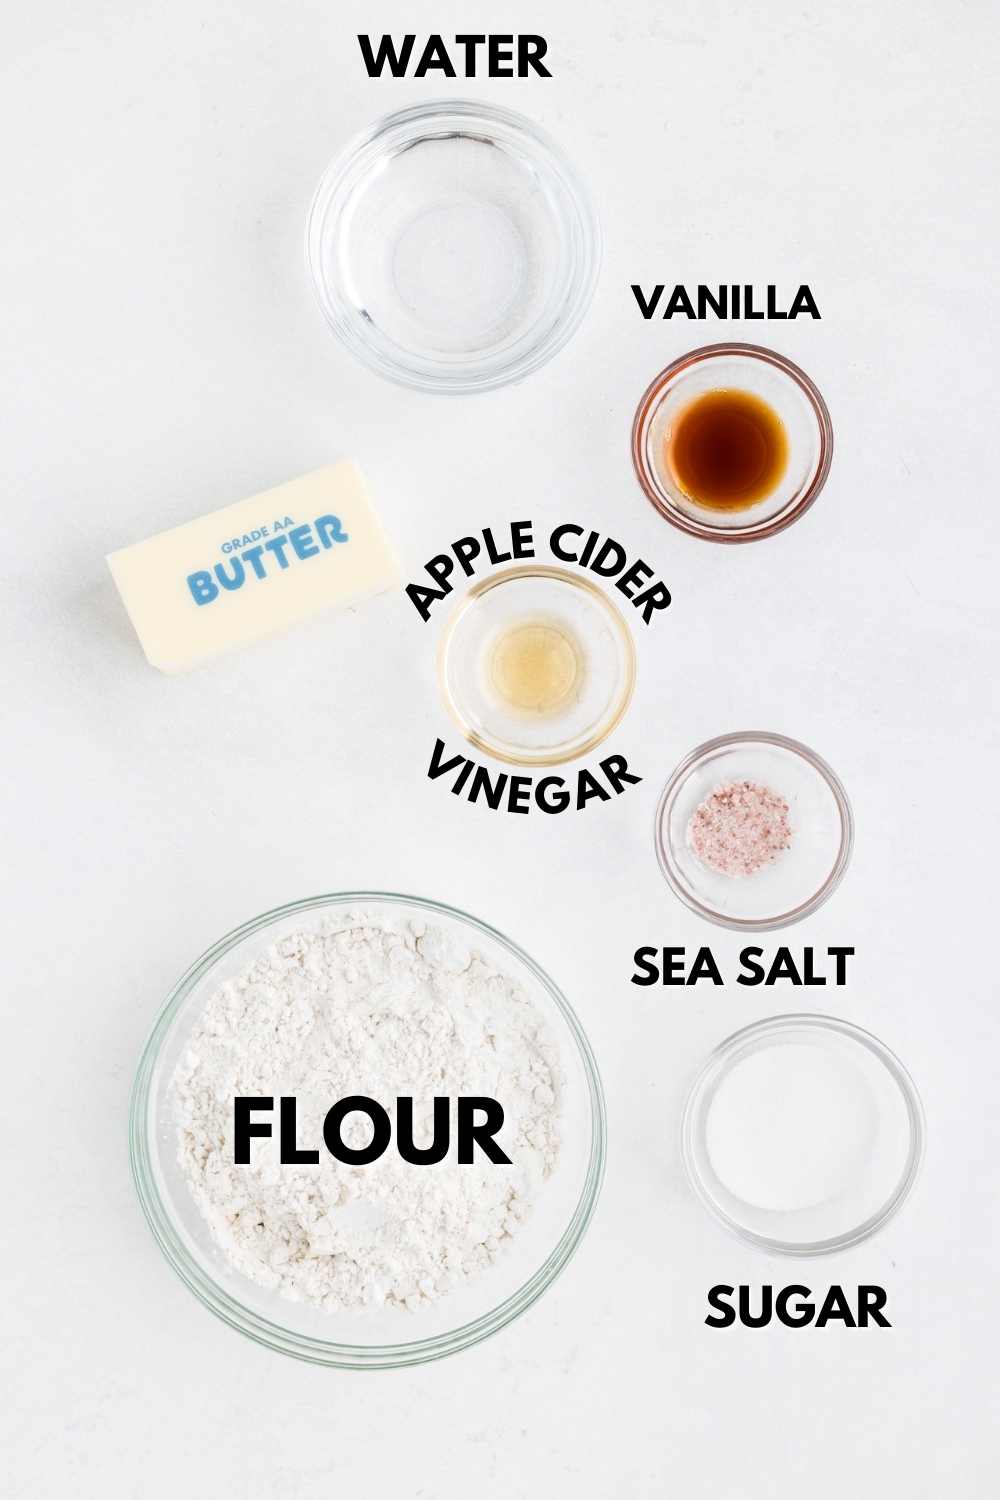
- Flour – use all-purpose flour for the traditional crust. For gluten-free, use Bob’s Red Mill Gluten Free 1-to-1 Baking Flour. The first crust I made with Bob’s was so flaky that I immediately made another because I thought I might have grabbed the wrong flour, and the second came out just as well. King Arthur Measure for Measure worked, but it wasn’t nearly as flaky. I don’t recommend white whole wheat flour because it’s more absorbent than all-purpose flour.
- Butter – use unsalted butter in both the crust and filling. US butter works and is what was used in the photos. European-style butter such as Kerrygold or Plugra gives the pie especially good flavor. If you’re baking in Europe, see the recipe notes for the tested weight adjustments.
- Apple cider vinegar – you can’t taste it in the baked crust. White vinegar can be used instead.
- Vanilla – I use a full teaspoon, along with a little more salt than in many pie crusts, to give the crust more flavor.
For the filling:

- Dutch-process cocoa powder – this is the type I tested and recommend for the chocolate filling.
- Chocolate – use semi-sweet, bittersweet or dark chocolate chips or chopped chocolate. Don’t use milk chocolate because the filling would be too sweet. If you want to omit the chocolate, replace it with more pecans.
- Pecans – use chopped pecans. There’s no need to toast them first; see the tips below for why.
- Brown sugar and maple syrup – these sweeten the filling without corn syrup.
- Eggs – use large US eggs, about 50 grams each without the shell. Medium eggs in the EU are the equivalent size. Egg size matters in this filling, so don’t knowingly substitute larger or smaller eggs.
For the gluten-free version, also check that your chocolate and any other packaged ingredients are certified gluten-free if needed.
I don’t have a tested vegan version because I don’t know of a good substitute for the three eggs in the filling.
How to Make It
The filling is simple to make – you just stir the ingredients together. Most of the detail in the full recipe is for the crust because those small steps make a difference in how flaky it turns out.
- Make the crust – pulse the flour, sugar and salt in a food processor, then briefly process in the butter until you have pea-sized pieces. Add the cold vanilla and vinegar, followed by only as much cold water as needed for the dough to hold together.
- Chill the dough – form it into a flat disc, wrap it and refrigerate for at least 45 minutes.
- Roll and shape – roll the dough until it’s about 1/2 inch (1.25 cm) wider than the top circumference of your 9-inch (23-cm) pie plate. Fit it into the pan, crimp the edge and chill for another 15 minutes.
- Mix the filling – stir together the filling ingredients except the pecans and chocolate, then stir those in.
- Fill and bake – pour the filling into the chilled, unbaked crust and bake at 350 °F (175 °C) for 55-60 minutes, or until the middle is set. Cool completely, then refrigerate before slicing.


Tips
Don’t Skip the Chilling Time
Chilling the dough solidifies the butter and gives the flour time to absorb moisture, which helps the crust stay flaky and makes the dough easier to roll. If you’re using all-purpose flour, the rest also lets the gluten relax.
Dough that hasn’t been chilled is more crumbly and harder to roll, and it can brown more quickly and bake up tougher.
I put the vanilla and apple cider vinegar together in a tiny bowl in the freezer for about 10 minutes, and do the same with the water in a separate bowl. I keep them separate because you may not need all of the water.

Don’t Toast the Pecans First
There’s no need to toast the pecans first. If you do, the pecans that float to the top can burn during the 55-60 minute bake. Mine looked and even smelled a little burned when the pie first came out of the oven, but once it cooled, nothing tasted or smelled burned.
If the top gets darker than you’d like, loosely cover the pie with foil. The surface becomes dry well before the filling underneath is fully baked, so the foil shouldn’t stick.
That dry surface also makes doneness tricky. The top can look completely done while the filling underneath is still liquid. Mine needs 55-60 minutes, but ovens vary. It’s better to bake it too long than too short, so make sure the middle is set before taking it out.

About the Crust
I’ve made a lot of disappointing pie crusts over the years that stuck to the pan or turned out greasy. With this crust, after a few slices had been removed from another pie, the pie slid freely around the pan and I could even pick it up. The vanilla and slightly higher amount of salt also give the crust more flavor than a basic pie crust.
It also works for recipes that require a fully baked crust with a no-bake filling.
You can use a store-bought pie crust instead if you prefer. Because pecan pie filling is already sweet, I don’t recommend a cookie-like crust such as gingersnap, graham cracker or the oatmeal-cookie-style crust used in my Eggless Cheesecake.

You Can Make the Crust Without a Food Processor
A food processor is easier, but it isn’t required. I’ve made the crust by hand with a pastry cutter. I needed a little more water to get the dough hydrated, which made the crust slightly less crisp, but it was still good.
Optional: Blind-Bake the Crust
You don’t need to blind-bake the crust for this pie. I didn’t for the pie in these photos, but you can if you want the bottom extra crisp.
I’ve blind-baked this crust about eight times with different fillings and it worked every time without burning. In one test, I blind-baked it and then baked it with a filling for another 70 minutes at a lower temperature, and the crust still wasn’t close to burned.

- Loosely cover the shaped crust with plastic wrap and freeze it for 45 minutes.
- While it freezes, preheat the oven to 400 °F (205 °C) and place a baking sheet on the rack where the pie will bake.
- Line the crust with parchment paper and add pie weights or dry beans. A lot of sources say to fill them all the way to the top of the pan, but I tested weights only over the bottom and it worked fine.
- Carefully place the pan on the hot baking sheet and bake for 20-23 minutes, just until the tops of the crimped edges begin to very lightly brown.
- Remove the parchment and weights and bake for another 5-7 minutes, or until the bottom is dry and beginning to brown. You can turn the oven off now and turn it back on in 15 minutes, or just leave it running.
- Place the pan on a wire rack and cool completely, about 30 minutes. After about 20 minutes of cooling, start preparing the filling and turn the oven to 350 °F (175 °C).
Bake It on a Baking Sheet
I strongly recommend baking the pie on a baking sheet. It’s easier to move the pie in and out of the oven, it catches any unexpected drips, and it helps the bottom crust bake well.
I’ve made this exact pie as written four times without butter dripping from the crust or the filling bubbling over. But pie-pan size and butter brands can vary, and a baking sheet avoids having to pull the pie out mid-bake to deal with burned butter on the bottom of the oven.
Cook’s Illustrated also tested pies baked directly on the rack versus on a baking sheet and found that the baking sheet helped prevent a soggy bottom crust.

Use the Right Pie Pan
Because the crust is chilled or frozen before going into a hot oven, check the manufacturer’s instructions for your pie dish to make sure it’s safe for that temperature change.
- Ceramic – some ceramic pie dishes can handle moving from the refrigerator or freezer to the oven, but this isn’t universal. Check the manufacturer’s instructions. Ceramic pie dishes also heat slowly and evenly.
- Glass or Pyrex – avoid extreme temperature changes that can cause the dish to break. Glass is useful because you can see whether the bottom crust has browned, but don’t move a glass dish directly from the freezer to a hot oven unless the manufacturer specifically says it’s safe.
- Metal – metal pie pans conduct heat well and are excellent for crisp crusts. They can also brown the crust more quickly, so watch the edges closely.
If the crust edges are browning too quickly, cover them with foil or use a pie shield.
European-Style Butter Gives the Best Flavor
This pie tastes significantly better with European-style butter such as Kerrygold or Plugra, although US butter works, too, and that’s what was used in the photos. You can see what this crust looks like with Kerrygold in my Pecan Tart.

Troubleshooting
- The dough is too crumbly – add cold water 1 teaspoon at a time. The amount you need depends on how cold your ingredients and kitchen are. I’ve made this several times with the same brands and needed anywhere from 2 1/2 to 5 1/2 tablespoons (37-81 grams). Stop as soon as a pinched piece holds together and you can form a disc.
- The crust isn’t flaky – don’t overprocess the butter, don’t add more water than necessary and don’t skip the chilling time. For the gluten-free version, use the Bob’s Red Mill flour specified in the Ingredients section.
- The filling is still loose – ovens vary, so keep baking until the middle is set even if the surface already looks dry.
- The slices are messy – give the pie the full cooling and chilling time. Cool it for 2-3 hours at room temperature, then refrigerate for at least 2 more hours before cutting.
- You want to omit the chocolate – replace it with additional pecans.
- You want to omit the cocoa powder – make the Gluten-Free Pecan Pie linked near the top of the post instead. You can use this flaky crust rather than its oat flour crust if you prefer.
Make Ahead & Storage
The pie needs plenty of cooling and chilling time before serving. After baking, cool it completely at room temperature for 2-3 hours, then refrigerate for at least 2 more hours before slicing.
You can make the pie dough up to 2 days ahead and keep it wrapped in the refrigerator before rolling it out.
Store leftover pie covered in the refrigerator for up to 4 days. It also freezes well for up to 3 months.
You can eat a slice straight from the freezer, but when it’s that cold, the chocolate dominates and you don’t taste the crust as well. I prefer letting a frozen slice sit at room temperature for about 30 minutes before serving. The flaky crust isn’t quite as nice after freezing as it is freshly baked, but it’s still good.
I hope you’ll enjoy this cocoa pecan pie! If you try it, I’d love to hear how it turned out.

Cocoa Pecan Pie
Ingredients
Crust:
- 1 1/4 cups (156 grams) flour + a tiny bit more for flouring, see notes
- 1 tablespoon granulated sugar
- 1/2 teaspoon fine sea salt
- 1/2 cup (113 grams) unsalted butter cut into 8 pats, see notes
- 1 teaspoon cold vanilla extract see notes
- 1/2 teaspoon cold apple cider vinegar
- 2.5 to 5.5 tablespoons (37 to 81 grams) cold water
Filling:
- 1 cup (200 grams) light brown sugar packed
- 1/2 cup (160 grams) pure maple syrup
- 6 tablespoons (84 grams) unsalted butter melted and still warm
- 3 large eggs 50 grams each, out of shell, room temperature
- 1 teaspoon vanilla extract
- 2 tablespoons (17 grams) Dutch-process cocoa powder
- 1 1/2 teaspoons cornstarch
- 1/2 teaspoon salt
- 1 3/4 cups (193 grams) pecans chopped
- 2/3 cup (113 grams) chocolate chips semi-sweet, bittersweet or dark; or chopped chocolate
Instructions
Make the crust:
- Get out a standard 9” (23cm) pie plate. It should be one that’s safe to move from the fridge to a hot oven (see post for more info). Do not grease it.
- To the bowl of a food processor fitted with an S-blade, add the flour, granulated sugar and salt. Pulse a few times.1 1/4 cups (156 grams) flour, 1 tablespoon granulated sugar, 1/2 teaspoon fine sea salt
- Turn it to the lowest speed and add in the butter. Process just until you have pea-sized bits of butter. Don’t overprocess! Stop pulsing.1/2 cup (113 grams) unsalted butter
- Evenly drizzle the vanilla extract and apple cider vinegar over the top.1 teaspoon cold vanilla extract, 1/2 teaspoon cold apple cider vinegar
- Turn on the lowest speed and pour in 2.5 tablespoons of water. The amount of water you need will depend on how cold your ingredients, kitchen, etc. are. I’ve made this several times with the same brand of ingredients, and have needed between 2.5 and 5.5 tablespoons.2.5 to 5.5 tablespoons (37 to 81 grams) cold water
- Process very briefly until it looks like it’s coming together. It’ll look shaggy and not like a uniform ball. Pinch some together. If it stays together without being crumbly, it’s ready. You don’t want to add too much water. More water than necessary = non-flaky pie crust. If you think it needs a bit more water (it almost certainly will), add more water, 1 teaspoon at a time. If you think you can form a disc with it without it falling completely apart into a thousand crumbs, that’s another clue it’s ready.
- Place the dough in the center of a large piece of plastic wrap and wrap it up into a flat disc, about 1” (2.5cm) or a little less. If you can’t form a disc because it’s nothing but crumbs, it needs a little more water.
- Refrigerate for at least 45 minutes and up to 2 days.
- Place a baking sheet on the baking rack (one in the lower third of the oven) that will fit your pie. This is for the very unlikely case that something spills over and for a crisper crust bottom. Preheat the oven to 350 °F (175 °C).
- Very lightly flour a piece of parchment paper and place the unwrapped dough on there. Sprinkle a tiny bit of flour over the top of the dough.
- Place the plastic wrap or another piece of parchment paper on top of the dough and roll it out so that it’s about 1/2” (1 1/4 cm) wider than the top circumference of your pie plate.
- Remove the piece of plastic wrap or parchment covering the pie crust, place the ungreased pie pan on top of the dough, and then flip over the dough and pan. Press the dough down around the edges at the bottom of the pan and then remove the piece of parchment paper.
- Fold the dough up so it’s not hanging off the sides, and crimp the edges. The dough should go all the way up the edges and be crimped along the rim.
- Place in the fridge, uncovered, for at least 15 minutes while preparing the filling.
Make the filling:
- In a large mixing bowl, stir together all filling ingredients except for the pecans and chocolate, sprinkling on the cornstarch and cocoa powder rather than plopping down a big clump. If there are any eggy bits that aren’t coming out, remove them, or they’ll bake up ugly.1 cup (200 grams) light brown sugar, 1/2 cup (160 grams) pure maple syrup, 6 tablespoons (84 grams) unsalted butter, 3 large eggs, 1 teaspoon vanilla extract, 2 tablespoons (17 grams) Dutch-process cocoa powder, 1 1/2 teaspoons cornstarch, 1/2 teaspoon salt
- Once combined, stir in the pecans and chocolate chips.1 3/4 cups (193 grams) pecans, 2/3 cup (113 grams) chocolate chips
- Pour the filling into the unbaked chilled pie crust, but do not pour so high that it goes over the crust! My photographer and I had plenty of room left over with our standard pie pans.
- Bake for 55-60 minutes or until the middle is set.
- Place on a cooling rack to cool completely, about 2-3 hours, and then refrigerate for at least 2 more.
- Refrigerate any leftovers for up to 4 days. It also freezes great for up to 3 months.
Notes
- For the flour, you can use all-purpose; or for gluten-free, use 1 1/4 cup (173 grams) Bob’s Red Mill 1-to-1 Gluten-free Baking Flour.
- The crust tastes better with European-style butter like Kerrygold or Plugra.
- If you live in Europe, use 110 grams butter to replicate US butter for the pie crust. Instead of 84 grams of butter in the filling, use 82 grams (and no water). Also use medium EU eggs instead of large eggs.
- I put the vanilla and apple cider vinegar together in a tiny bowl in the freezer for about 10 minutes, and the same with the water. I don’t put the vanilla/ACV and the water together in the same bowl because you might not use all the water.
- If you take a peek while baking and are worried about it getting too brown, you can cover the pie with foil. The top of the pie will be dry well before it’s done baking, so you can easily cover it without the foil sticking to the pie.
- You can also use a pie shield if the crust looks like it’s browning too much, but my pie crust was nowhere near getting too browned.
- The dry top of the pie actually makes it difficult to know when it’s done. The top will be dry when the filling underneath is still a puddle of liquid. 55-60 minutes is what I needed, but all ovens are different. It’s better to bake it too long than too short!
- The nutrition information provided is calculated as a courtesy and is only an estimate. I am not a licensed nutritionist or dietitian. For the most accurate nutritional data, consult a professional or use your preferred calculator.



Absolute fire. My family will flip when I show up to Thanksgiving with this bad boy. It is SO. GOOD.
Yay! I’m so glad to hear that. I hope they’ll enjoy it as much as you did! Thanks for your comment.
I commented most of this on the pie crust post, but I made this for Thanksgiving and my family thought it was a regular pie from bakery. Not a GF pie! Thanks so much for the fantastic recipe. The filling is just the right amount of gooey and isn’t too sweet like most normal pecan pie recipes. Thank you. I hope you had some rest over the holiday weekend! I can tell you put a ton of work into that pie crust and I saw how you were making it last minute for people wanting a vegan version. ♥♥♥♥♥
Aww, you are so nice! No, I didn’t get any rest, but I will today. ???? Thanks so much for your two very kind reviews! I really appreciate it. I’m glad to hear that you didn’t find the pie too sweet. I don’t like normal pecan pies for that reason! And how awesome that everyone thought this was a normal non-GF pie. Thanks again and I wish you a great week!
This was the easiest pie ever using a frozen pie crust. My family said it’s my job from now on to bring this. Ha! Thank you!
Haha. I’m glad that you’ve been given a job you think is easy! :) I’m thrilled that everyone liked it. Thanks so much for letting me know!
Wow this cocoa pecan pie is out of this world! Also not so dfficult to make especially with your fab step by step photos and detailed instructions. Thank you!
You’re welcome! I’m really glad to hear that the instructions were helpful. Thanks a bunch for your comment!
Everyone loved this at Thanksgiving! I used store brand all purpose flour and butter and it was so good. I’m interested at how it will taste with Kerrygold! I will try that next. Thank you for your experimenting. It definitely paid off!
You’re welcome! I’m glad people are enjoying the results of my many trials. ???? And I’m happy that it came out well for you! Thanks a bunch for your feedback.
My family finished this pie in minutes. A new record! They may have been a quabble over the last piece. Thank you! Great job.
You’re welcome and thank you for your comment! I love the fight over the last piece. :D Always a good sign that something was successful, right? :)
We made this pecan pie along with some sweet potato pie for Thanksgiving and everyone loved it! The chocolate chips were a really nice addition.
I’m really glad to hear that everyone loved it! Sweet potato pie also sounds great. :) Thanks for your feedback!
I wasn’t the biggest fan of pecan pie, but then I tried this chocolate pecan pie and I am in love! This is so good – the chocolate really does take it up a notch!
Woohoo! I’m so glad to hear that. Tons a ton for letting me know and and happy Thanksgiving! :)
This was such a decadent pie. I love pecans and chocolate together and this is everything I craved and more.
I’m so happy to hear that! Thanks for letting me know that it came out well. :)
I made this with the GF flour. It turned out crazy good. Can’t wait to share this with the family for Thanksgiving. Thank you so much.
You’re welcome! I hope that your family will enjoy it just as much. Thanks for your comment and happy Thanksgiving! :)
I always, ALWAYS add chocolate to my pecan pies. This flavour combination is dynamite and I love how you also added cocoa. I’m going to try that next time. Happy Thanksgiving!
Happy Thanksgiving and I hope you’ll enjoy the pie if you get to try it out! :)