This French apple pie is an excellent choice for Thanksgiving if you’re looking for a lighter, elegant dessert to balance out the indulgent holiday spread. Its creamy apple custard filling and crisp, buttery crust offer a refined take on traditional pie. It can be made traditionally or with gluten-free flour.
Unlike heavier desserts, this pie is refreshing and won’t leave you feeling overstuffed, making it the ideal sweet finish after a hearty Thanksgiving feast.
French apple pies, as commonly understood in the US, don’t really exist in French culinary tradition. Many recipes labeled as “French apple pie” are often actually American or Dutch apple pies, which are characterized by streusel toppings or double crusts. I have no idea why some bloggers are labeling them as French.
In France, apple desserts are more commonly associated with tarte tatin (an upside-down caramelized apple tart) or tarte aux pommes (a classic apple tart with thinly sliced apples arranged over a buttery pastry base).
These French tarts are elegant and highlight the natural flavor of apples, often complemented by a custard or jam glaze, as opposed to the spiced, sugar-heavy fillings typical in American-style apple desserts.
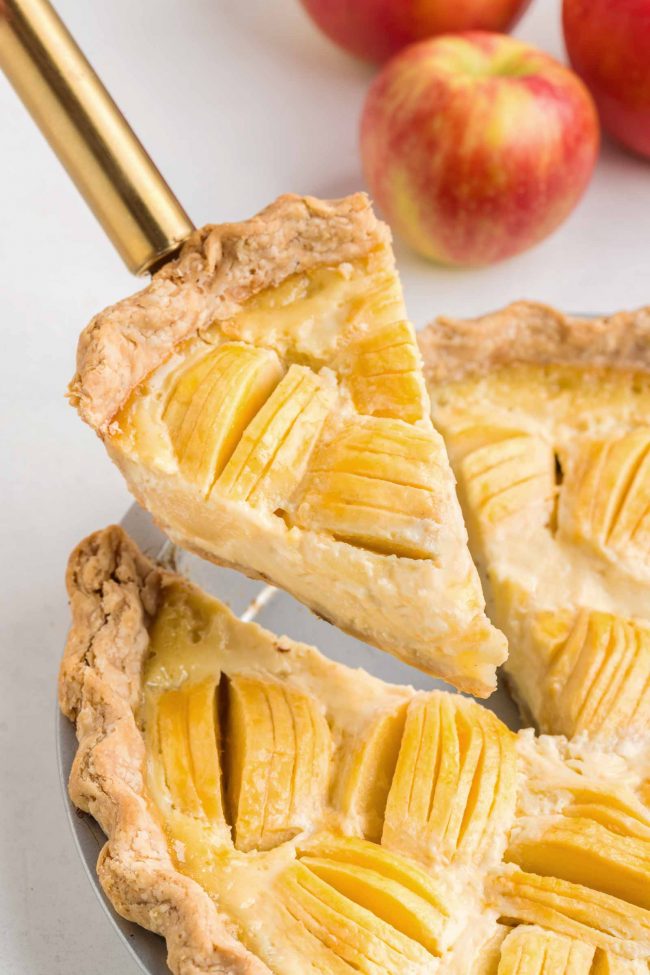
What is an Alsatian apple tart?
A classic French tart, the tarte aux pommes alsacienne (Alsatian apple tart), combines a buttery pastry crust with a custard filling and beautifully arranged apples. Originating from the Alsace region in northeastern France, bordering Germany and Switzerland, this tart is known for its elegant presentation and simple yet sophisticated flavors.
The tart typically begins with a pâte brisée or pâte sucrée crust, providing a sturdy yet tender base. Thinly sliced apples are arranged in concentric circles on the crust, creating a visually stunning design.
The apples are then topped with a custard made from eggs, cream, sugar, and sometimes a hint of vanilla or almond extract, which bakes to a silky consistency. A glaze, often made with apricot jam, is brushed over the tart after baking to add shine and enhance the flavor.
The tarte aux pommes alsacienne differs from other French apple tarts, such as the classic tarte tatin, in that it combines the richness of custard with the fresh sweetness of apples. It’s a dessert that perfectly balances texture and flavor, making it a favorite in French pâtisseries and homes alike.
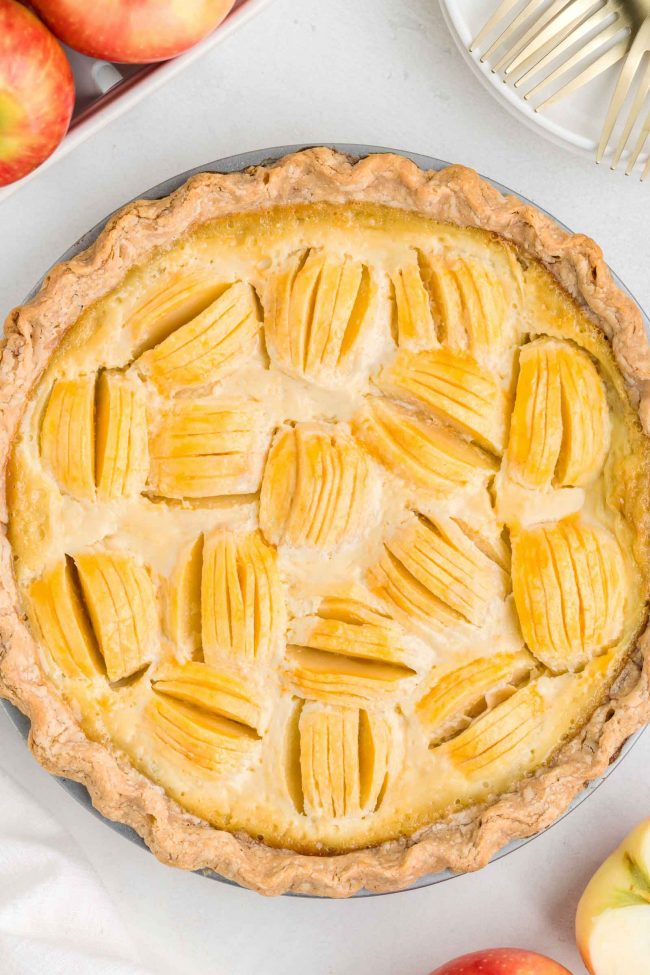
How is this a French apple pie?
As I said before, no such thing exists. At least not traditionally! I’m sure there are French bloggers sharing apple pie recipes nowadays, but that doesn’t make them traditional French apple pie recipes.
My “French apple pie” is a reinterpretation of an Alsatian Apple Tart, adapted to use a pie pan and American pie-making techniques. This fusion combines French elegance with the more rustic, substantial qualities of a pie.
In an Alsatian apple tart, the apples are placed in a pretty concentric circle. I tried that numerous times with this pie, and it didn’t work very nicely.
It tasted good, but it looked terrible. You just can’t create the same pretty design in a pie pan.
Another difference is the crust. Pâte brisée has a tender, crumbly texture that’s almost shortbread-like.
It’s less flaky with a more uniform consistency, making it ideal for French tarts and pies where the crust serves as a delicate base.
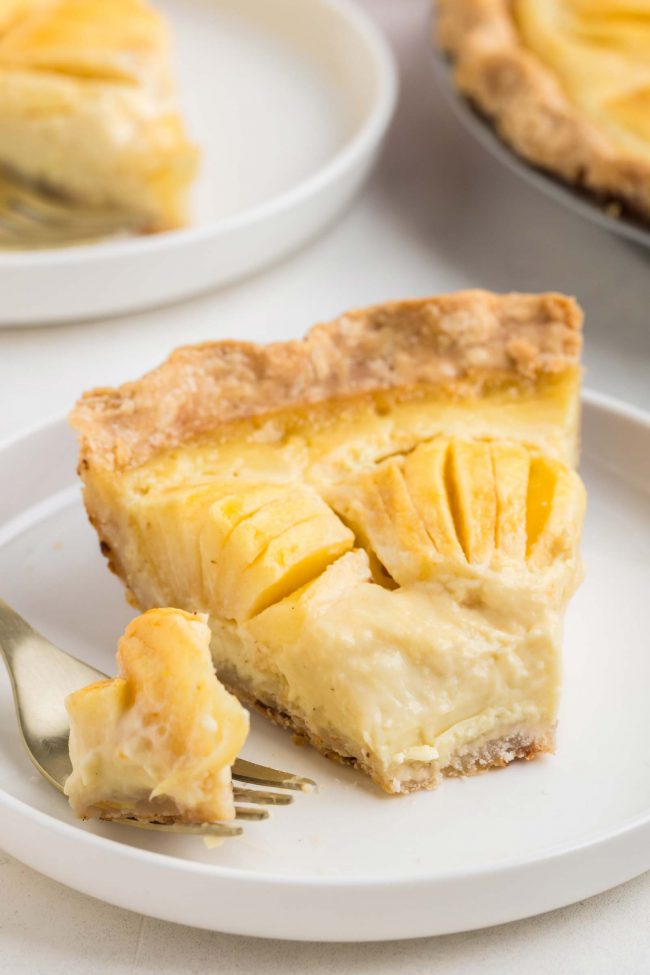
You know what it’s not ideal for? A pie pan. Against my better judgement, I tried using a pâte brisée recipe for this pie, and I couldn’t cut a single decent slice.
US flaky pie crusts prioritize flakiness, with visible layers that shatter and crunch, which just happens to be perfect for a custard pie!
Pâte sucrée, the other traditional choice for an Alsatian apple tart, has a sweet, tender, and cookie-like texture. It doesn’t flake but instead has a crumbly and melt-in-your-mouth quality.
Incredible for tarts! But I had the same issue when cutting it.
I’ve had this recipe ready to share for over a year. I first started working on it after I finally came up with a flaky pie crust recipe I loved, this Gluten-free Pie Crust, which can also be made with all-purpose flour.
I was very excited to use it in this pie recipe, and it worked perfectly.
It almost sounded like I was crushing a potato chips bag when I cut through it. I was even able to pick the entire pie out of the pan and hold it in my hands. It’s sturdy!
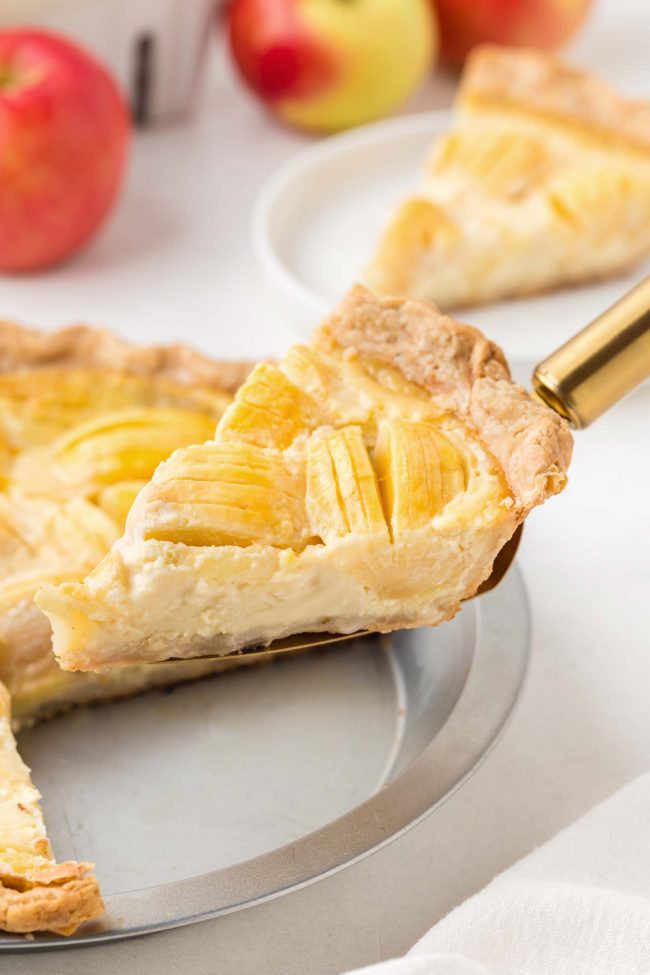
Ingredients
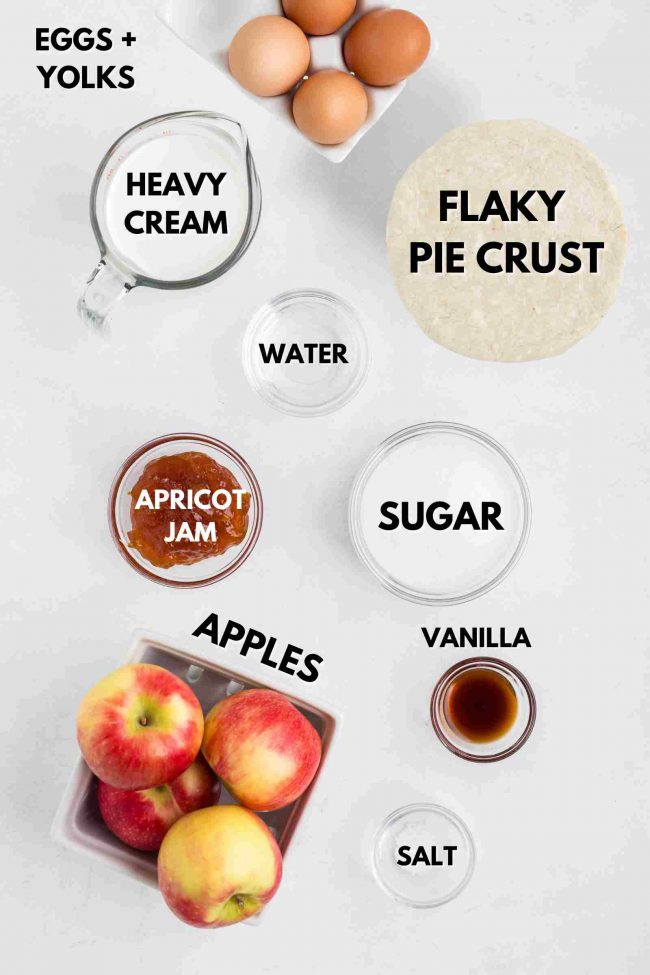
Here’s a breakdown of the ingredients you’ll need for this pie recipe.
There aren’t really any subs possible for this recipe, except for 2 small things.
You can replace part of vanilla in the custard with some almond extract. I’d do up to 1 teaspoon.
And instead of the apricot jam, which is used to give the tart its glossy, professional finish, you could substitute it with apple jelly.
The apples look kind of dull and boring without the jam, so I would definitely not omit it.
I’ve listed my pie crust recipe in the recipe below, but you can use a store-bought pie crust. Follow the package directions on how to thaw and blind-bake it.
Why no cinnamon?
French apple desserts often emphasize the natural flavor of the fruit, with cinnamon used sparingly or omitted in favor of vanilla, lemon zest, or Calvados (apple brandy).
As someone from the US, it feels wrong not to use cinnamon in an apple dessert. So one of my trials included cinnamon.
It was weird. Skip the cinnamon!
If you want something more traditional for Thanksgiving, these Apple Tartlets have loads of cinnamon flavor and are typically American.
This French apple pie is for when you’re looking for something lighter and a little different!
What type of apples to use
The best apples for this apple pie, or any baked apple dessert, are those that strike a balance between sweetness and tartness while holding their shape during baking. Here are some excellent options:
- Granny Smith – their tartness contrasts beautifully with the sweet custard, and they stay firm when baked. I personally prefer something sweeter, like one of the below choices.
- Honeycrisp – slightly sweeter than Granny Smith, with a crisp texture that holds up well in the oven.
- Golden Delicious – if you’re looking for a tender but not mushy apple in baked dishes, this is a solid option. They’re sweet with just a hint of tartness.
- Braeburn – a mix of tart and sweet flavors with a firm structure, making them ideal for elegant presentations. You don’t want to bake with mushy apples that shrivel and become unappetizing-looking while baking.
- Pink Lady – tangy with a hint of sweetness and excellent firmness.
You can also experiment by mixing apple varieties for a more complex flavor profile. For instance, pairing a tart apple like Granny Smith with a sweeter one like Honeycrisp can elevate the overall taste of the tart.
Using up old apples for baking works just fine in recipes like Apple Crumble or Healthy Cinnamon Apple Muffins, but not this one.
Since this pie doesn’t rely on heavy spices like cinnamon or nutmeg or a lot of brown sugar as many US apple recipes do, the quality of the apples is really important. Be sure to use fresh, flavorful apples that are crisp and juicy.
Avoid older, dried-out apples or ones that lack flavor. The apples are the star of the show here, so their taste and texture will directly impact the success of your pie.
How to make it
Here’s an overview of how to make it.
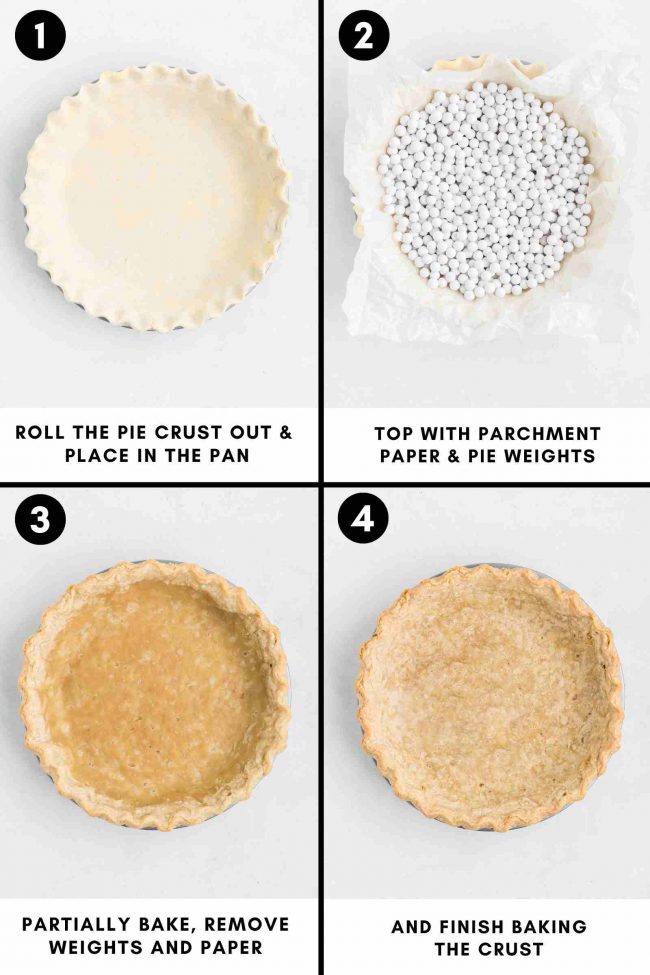
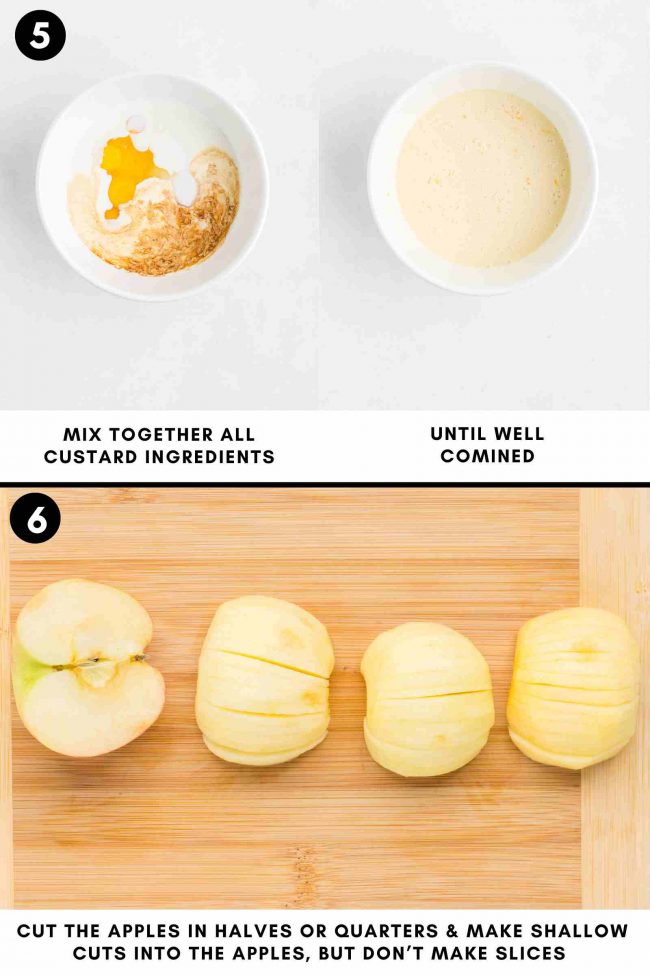
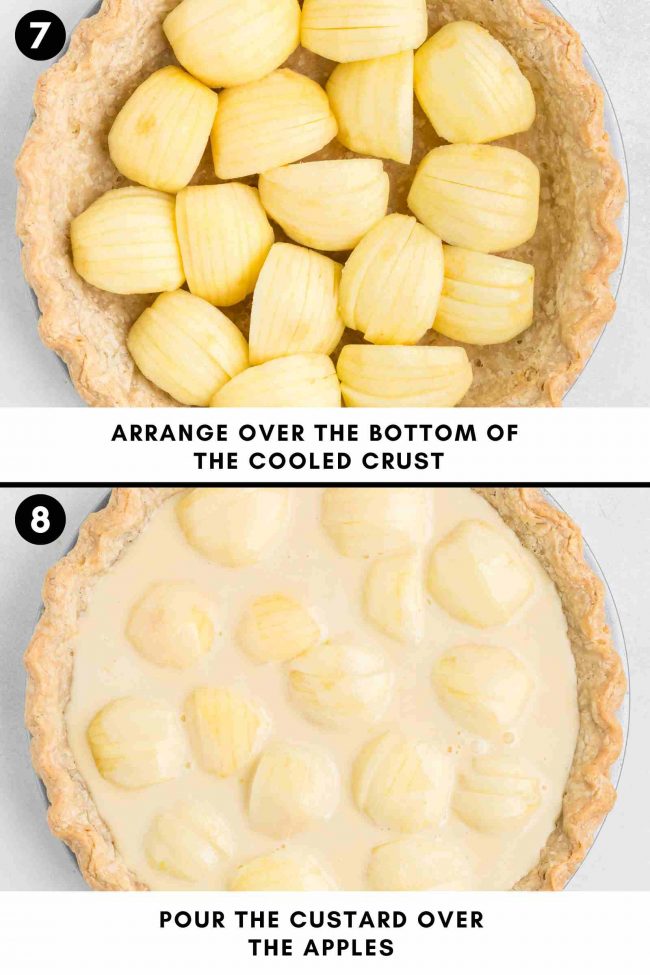
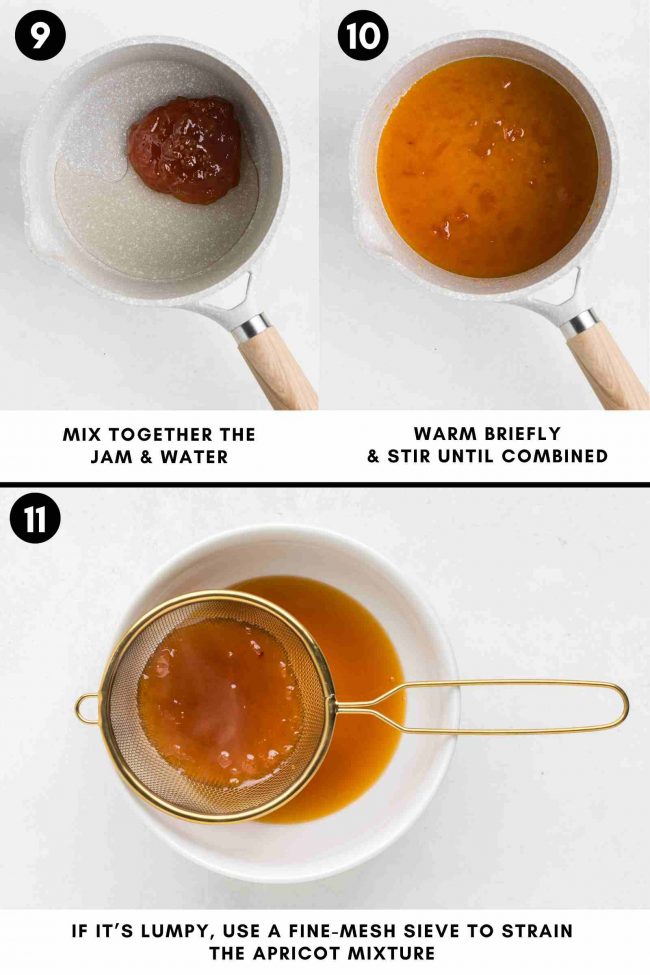
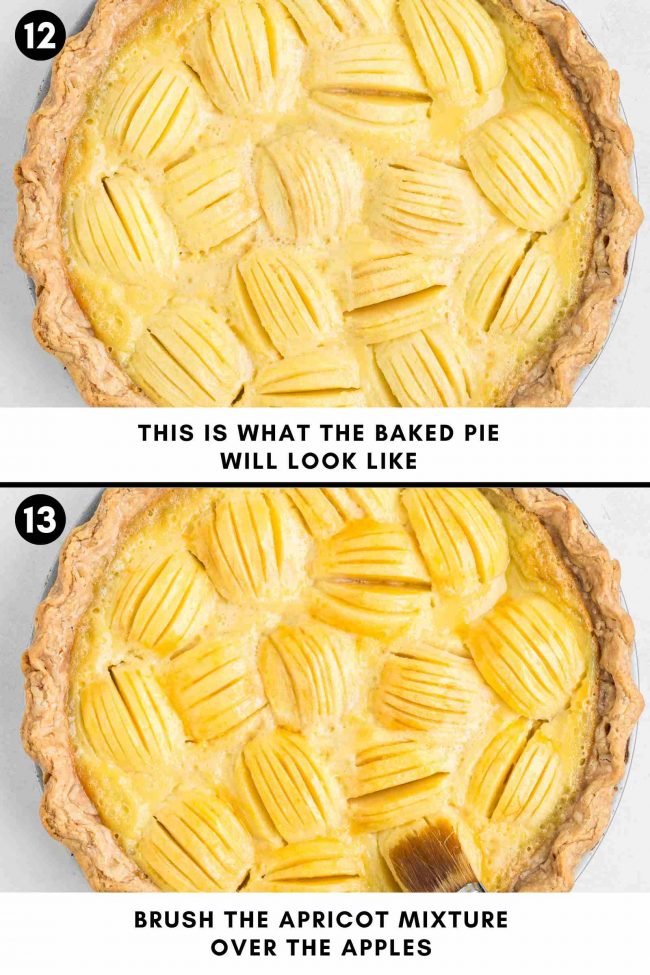
I’ll let the pictures do the talking!
What pie pan to use?
You need a standard 9″ (23 cm) pie pan and NOT a deep dish. I tried that, and it wasn’t enough filling or crust for a deep dish.
How to prepare the apples
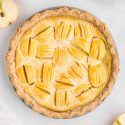
Making neat concentric circles of apple slices didn’t work for me. Neither did coring and slicing the apples and then reassembling them neatly in the pan.
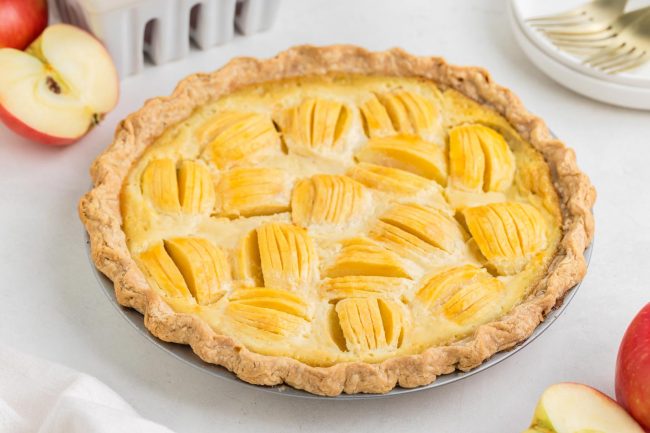
If that doesn’t make sense, look at how the apples look in the pie. That’s what I mean.
What you’re going to do is score the apples by making shallow cuts into the apples without slicing all the way through.
This technique is often used to add a decorative element to desserts, but more importantly, to help apples cook more evenly by allowing steam to escape.
Do I have to blind-bake the crust?
Yup. If you want the crust to be baked through and not soggy.
This recipe works great in certain recipes, like this Cocoa Pecan Pie, without blind-baking. It somehow magically gets crisp.
In this apple pie recipe, however, the non-blind-baked crust came out pale, wet and flavorless.
How to make ahead
This isn’t the best make-ahead dessert for Thanksgiving, but you can prepare the crust in advance. However, I recommend baking the pie on the day of serving to ensure the crust is at its best.
You can make the dough 2 days in advance and keep it refrigerated until ready to use. If you’d like to bake the pie crust and then fill it the day of serving, this is what to do.
- Let the prebaked pie crust cool completely at room temperature to reduce the risk of condensation forming inside the storage container.
- Wrap the crust tightly in plastic wrap or aluminum foil, then place it in a Ziploc bag. Ensure it’s well-sealed to protect it from air and moisture.
- Store the crust at room temperature for up to 3 days or freeze it for up to 2 months.
- To use the frozen pie crust, thaw it in the refrigerator for several hours or overnight. Thawing at room temperature can cause condensation to form as the crust warms, especially if it was frozen. This moisture can seep into the crust, making it soggy, particularly at the base. Thawing in the fridge allows the crust to warm slowly, reducing condensation and keeping it crisp.
You don’t want to cut up the apples in advance, but you can mix up the custard a day before baking the pie. It has raw eggs in it, so you don’t want to prepare too far ahead of time.
Troubleshooting
If things don’t go as planned, these tips can help for next time. Or you can read them now to avoid issues. :)
- Soggy crust – ensure the crust is blind-baked thoroughly and cooled before adding the filling.
- Custard not setting – bake the pie until the custard no longer jiggles in the center.
- Apples sinking – score the apples thinly and arrange them tightly in the pie pan to keep them from shifting during baking.
Don’t live in the US?
You’ll unfortunately need to find a pie crust recipe that works with whatever flour you have access to. I can tell you 100% that Swedish and German flour would be a disaster in this pie crust recipe.
Those are the only two countries I’ve lived in other than the US, and the flour is SO different.
There are several reasons for this, but here are a few, in case you’re interested.
US flour
Hard wheat, common in North America, is higher in protein and gluten, yielding stronger doughs, which is perfect for bread and chewy baked goods. It absorbs more water than soft wheat.
All-purpose flour is around 10–12% protein, bread flour is 12–14%, and cake flour is 7–9%.
European flour
Soft wheat is lower in protein and gluten, producing tender, less elastic dough that absorbs less water. This is what’s common in Europe and is ideal for pastries, cakes, and delicate baked goods. French all-purpose flour (Type 55) and German (Type 405) have about 8–10% protein, making it more like US pastry flour.
German Type 550 is also around 10-12% protein, but still – it’s not a direct sub.
Traditional European baking emphasizes softer, more delicate textures in pastries, cakes, and enriched doughs (like brioche and croissants), which require less gluten. And for bread, many regions rely on specific techniques, like long fermentation and blending flours, to compensate for moderate protein levels.
You can find higher-protein flours in most countries, but they’re not the standard and not a direct replacement for US all-purpose flour, and won’t work for a flaky pie crust recipe.
In conclusion, find a local recipe for the pie crust that you know bakes up flaky. :)
Gluten-free version
You’ll need to use Bob’s Red Mill 1-to-1 Gluten-free Baking Flour. The resulting crust is the flakiest and best I’ve ever had!
If you use another brand, please know you probably won’t have the same results.
I hope you’ll enjoy this French apple pie! If you try it out, I’d love to hear your thoughts below in the comments. Thanks! :)

French Apple Pie
- Prep Time:
- Cook Time:
- Ready in:
- Yield: 8 slices
Ingredients
- 1 1/4 cups (156 grams) all-purpose flour or for gluten-free, use 1 1/4 cups (173 grams) Bob's Red Mill Gluten-free 1-to-1 Baking Flour + tiny bit more for flouring
- 1/2 teaspoon sea salt (I used fine pink Himalayan sea)
- 1 tablespoon granulated sugar
- 1/2 cup (113 grams) unsalted butter, cut into 8 pats
- 1 teaspoon cold1 vanilla extract
- 1/2 teaspoon cold apple cider vinegar
- 3 to 5.5 tablespoons2 of cold water
- pie weights or beans
- 2 large eggs
- 2 egg yolks
- 1 cup (23 6ml) heavy cream
- 1/2 cup (100 grams) granulated sugar
- 1/8 teaspoon salt
- 2 teaspoons vanilla extract
- 3-4 medium baking apples of choice
- 1/3 cup (95 grams) apricot jam (smooth, not lumpy)
- 2 tablespoons water
Crust (or use your favorite flaky pie crust - store-bought or homemade):
Filling:
Topping:
Directions
- Get out a standard 9” pie plate. Do not grease it.
- To the bowl of a food processor fitted with an S-blade, add the flour, salt and granulated sugar. Pulse a few times.
- Turn it to the lowest speed and dump in the butter. Process just until you have pea-sized bits of butter. Don’t overprocess! Stop pulsing.
- Evenly drizzle the vanilla extract and apple cider vinegar over the top.
- Turn on the lowest speed and pour in 3 tablespoons of water. Process very briefly until it looks like it’s coming together. It’ll look shaggy and not like a uniform ball. Pinch some together. If it stays together without being crumbly, it’s ready. If you think it needs a bit more water (it almost certainly will), add more water, 1-2 teaspoons at a time. If you think you can form a disc with it without it falling completely apart into a thousand crumbs, that’s another clue it’s ready.
- Place the dough in the center of a large piece of plastic wrap and wrap it up into a flat disc, about 1” or a little less. If you can’t form a disc because it’s nothing but crumbs, it needs a little more water.
- Refrigerate for at least 45 minutes and up to 2 days.
- Very lightly flour a piece of parchment paper and place the unwrapped dough on there. Sprinkle a tiny bit of flour over the top of the dough.
- Place the plastic wrap or another piece of parchment paper on top of the dough and roll it out so that it’s about ½” wider than the top of your pie plate.
- Remove the piece of plastic wrap or parchment covering the pie crust, place the pie pan on top of the dough, and then flip over the dough and pan. Press the dough down around the edges at the bottom of the pan and then remove the piece of parchment paper.
- Trim the dough, if needed, and crimp the edges. The dough should go all the way up the edges and be crimped along the rim, like in the GF pecan pie.
- Cover loosely with plastic wrap so that ice crystals from the freezer don’t fall in. Place in the freezer (not the fridge!) for 45 minutes. When there are 15 minutes left on the clock, preheat the oven to 400 °F (205 °C). Place a baking sheet on the baking rack that will fit your pie.
- Line the crust with a piece of parchment paper and then fill with pie weights/ beans. A lot of sites say you need to fill them all the way to the top of the pan, but I just did the bottom, and it was fine.
- Carefully place the pan on the now very hot baking sheet and bake for 20-23 minutes or just until you see the tops of the crimped edges starting to very lightly brown.
- Remove the pan from the oven. Remove the parchment paper and weights and bake the crust for another 5-7 minutes or until the bottom of the crust is dry and starting to brown. You can now turn off the oven and turn it on again in 15 minutes, or just keep it running.
- Remove the pan from the oven and place on a wire rack to cool completely - about 30 minutes. After about 15 minutes of cooling, start preparing the filling and turn the oven to 325 °F (163 °C).
- In a medium mixing bowl, stir together all the filling ingredients except the apples. Set aside.
- Peel, core and either halve or quarter your apples. It’ll depend on how big they are. Then score the tops of the apples, lengthwise, being careful not to cut all the way through the apples, which would make slices. Place the apples, scored side up, in two concentric circles (so an outer and inner circle).
- Pour the filling over the top. Be sure not to pour it on or over the sides of the crust.
- Bake for 40-50 minutes or until the middle is set and doesn’t appear raw.
- Place on a wire rack to cool completely, about 1 to 2 hours. After 20 minutes of cooling, stir the apricot jam and water in a small saucepan over medium heat. Cook for a few minutes, stirring often, until well combined. Use a fine mesh sieve to get rid of any lumps, if necessary. Brush over the apples.
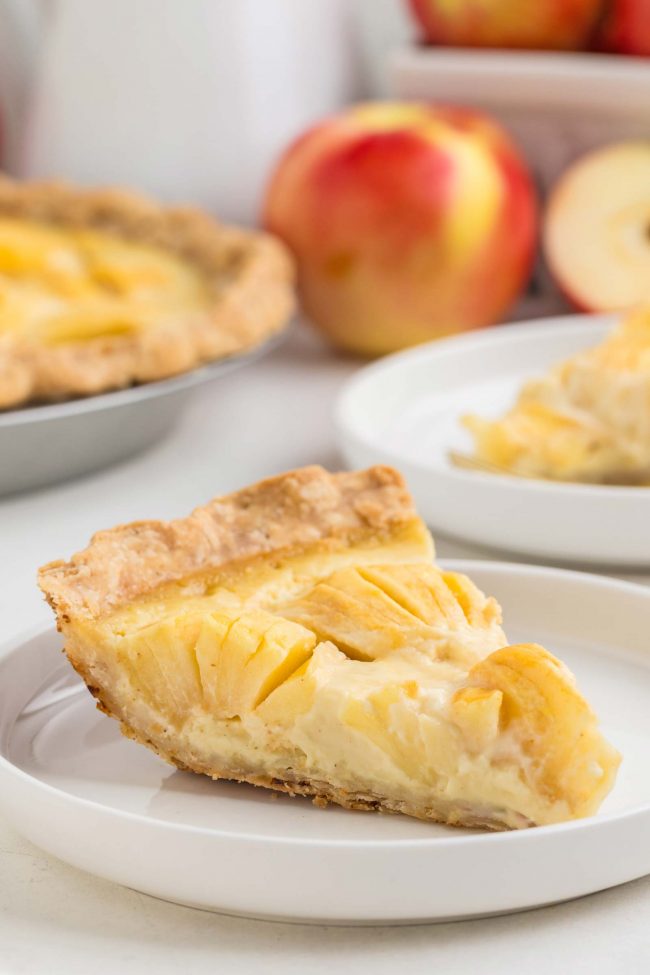
- After it’s completely cooled, place in the fridge for 2 hours to firm up more, allowing for a cleaner slice.
- Cover and refrigerate for up to 3 days.
Make the crust:
Prepare the filling and apples:
Notes
- I put the vanilla and apple cider vinegar together in a tiny bowl in the freezer for about 10 minutes, and the same with the water. I don’t put the vanilla/ACV and the water together in the same bowl because you might not use all the water.
- The amount of water you need will depend on how cold your ingredients, kitchen, etc. are. I’ve made this several times with the same brand of ingredients, and have needed between 3.66 and 5.5 tablespoons.


3 comments on “French Apple Pie” — Add one!
How could I incorporate some brandy or bourbon into this?
I made this and your crustless pumpkin pie and loved them both. I don’t normally eat crust but this was incredible. I used regular flour. I loved how buttery and crunchy it was. And the custard filling was perfect. I love your made-up pie. 😂
Oh, yay! So glad that the crust was a hit. I didn’t like crust before that recipe, either! Thanks for the kind words about my made-up pie. ;) Happy Thanksgiving!