

Blackberry Crumble

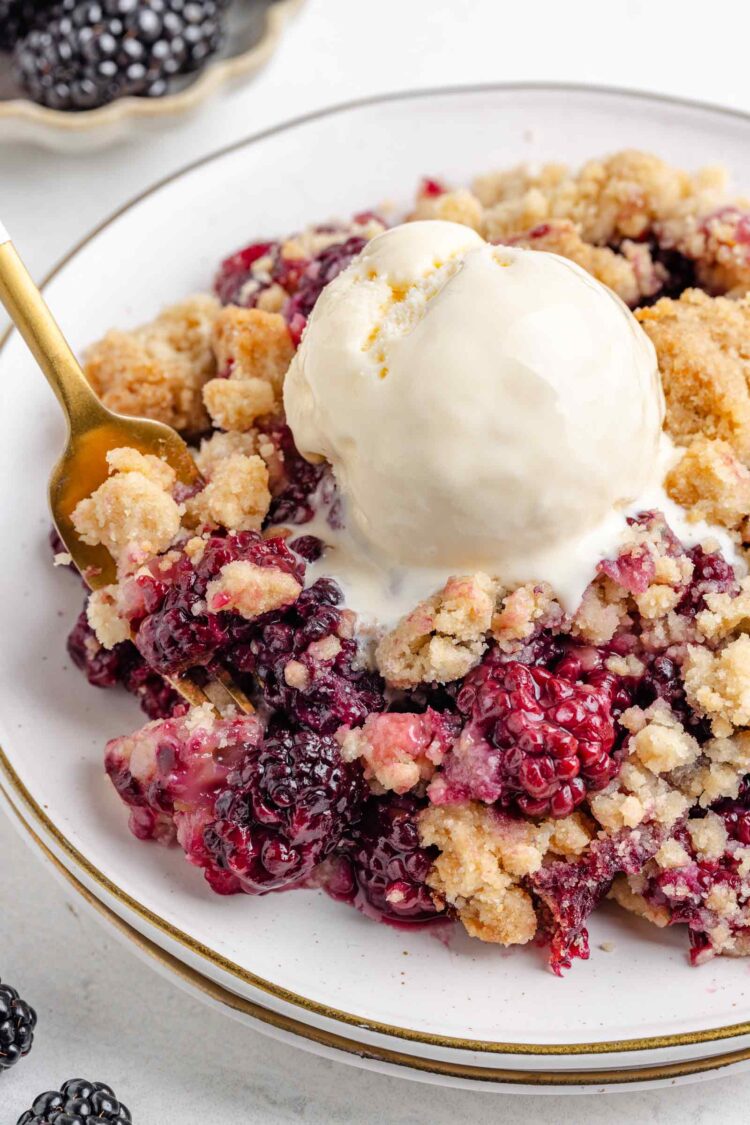
This blackberry crumble is a simple dessert with a thick crumble topping and a berry filling that sets up nicely after baking. It works with fresh or frozen berries, so you’re not limited to one season. You can make it traditionally or gluten-free, as well as vegan and dairy-free.
The filling isn’t overly sweet, and the lemon helps keep the flavor balanced. The topping is a bit thicker than most crumbles, which gives it more structure and a slightly firmer bite.
I’m not a fan of crisps and crumbles with a puny amount of topping! This is not one of those desserts.
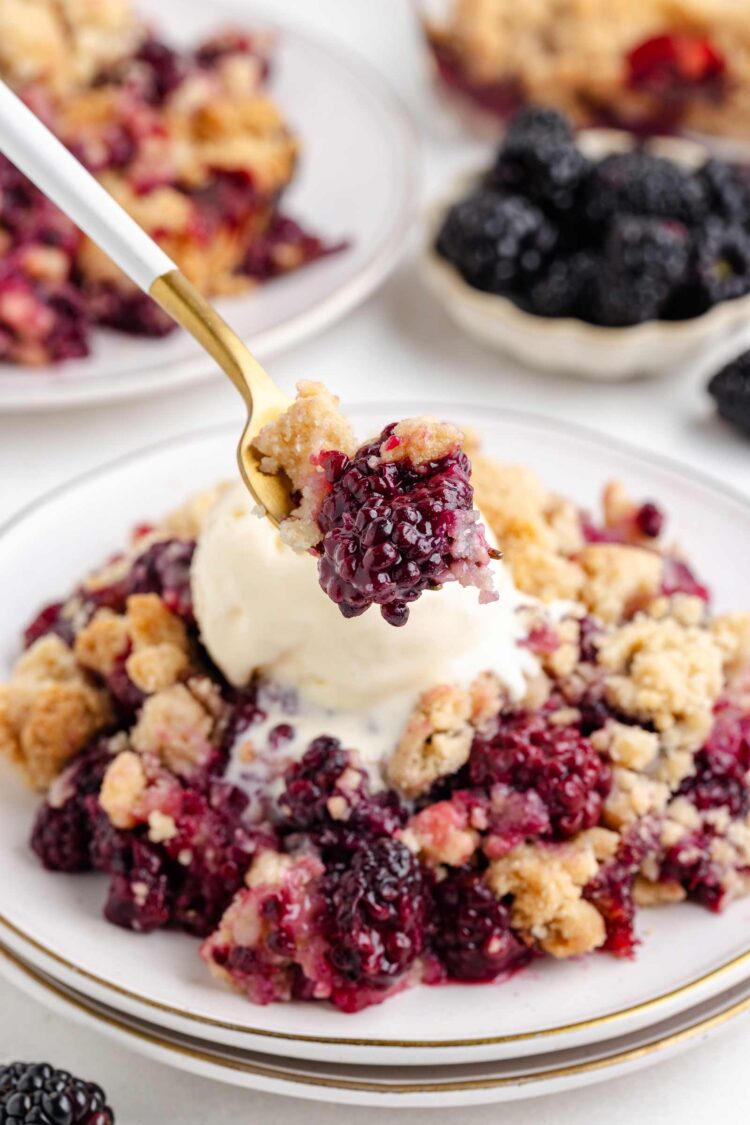
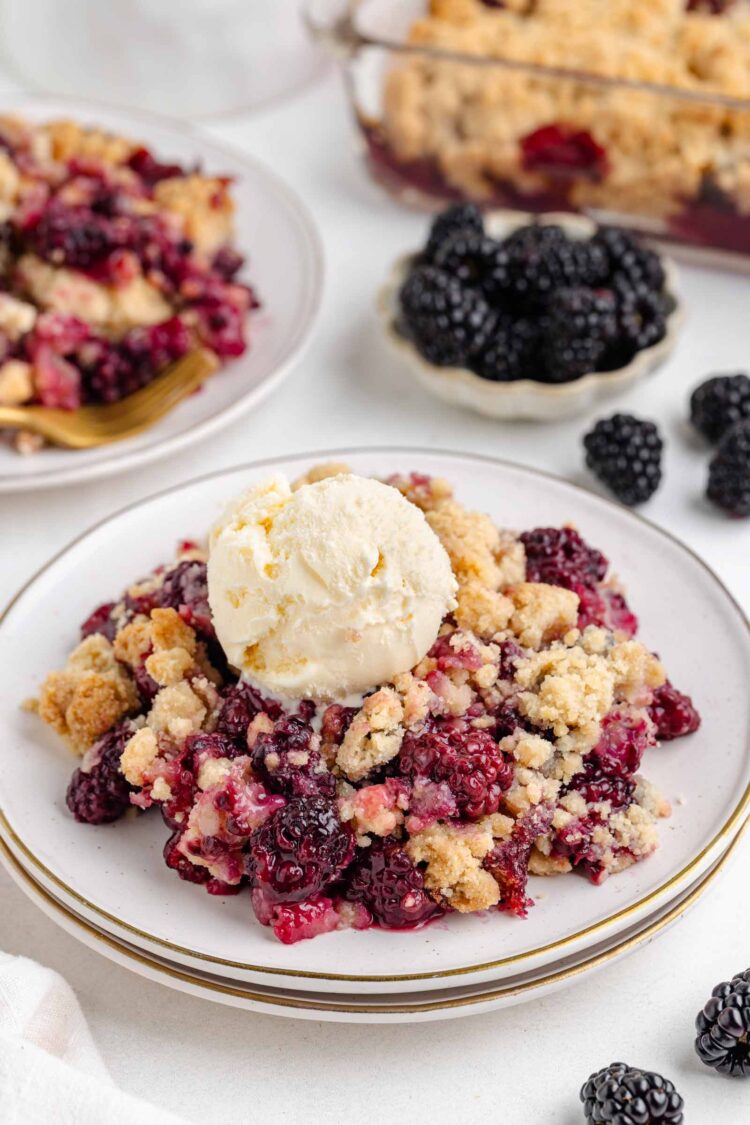
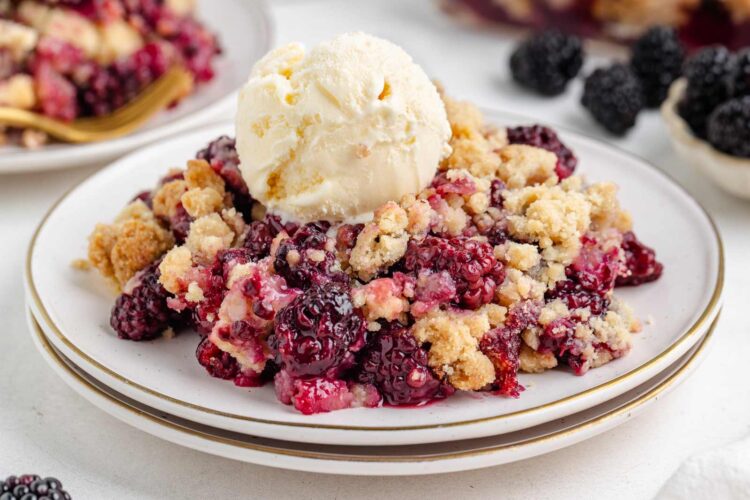
It’s especially good served warm with ice cream, but it also holds up well after chilling, making it a practical option to make ahead.
I got a few crates (actual crates and not packages 🙃) of free blackberries recently, which is why I’m working on expanding my blackberry offerings. Up until a few weeks ago when I posted these Lemon Blackberry Muffins, I had exactly zero blackberry recipes. 😄 They’re just so expensive here in Germany.
If you’re in the mood for something a little more seasonal, this Strawberry Rhubarb Crisp is a great option.
- Works with fresh or frozen berries – I’ve tested this recipe with both, so you can be sure it works. No thawing needed, which makes it easy to make anytime.
- Balanced sweetness – the lemon keeps the filling from tasting flat.
- No mixer needed – everything comes together by hand.
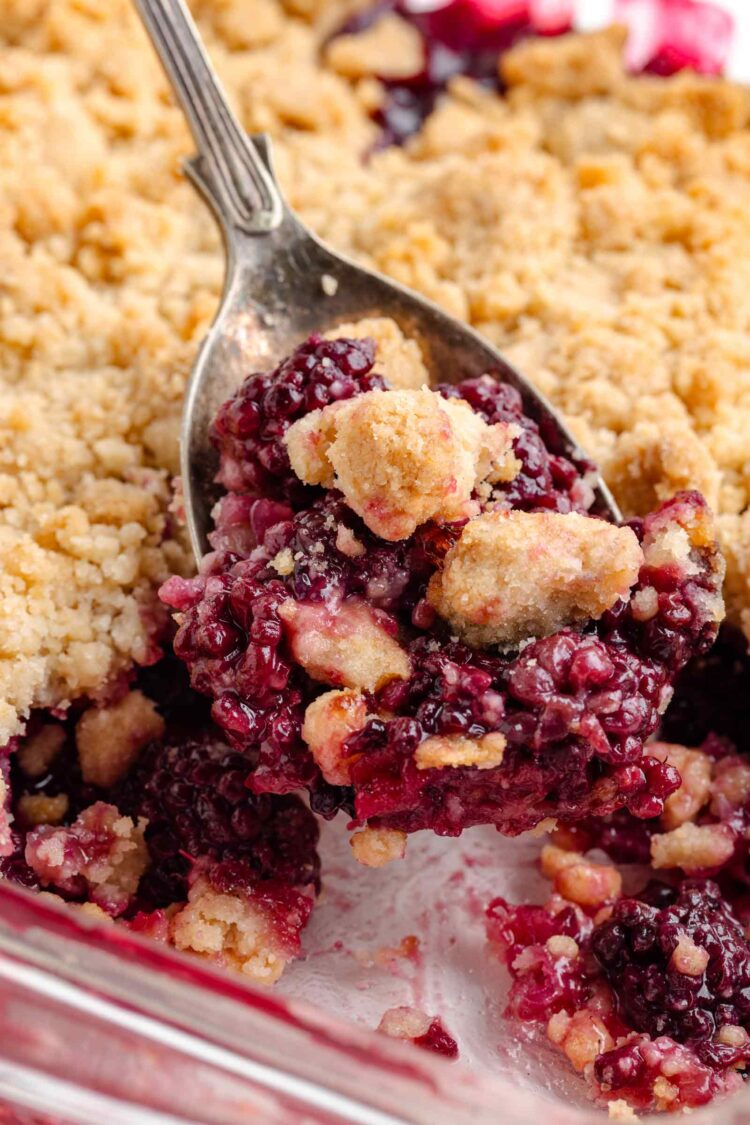
This is definitely a dessert for people who really enjoy blackberries. The filling is quite seedy, but that’s just the nature of blackberries. And if you strained out the seeds, you’d basically have unsweetened blackberry puree, so you don’t want to try that.
If you don’t mind the texture, it’s not an issue at all. But if you’re sensitive to seeds, you might want to go with a different fruit instead.
Ingredients
These are just some notes on selected ingredients. Scroll down for the full recipe.
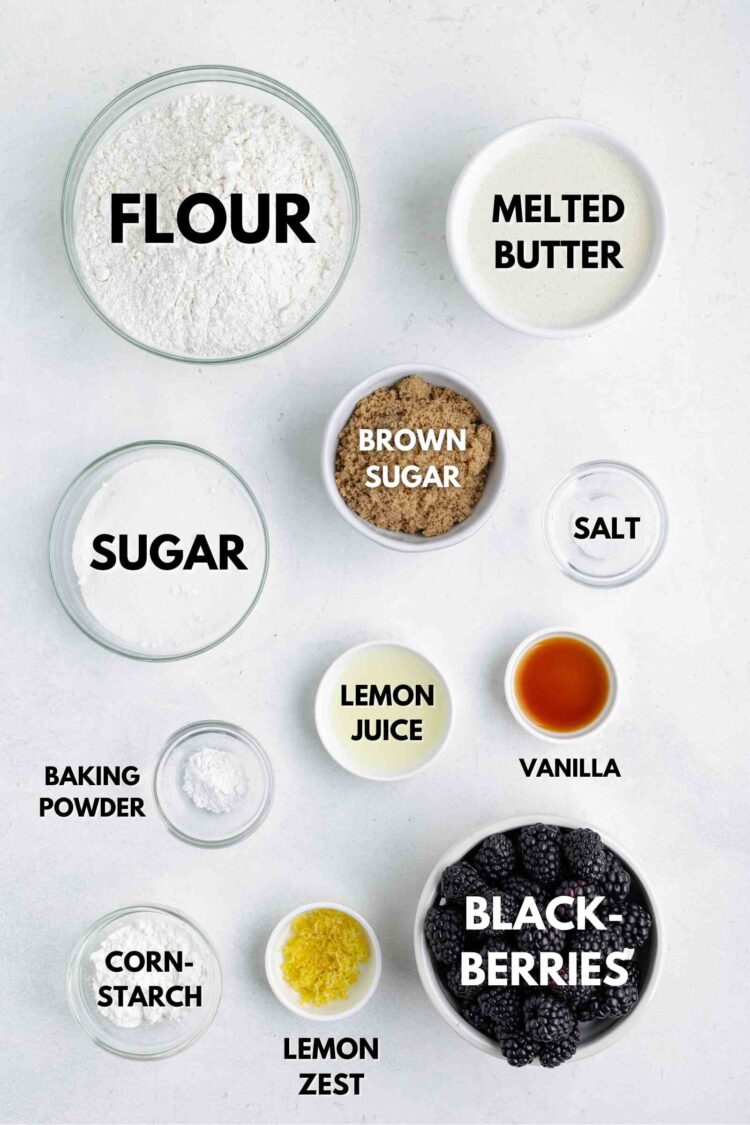
- Flour – you can use all-purpose flour, or for a gluten-free version, use King Arthur Flour Gluten-free Measure for Measure Flour or Bob’s Red Mill 1-to-1 Gluten-free Baking Flour. The Bob’s version was a little sandy compared to KAF, but still great!
- Butter or coconut oil – the photos use regular butter. For a dairy-free or vegan version, use the coconut oil + water option instead of doing a straight swap. Coconut oil is 100% fat, while butter is only about 80–84%, so using it 1:1 can make the topping a bit greasy or heavy. Using slightly less coconut oil plus a little water better mimics how butter behaves here. I recommend refined coconut oil so the topping doesn’t taste like coconut. Vegan butter also works, and in that case you can use the same amount as the butter called for.
- Cornstarch – the amount depends on whether you’re using fresh or frozen berries. I recommend weighing it if possible because cornstarch measurements can vary a lot. If you’re using measuring spoons, scoop it directly from the container and level it off (don’t spoon and level it like regular flour), since that’s how this recipe was tested.
- Blackberries – if using frozen, keep them completely frozen before mixing. This is super important! You’ll have a soupy mess if you let them defrost first, because they release a lot of liquid as they thaw, which throws off the filling before it even goes into the oven.
- Lemon zest – adds a bit of brightness to the filling. You can omit it if you’d like or use some cinnamon in its place.
If you’re looking for a fruit dessert with oats, I’ve got this Apple and Blueberry Crisp and Gluten-Free Apple Crisp. You could replace the blueberries with blackberries and add a bit more sugar to the filling, and in the apple crisp, just toss in a handful of blackberries.
How to Make It
Preheat your oven to 350 °F (175 °C). Place a rimmed baking sheet on the lower rack in case anything bubbles over (this hasn’t been an issue for me, but I don’t know exactly what baking dish you’ll be using), and grease an 8×8-inch (23 cm x 23 cm) casserole or baking dish.
In a large bowl, stir together the flour, sugars, baking powder, and salt. Add the vanilla to the melted butter, then pour it into the dry ingredients. Stir with a spoon, then use your hands to bring it together. The mixture should be clumpy and hold together when pressed.
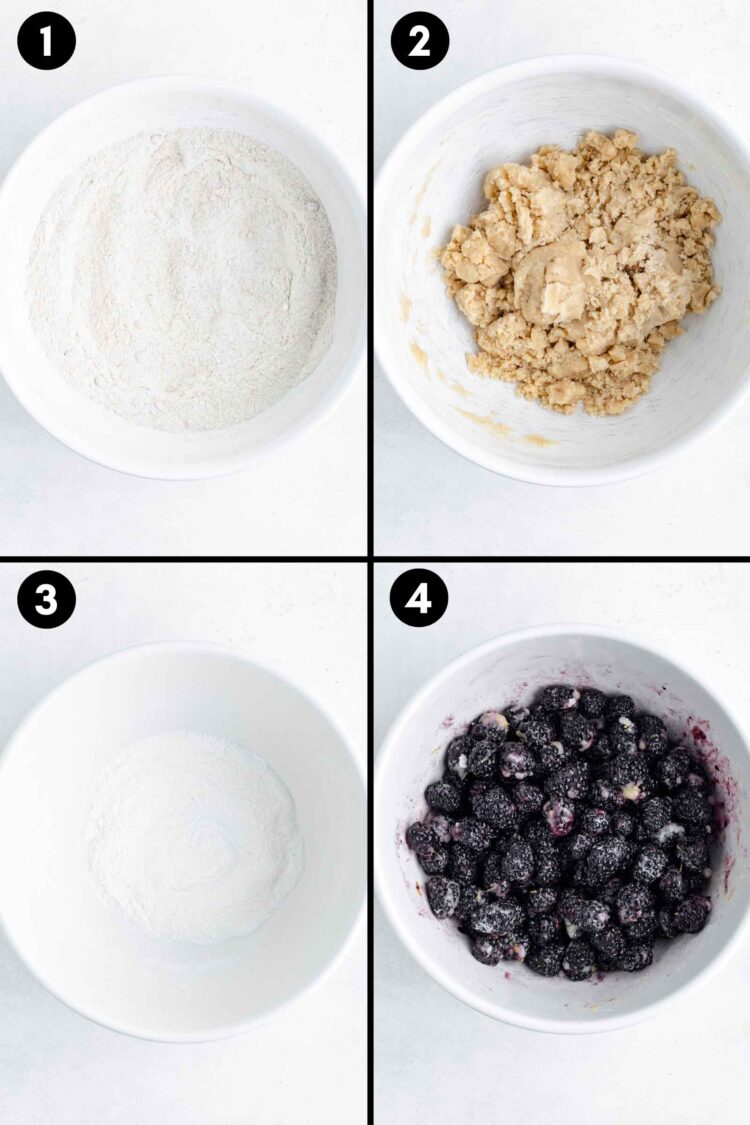
In another bowl, mix the sugar and cornstarch. Add the blackberries, lemon juice, vanilla, and zest, and toss until evenly coated. Spread the mixture into the prepared dish.
Scatter the topping evenly over the fruit and press it down lightly so there aren’t any pointy bits sticking up (which might burn).
Bake for 35–45 minutes. The topping should be set, and the filling should be bubbling in the center. If it’s only bubbling at the edges, it needs more time.
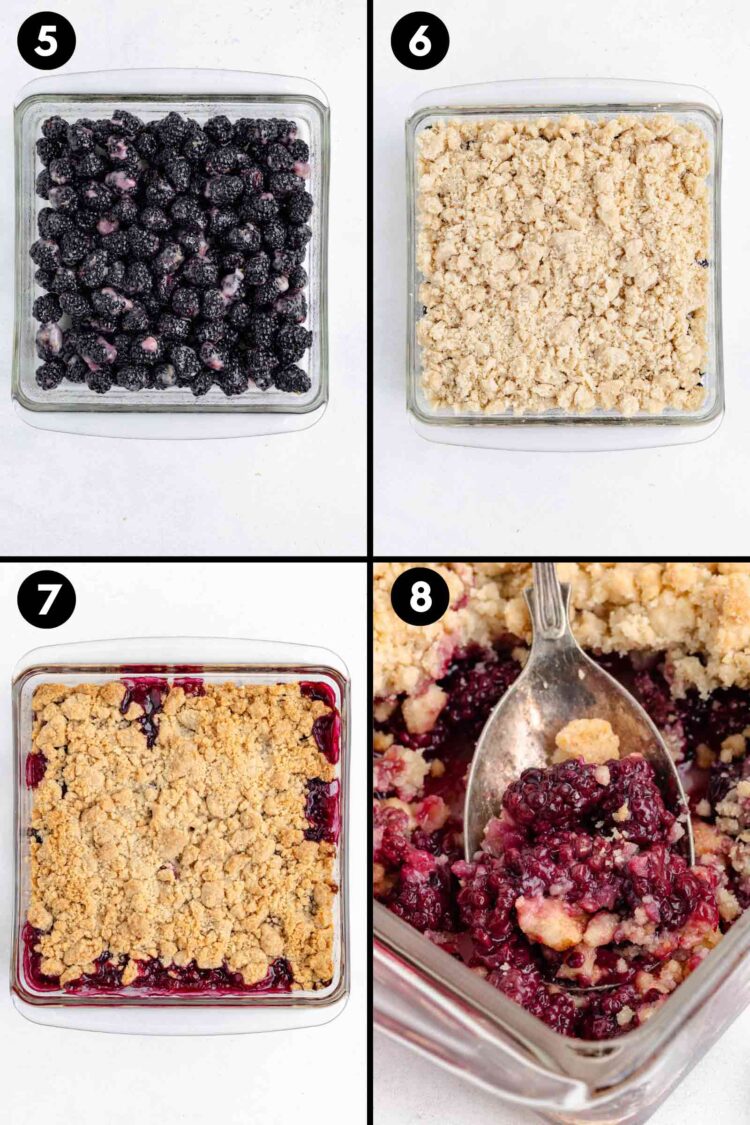
Let the crumble cool for about 30-40 minutes before serving so the filling can thicken properly.
Serve it warm with a scoop of French Vanilla Ice Cream or the vanilla sauce in the notes of this Swedish Apple Pie recipe.
If you’re making the vegan option, I have even more suggestions!
If something seems off, it’s usually related to bake time or measurements.
- Runny filling – it didn’t bubble in the center or didn’t cool long enough.
- Filling’s too thick – too much cornstarch was used.
- Topping too soft – it likely needs more bake time.
- Topping browning too quickly – cover loosely with foil near the end.
How to Make Ahead, Store and Freeze
You can assemble the crumble ahead of time, cover it, and refrigerate it for several hours before baking. If baking straight from the fridge, add a few extra minutes to the bake time.
Let cool completely before covering and refrigerating for up to 4 days.
It can also be stored for up to 24 hours at room temp, loosely covered. You can rewarm it in the oven at 350 °F (175 °C) for about 10 minutes, which helps dry out and re-crisp the topping a little bit (but be warned that it won’t be as crisp as freshly baked). I normally just use the microwave, but I don’t mind soft topping.
To freeze, let the baked crumble cool completely, then wrap it tightly and freeze for up to 3 months. Thaw overnight in the refrigerator and reheat before serving.

Blackberry Crumble
Ingredients
For the topping:
- 2 cups (250) flour see notes
- 1/2 cup (100 grams) granulated sugar
- 1/4 cup (50 grams) brown sugar
- 3/4 teaspoon baking powder
- 1/4 teaspoon salt
- 1 teaspoon vanilla extract
- 3/4 cup (168) unsalted butter, melted or for dairy-free vegan, use 2/3 cup (150 grams) refined coconut oil + 1 tablespoon water
For the filling:
- 1/3 cup (66 grams) granulated sugar
- 1 1/2 tablespoons (15 grams) cornstarch if using fresh berries or 2 1/2 (25 grams) if using frozen
- 5 1/2 cups (750 grams or 26 ounces) fresh or undefrosted blackberries
- 1 tablespoon lemon juice
- 1 teaspoon vanilla
- 2 teaspoons lemon zest
Instructions
- Adjust oven rack to the lower third of the oven. Preheat the oven to 350 °F (175 °C) and grease a 2-quart (2-liter) casserole dish or an 8 × 8-inch (20 × 20 cm) baking dish. Place a rimmed baking sheet on the lower rack of your oven. This is on the off chance that something leaks.
- In a large mixing bowl, stir together the dry ingredients (flour through salt).2 cups (250) flour, 1/2 cup (100 grams) granulated sugar, 1/4 cup (50 grams) brown sugar, 3/4 teaspoon baking powder, 1/4 teaspoon salt
- Add the vanilla to the melted butter and stir into the dry mixture. Use a wooden spoon to combine it the best you can, then use your hands to bring it together. It’ll look soft and slightly clumpy. It won’t form a smooth ball, but it should hold together when pressed between your fingers.1 teaspoon vanilla extract, 3/4 cup (168) unsalted butter,
- Prepare the fruit filling. In a large mixing bowl, mix together the sugar and cornstarch.1/3 cup (66 grams) granulated sugar, 1 1/2 tablespoons (15 grams) cornstarch if using fresh berries or 2 1/2 (25 grams) if using frozen
- Add the fresh or undefrosted blackberries to the bowl, sprinkle the lemon juice, vanilla and lemon zest over the top, and coat the blackberries in the sugar mixture.5 1/2 cups (750 grams or 26 ounces) fresh or undefrosted blackberries, 1 tablespoon lemon juice, 1 teaspoon vanilla, 2 teaspoons lemon zest
- Spoon the fruit mixture into the pan and distribute the topping evenly over the top. It’ll be a thick layer of topping. Press down slightly so there aren’t pointy bits that might burn.
- Place the crisp on the middle rack of your oven and bake for 35-45 minutes or until the topping is firm and the edges and center are bubbly (you want the center bubbly or else the cornstarch won’t activate, which happens around 203 °F). Let cool for 30-40 minutes, which will give the juice some time to thicken a little, for the fruit to soften more and become more jammy.
- Let cool completely, then cover and refrigerate for up to 4 days. It’s also fine at room temperature for up to about 24 hours, loosely covered. You can rewarm it in the oven at 350 °F (175 °C) for about 10 minutes, which helps dry out and re-crisp the topping a bit (but it won't be as crisp as fresh).
Notes
- For the flour, you can use 2 cups (250 grams) all-purpose flour or for gluten-free, use 2 cups (250 grams) King Arthur Flour Gluten-free Measure for Measure Flour or 2 cups (276) grams Bob’s Red Mill 1-to-1 Gluten-free Baking Flour. Both worked great, but I think Bob’s was a little more sandy.
- For vegan or dairy-free, make sure to use the coconut oil + water option in place of the butter, or use vegan butter. I recommend using refined coconut oil so that your topping isn’t coconut-flavored.
- The nutrition information provided is calculated as a courtesy and is only an estimate. I am not a licensed nutritionist or dietitian. For the most accurate nutritional data, consult a professional or use your preferred calculator.


Get New Recipes In Your Inbox!
Subscribe to get all the latest healthy sweets & treats delivered straight to you!