

Black Heart Cake

This black heart cake is not just visually stunning but also utterly delicious. The frosting has that iconic Oreo taste, thanks to the black cocoa powder, and you don’t need any specialty pans – just regular 8″ (23 cm) round pans will do! Whether you’re celebrating Valentine’s Day, a birthday, or simply satisfying a craving for a decadent dessert, this recipe has you covered.
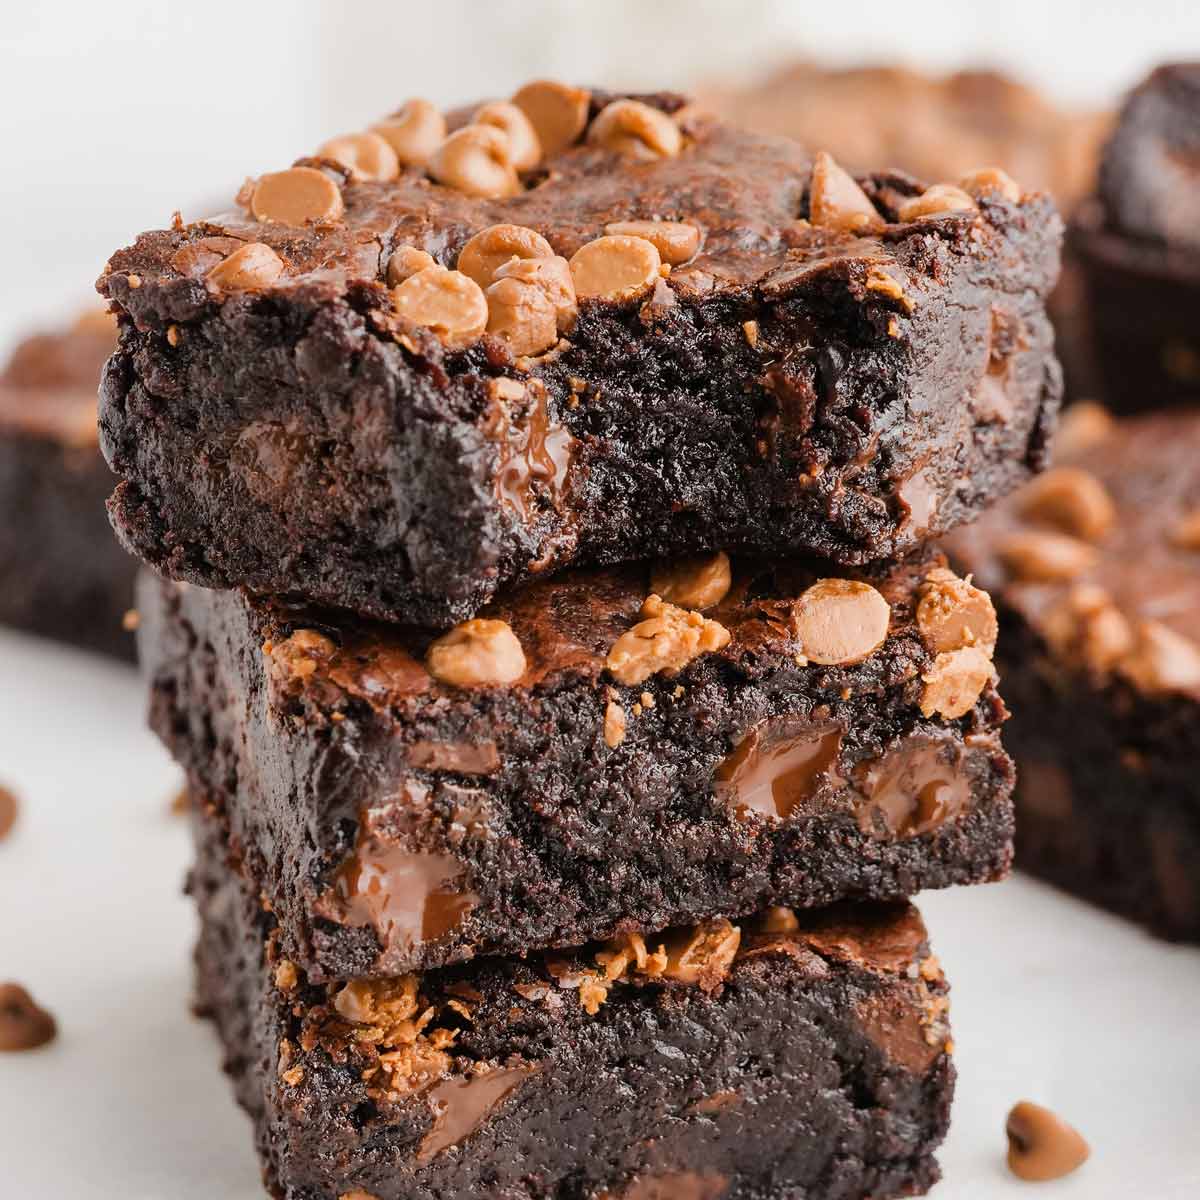
With its rich and moist texture, topped with an irresistible cream cheese frosting, this cake is perfect for any chocolate lover. It can be made traditionally, whole wheat or gluten-free.
Why would anyone want a black heart cake? Because not everyone is into pink. If you’re a fan of pink, I recommend my Vintage Heart Cake.

And because of the flavor. Black cocoa is what gives Oreos their signature flavor. When you add it to cream cheese frosting, it creates a uniquely rich and delicious combination that is incredibly hard to resist.
After everyone who tasted my Jack Skellington Cake fell in love with its flavor, which uses the same cake base and frosting recipe, I decided Valentine’s Day would be the perfect occasion to give it a romantic twist.
I’ve been eager to share this version with you for almost a year! Though I guess it would have been just as fitting for Halloween.

Ingredients
The only special ingredient you need for this cake is black cocoa powder. The rest is just typical cake stuff.
- Granulated sugar – coconut sugar is an alternative. Keto or liquid sweeteners aren’t. I know it’s a lot of sugar, but the less sugar you use, the less moist the cake will be. If you need to reduce it, I wouldn’t go any lower than 1 3/4 cups (350 grams).
- Flour – you can use all-purpose, whole wheat, white whole wheat the gluten-free alternative mentioned below.
- Cocoa powder – using regular Hershey’s cocoa powder would result in a lighter brown cake compared to mine. I definitely recommend sticking to Dutch-process!
- Black cocoa powder – if you want a black cake, you have to use black cocoa powder in the frosting. Or you can use regular or Dutch-process powder and add black food coloring to get the black color. I have no idea how much you’d need, though, and it might affect the flavor.
- Eggs – to make this cake eggless, chia eggs are an option. I’ve tested them, and they work great. But due to the cream cheese frosting, making this black heart cake vegan is impossible.
- Milk – any type will work! Read the notes of the recipe if you want to use canned coconut milk.
- Oil – I use olive oil, but canola oil, grapeseed oil, vegetable oil, or any neutral oil works well. Just avoid using expensive, flavorful olive oil. I typically use store-brand organic olive oil from Aldi or Lidl, and the olive oil taste dissipates once the cake cools. I suggest using light olive oil to be on the safe side.
- Using unrefined coconut oil would add some coconut flavor to the cake, which I don’t think is a great combination with black cocoa. While butter can be used, it would make the cake less moist since butter contains 80-82% fat, compared to oil, which is 100% fat. For the best, moistest cake, you should really use oil.
- Boiling water – despite seeming like a large amount, the full amount is necessary. The batter will be quite thin!
- Vanilla extract, baking powder, baking soda, and salt

For the frosting
- Cream cheese – as I said above, this is necessary. No substitutions are possible. The same applies to the other frosting ingredients listed below.
- Butter – make sure it’s at room temperature for easy blending with the cream cheese.
- Powdered sugar – if it’s very lumpy, you might want to sift it or blitz it in a high-speed blender to get a light and powdery consistency again.

What is black cocoa powder?
Black cocoa powder is made from the same beans as regular cocoa powder but undergoes treatment with an alkaline solution to reduce acidity.
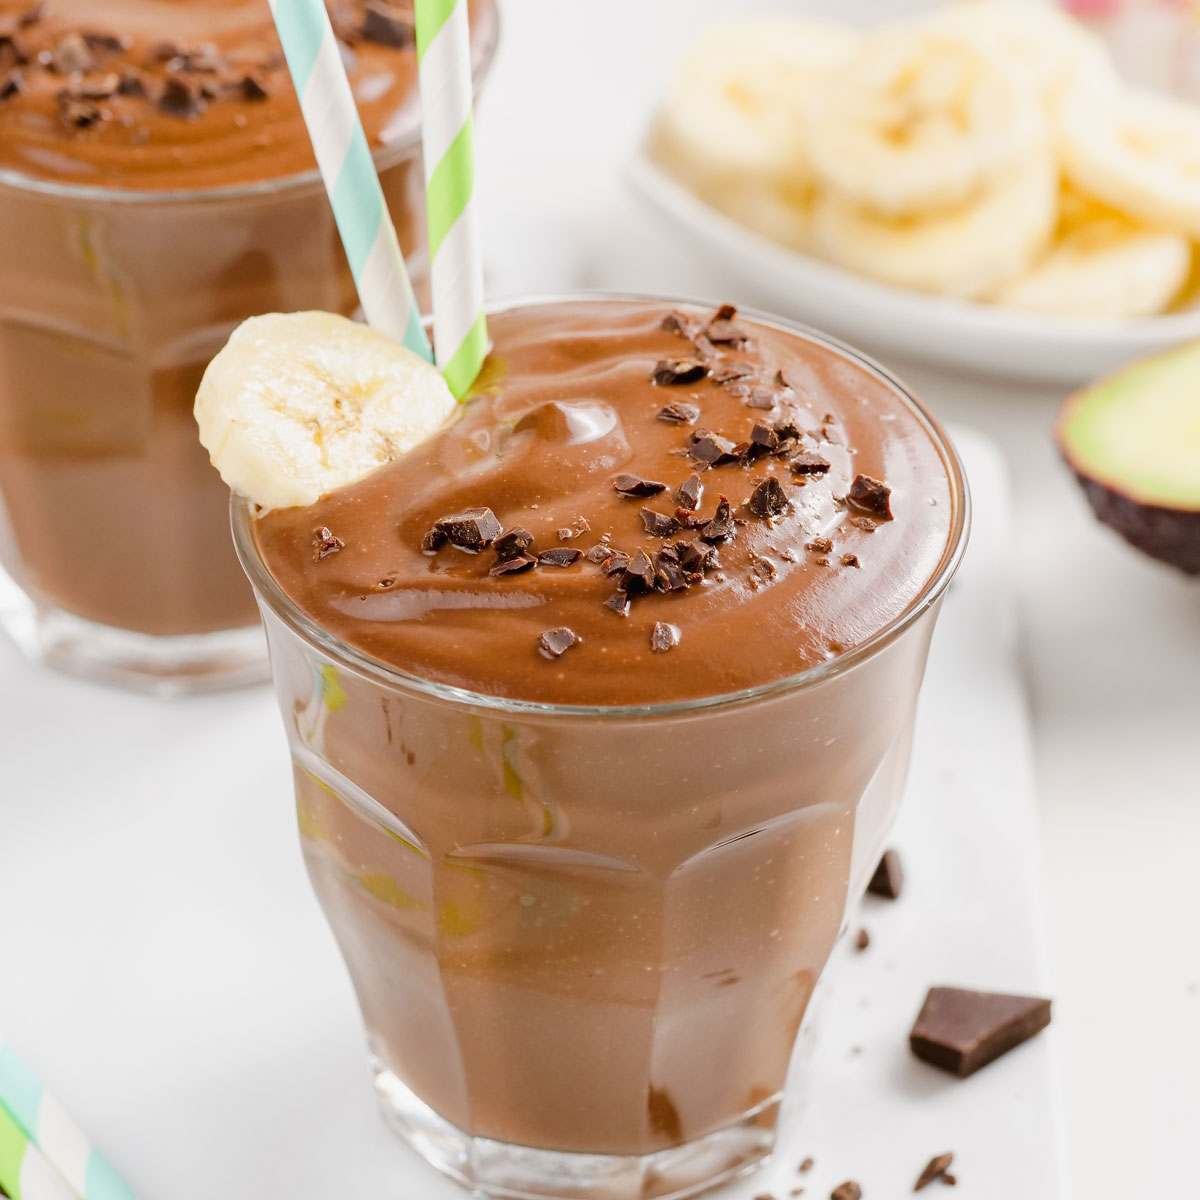
The different processing methods contribute to its intense chocolatey flavor and stark color. It’s also less bitter than regular cocoa and more soluble, making it a great addition to frostings, ganache, chocolate sauces, and even smoothies or milkshakes, such as this Black Milkshake.
As I said before, it’s the ingredient that gives Oreos their distinct flavor. However, it’s not always interchangeable with regular Dutch-process cocoa.
I used it in my Kladdkaka as a direct substitute for cocoa. When I tried it right after baking, I worried I had forgotten to add sugar.
Later, some sweetness emerged, but it was still really odd. Overnight, it developed the taste of BRISKET. I let it sit another day to see if it would change, but it remained brisket-flavored.

So! If you’re considering experimenting with black cocoa, it’s wise to start with a smaller batch to avoid wasting ingredients on something that may end up in the trash.
If you don’t have or don’t want to buy black cocoa powder, then check out my Chocolate Heart Cake. It uses Dutch-process cocoa powder.

Warning!
Like I’ve said in all my black cocoa powder posts, as black cocoa powder journeys through your digestive system, it doesn’t lose its color.
I hope you appreciate the warning. ;) I wanted to save you the trouble of googling and panicking. Black usually signals an immediate trip to the doctor, it seems.
So fear not after eating this cake. If you have small kids, they’ll probably find this quite amusing.
How to prepare the cake
The full directions are at the bottom of the post in the recipe box.
The pictures are here just to give you an overview.
It’s a super-easy one-bowl recipe. If you’ve made this cake before, note that the batter is thicker than the original Hershey’s recipe and my adaptations I’ve posted over the years.
It’s usually almost as thin as water, but I reduced the liquids by 25% to make the cake less sticky and easier to handle when stacking the layers.
Many, many reviewers have said that this is the best chocolate cake ever, and I agree. I’ve been making it for over 15 years.

I’ve stopped trying other chocolate cake recipes and ordering cake from bakeries because they’re always disappointing. This is really the perfect cake!
If you have questions about the recipe, check out my Healthy Chocolate Cake post, as I believe I’ve answered everything. :)
If not, feel free to ask your question below! I’d love to help make this cake a success for you.

The frosting
I’m absolutely in love with this frosting recipe. Not only does it taste amazing, but it’s incredibly easy to make.
There’s no need to prepare two separate frosting recipes or, even worse, separate frosting and filling recipes.
You just make one large batch of cream cheese frosting. If you want to write anything on the cake, reserve a small amount of frosting and add black cocoa to the big bowl of frosting.
If you live outside the US or Canada, be sure to read the notes at the bottom of the recipe. You’ll need to remove some of the whey from non-US cream cheese before making the frosting. It’s easy to do. Just a bit annoying.

Frosting yield
If you’re thinking that’s too much frosting and want to reduce the amount, here’s how much I used and where.
- Middle of the cake – 3/4 cup (173 grams)
- Crumb coat – 1/2 cup (115 grams) – you might need only 1/3 cup
- Attaching rounded cut-offs to main cake piece – 1/4 cup (58 grams) – you’ll likely use less
- Top of cake – 3/4 cup (173 grams)
- Sides of cake – 1 cup (230 grams)
The frosting recipe yields 4 cups (942 grams). 1 cup = 230 grams, leaving 3/4 cup (173 grams) for piping decorations.
If you want to write something on top as I did, reserve about 1/4 cup of frosting before adding the black cocoa powder. Keep the crumb coat down to 1/3 cup (as I did) to ensure you’ll have enough frosting for everything.

How to assemble the cake
Before you get started, here are a few tips.
- My cake layers weren’t perfectly flat on top, but not excessively domed either. If you prefer, you can level them for a more uniform appearance.
- Choose a cake plate with flat edges, not a rim. I made the mistake of using a plate with slightly curved edges, making it challenging to cut neat slices and frost the sides.

Crumb coat
A crumb coat is a thin layer of frosting applied to a cake before the final coat of frosting. Its purpose is to seal in the crumbs so that when you pipe on your decoration, they don’t mix in with the frosting.
Use between 1/3 cup and 1/2 cup (77 to 115 grams) of frosting as a crumb coat. It might not sound like much, but it gets the job done.
Keep the frosting refrigerated until ready to use. If it starts to feel too soft, pop it back in the fridge. Melty frosting makes for messy decorating.
Spread the frosting around the sides and on the top of the cake.
Place the cake in the freezer for 20-30 minutes after crumb coating (or 1-2 hours in the fridge). You can also refrigerate it overnight to break up the workload.

I had hoped for a black or nearly black cake, but using all black cocoa didn’t significantly alter the color of the cake layers.
Or really change the taste! There’s really no need to use all black cocoa.
It’s quite expensive, so it’s best reserved for recipes where it makes a substantial difference, such as these Black Cookies and this Black Ice Cream.
For the European readers, I’ve tested all of my black cocoa recipes with Van Houten Intense Deep Black Cocoa.
It’s now called Noir Intense and is sold under the brand name Cacao Barry. I bought some to confirm it works exactly the same, and it does.
Everything I’ve made has come out perfectly black and tastes exactly how it should. Except the previously mentioned kladdkaka, but that’s not the cocoa brand’s fault.
Most of you and my photographer live in the US, so for her, what I did was read a ton of reviews on Amazon and pick the one with the best reviews and price. Almost all of them were tied when it came to the ratings, so I chose the cheapest one at the time.
So she used Modern Mountain black cocoa powder in the black cookies I mentioned above, and they looked exactly like my Van Houten/Cacao Barry cookies.
But then she sent me a picture of my Black Ice Cream, asking if it was supposed to be brown. It is not! See the photo below for the photo comparison.
So I read more Amazon reviews and had her get the black cocoa from The Cocoa Trader black cocoa, and the ice cream came out black. Or SUPER dark grey and almost black, but not jet black.
So I highly recommend buying The Cocoa Trader black cocoa to guarantee that your results look like the photos here. I haven’t tested this recipe with Modern Mountain or any other brands, except for the two mentioned above.
If you don’t want to risk your frosting coming out brown, then I recommend using The Cocoa Trader’s black cocoa.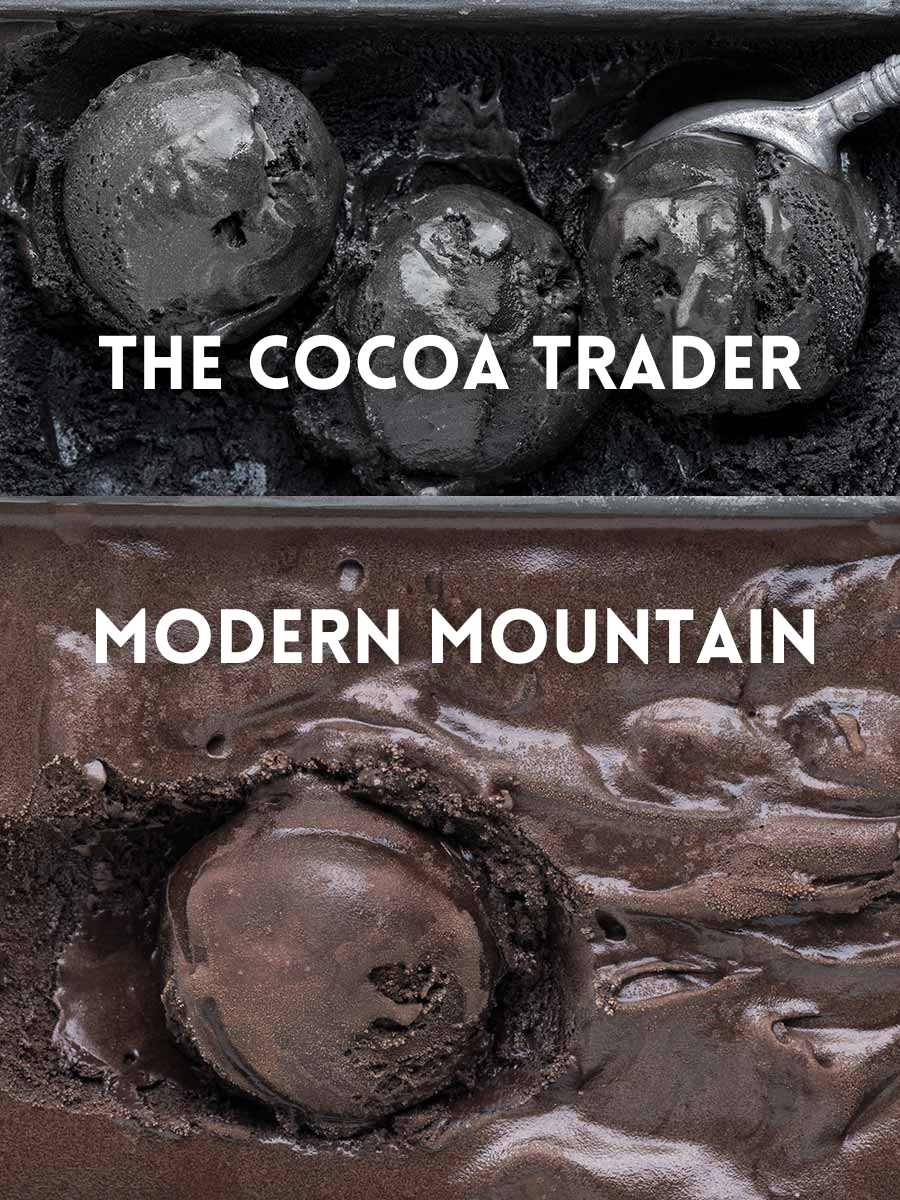
While I usually love King Arthur Flour Gluten-free Measure for Measure flour, it didn’t perform well in this recipe. After seven failed attempts resulting in collapsed or overly sticky cakes, I switched to Bob’s Red Mill 1-to-1 Gluten-free Baking Flour, which worked perfectly on the first try.
The cake made with Bob’s Red Mill flour is what you see in the photos. Both the all-purpose and whole wheat versions turned out identical.
The cake was stickier than usual, likely because black cocoa powder isn’t as absorbent as regular Dutch-process cocoa powder. But reducing the baking soda, baking powder, and water helped mitigate the stickiness.
Thanks to someone on a message board for that tip (though I can’t find the post anymore)!
Switching to a different brand of gluten-free flour may yield varied results. Or even terrible.
I recently tried the original version of this recipe (with all Dutch-process cocoa powder) as cupcakes with two different German gluten-free 1-to-1 flours. I had to throw them out as nobody would eat them.
But if you have another gluten-free flour that’s a direct substitute for all-purpose flour, you can certainly try it. I’d love to hear how it works out if you do!
Almond, coconut, oat or other flours aren’t even close to direct substitutes for all-purpose flour, so please don’t try those.
Baked cake layers – unfrosted cake layers can be wrapped in plastic wrap, placed in a Ziploc, and stored at room temperature for up to 2 days or refrigerated for 3.
You can also freeze them for up to 3 months. Freezing them will make them easier to handle when assembling the cake, but if the layers are too hard to cut through by the time you’ve stacked them, just let them sit for about 15-20 minutes. Then, you can make your cuts.
Crumb-coated cake – You can assemble the cake, add the crumb coat, and freeze it for up to a week. Wrap the cake in plastic wrap, then place it in a large bag for extra protection. You can freeze the remaining frosting.
Frosting – you can refrigerate this in an airtight container for up to 4 days. If freezing, use a freezer-safe container and freeze for up to 3 months (I actually freeze it WAY longer and have never had an issue!). The high-fat content of cream cheese frosting allows it to freeze well, unlike many dairy-based recipes.
Frosted cake – once assembled, you can cover and refrigerate the cake for up to 4 days. If you made the cream cheese frosting 4 days in advance, that doesn’t mean you can then store the cake for another 4 days.
Decorated cake – freeze the cake until solid, then wrap it in plastic wrap and place it in a large freezer bag.
Slices – I freeze individually wrapped slices from leftover birthday cakes for quite a while.
Please share your feedback by leaving a ✍️review and ⭐ rating – it helps me and others! I so appreciate it. ❤️


Black Heart Cake
Ingredients
For the cake:
- 2 cups (400 grams) granulated sugar
- 1 3/4 cups (219 grams) flour see notes
- 10 tablespoons (72 grams) Dutch-process cocoa powder
- 2 tablespoons (14 grams) black cocoa powder
- 1 teaspoon baking powder
- 1 teaspoon baking soda
- 1 teaspoon salt
- 2 large eggs room temp or chia eggs
- 1 cup (236 ml) milk
- 1/2 cup (120 ml) oil
- 2 teaspoons vanilla extract
- 3/4 cup (177 ml) boiling water
For the frosting:
- 16 ounces (450 grams) cream cheese room temperature
- 1/2 cup (113 grams) unsalted butter room temp
- 2 1/2 cups (300 grams) powdered sugar
- 1 teaspoon vanilla extract
- pinch salt
- 2/3 cup (74 grams) black cocoa powder
Instructions
Prepare the cake:
- Preheat the oven to 350 °F (175 °C). Line two round 8″ cake pans with parchment paper on the bottom and grease the sides of the pans.
- In a large bowl, stir together the dry ingredients (sugar through salt).2 cups (400 grams) granulated sugar, 1 3/4 cups (219 grams) flour, 10 tablespoons (72 grams) Dutch-process cocoa powder, 2 tablespoons (14 grams) black cocoa powder, 1 teaspoon baking powder, 1 teaspoon baking soda, 1 teaspoon salt
- Add the eggs, milk, oil and vanilla.2 large eggs, 1/2 cup (120 ml) oil, 2 teaspoons vanilla extract, 1 cup (236 ml) milk
- Mix until combined, and then stir in the boiling water. The batter will be almost as thin as water. Divide the batter between the two prepared pans. That’s 692 grams per pan when using Bob’s GF flour or 680 grams if using the other listed options.3/4 cup (177 ml) boiling water
- Bake for 26-28 minutes or until a toothpick comes out with some moist crumbs, but no uncooked liquid.
- Let cool for 10 minutes in the pans, and then turn out onto a rack to cool. Let cool completely before frosting.
- You can make these 3 days in advance. Wrap them in plastic wrap, place in a bag, and refrigerate or freeze until ready to use. Freezing them will make them easier to handle when assembling the cake, although they’d need to defrost a little bit to cut them up to make the heart design.
Make the frosting:
- In a large mixing bowl, beat the cream cheese and butter together with an electric hand mixer at medium speed until well combined. It’s okay if it looks a little crumbly.16 ounces (450 grams) cream cheese, 1/2 cup (113 grams) unsalted butter
- Gradually beat in the powdered sugar until totally combined, and then beat in the vanilla and salt. If you want to write something on top like I did, reserve about 1/4 cup of frosting before adding the black cocoa powder. Keep the crumb coat down to 1/3 cup (as I did) to ensure you’ll have enough frosting for everything.2 1/2 cups (300 grams) powdered sugar, 1 teaspoon vanilla extract, pinch salt
- Beat in the cocoa powder until well combined.2/3 cup (74 grams) black cocoa powder
Assemble the cake:
- Get out a cake plate that’s big enough for the heart.
- Transfer a cake layer to the cake plate – you want the first layer of cake to be towards the bottom of the serving dish (and not right in the middle) because the cut-off bits will be added towards the top of the cake to form the rounded top of the heart. If you put the cake plate on top of a cake layer (which is on the cooling rack) and flip everything over, the rounded part will be on top. If you have a different preferred way of transferring cake layers, do whatever you like. It doesn’t really matter if the rounded part of the cake layer ends up on top in the end, as it’s not very domed.
- Spread 3/4 cup (173 grams) of frosting on top.
- Add the other layer on top, flat side up.
- Use a ruler and measure out two 5” lines, forming a right angle. This will be the bottom of the heart.
- Cut away those curved bits, but be careful with them as they’re going to help form the top of the heart.
- Use about 2 tablespoons of frosting to help attach the rounded cut-offs to the main cake piece to form a heart shape. You’ll have to bend them a little.
- My heart shape looked pretty bad at this point, so I cut away a little bit at the very top, in the middle, and then the heart looked very nice.
- Use about 1/3 to 1/2 cup (76-115 grams – you’ll probably need closer to 1/3 cup) as a crumb coat. Spread the frosting over the sides and top of the cake.
- Place in the freezer for about 30-60 minutes or until the frosting is very firm.
- Frost the recipe of the cake. I used about another 3/4 cup (173 grams) on top and then about a cup on the sides.
- Place back in the freezer for about 30-60 minutes to allow the frosting to firm up before piping on the decoration.
Decorate the cake:
- If you reserved any white frosting to write on the cake, pipe your message on the cake first and then pipe on the small shell border with Wilton tip 21 on the top and bottom border of the cake.
Store:
- Cover and refrigerate the finished cake for up to 4 days. It also freezes great for up to 3 months.
Notes
- For the flour, you can use all-purpose flour, white whole wheat flour or whole wheat flour. If you’re gluten-free, use 1 3/4 cups (242 grams) Bob’s Red Mill 1-to-1 Gluten-free Baking Flour.
- To make the chia eggs for this recipe, mix together 2 tablespoons of ground chia seed with 6 tablespoons of water until well combined. Let sit for about 1-2 minutes or until goopy like regular eggs.
- You can use any type of milk in this recipe. If you’re using canned coconut milk, be sure to dilute it with water until it has a consistency similar to regular milk.
- I typically use olive oil in this recipe, but canola oil, grapeseed oil, vegetable oil, or any neutral oil works well. Just avoid using expensive, flavorful olive oil. I usually use store-brand organic olive oil from Aldi or Lidl, and the olive oil taste dissipates once the cake cools.. To be safe, you can also opt for light olive oil.
- If you live outside of the US – you likely have a different type of cream cheese than in the US. US cream cheese is firmer and meant for baking, rather than the kind for toast, like in Europe. For 8 ounces (225 grams) of cream cheese, buy a 300-gram package (the stuff at Aldi, Lidl, etc. works just as well as Philadelphia), put it in the center of a clean tea towel or cheesecloth, and squeeze out the liquid until you have 225 grams of cream cheese. So for this recipe, buy 900 grams of cream cheese and squeeze out the liquid until you have 680 grams of cream cheese left. Also note that medium eggs in the EU = US large eggs. You if you’re in the EU, you need medium eggs.
- I recommend using The Cocoa Trader black cocoa to ensure your frosting comes out nice and black.
- Cake based adapted from Hershey’s One Bowl Chocolate Cake.
- The nutrition information provided is calculated as a courtesy and is only an estimate. I am not a licensed nutritionist or dietitian. For the most accurate nutritional data, consult a professional or use your preferred calculator.


I baked this cake for my best friend’s goth-themed birthday party. It was such a hit! Everyone was asking for the recipe and couldn’t get over how moist and rich it was. And that frosting?! GIRL. ???? SO good.
Yay! I’m so happy to hear that it was a hit. I’m so with you on the frosting. It’s my favorite! Thanks for your comment and hope your friend had a great birthday. :)