

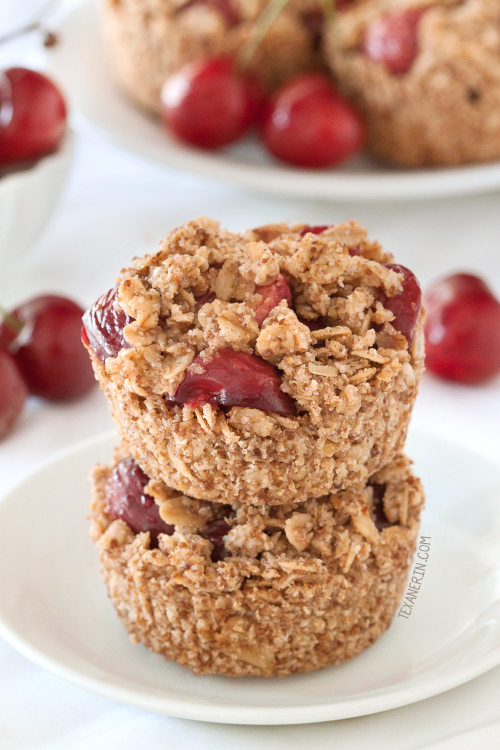
Vegan Mini Cherry Pies (gluten-free, whole grain)
These mini cherry pies use oats, oat flour and coconut oil in the crust, making them naturally gluten-free and vegan!
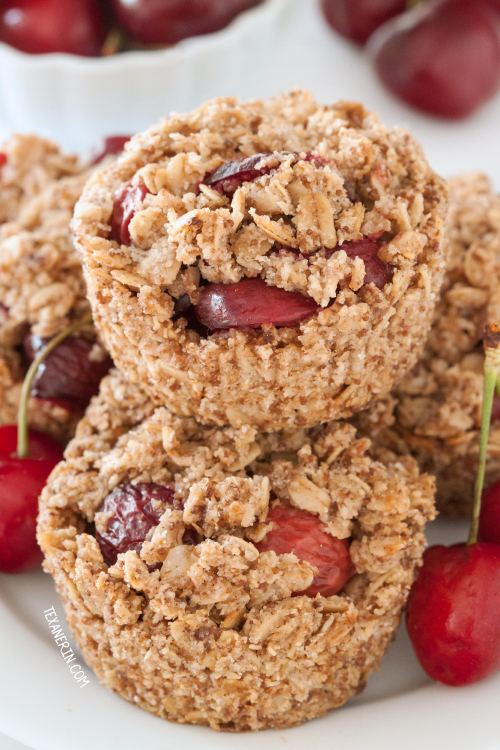
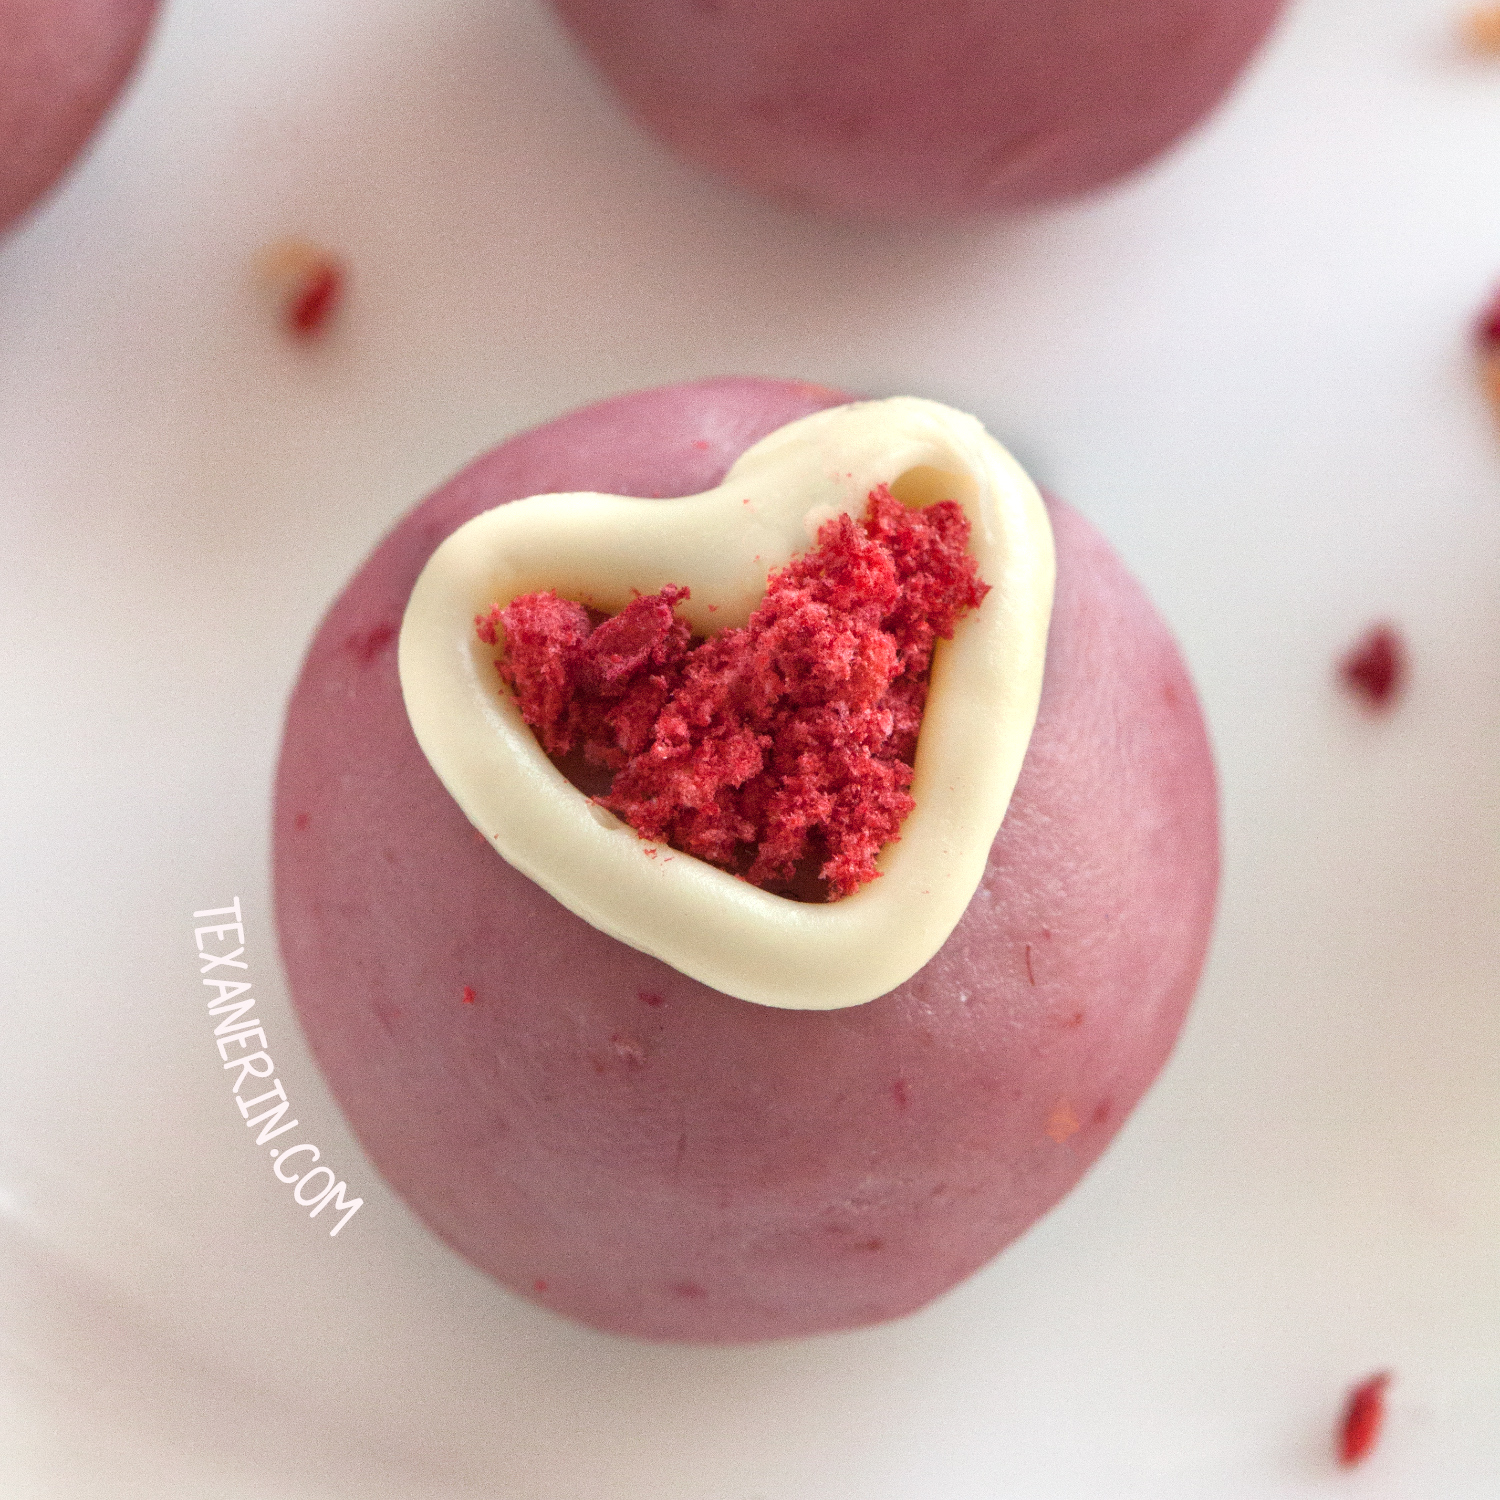
I made these gluten-free mini cherry pies for my latest post on My Baking Addiction. They’re heavy on the streusel (which, believe me, is a good thing!) and have an almond-flavored cherry filling.
The filling isn’t your typical jammy and sometimes gloppy cherry pie filling. It’s more like baked fruit encased in an oatmeal cookie-like envelope. I did bake a few of these a little longer to get them to the jammy point, but the topping sank into the filling, and the pies were pretty unfortunate-looking.
Now that I think about it, I could have partially baked the filling and then added the topping later on but to be honest… I’ve made these pies 8 times now. The thought of making them again makes me feel like taking a nap. Plus, they really are delicious as is!
One of the reasons why I made them so many times was that I wanted to offer butter as an alternative in the ingredients list. No matter how much butter I tried, they stuck to the liners. So definitely use coconut oil here! I think this is an excellent recipe for those of you who don’t have any dietary restrictions but want to bake something gluten-free, dairy-free or vegan for friends or family. The ingredients are super basic, so there’s no need to go and spend $15 on specialty flour!
Another issue I had was with waxy / glassine muffin liners. The first several times I made these, I used all kinds of regular paper and foil liners. They came out perfectly. Then I tried glassine liners, and the crusts stuck to the bottom! I was concerned that I had messed up the recipe, so I made them a few more times with different liners. However, I only had issues with the one set of glassine liners I had.
Because I only had the one set of glassine liners to test, I’m not sure if glassine liners in general are the problem or if it was just the one specific brand. Therefore, I advise against using all glassine liners. Sorry for the boring liner talk, but I thought I should warn you! Making pies and having to dig out the contents with a spoon was kind of sad. Delicious, but sad. ;)
For another gluten-free treat, try these gluten-free cherry oat bars! These Cherry Cheesecake Bars also look fantastic.

Vegan Mini Cherry Pies (gluten-free, whole grain)
Ingredients
For the crust and topping:
- 1 1/4 cups (115 grams) oat flour if you're gluten-free, use GF oat flour
- 2 cups (180 grams) rolled oats if you're gluten-free, use GF oats
- 1 1/2 teaspoons ground cinnamon
- 2/3 cup (133 grams) brown sugar or raw sugar
- 1/4 teaspoon salt
- 3/4 cup (168 grams) oconut oil melted
For the filling:
- 2 cups sweet cherries pitted, quartered (350 grams of cherries without the pits)
- 2 tablespoons granulated sugar
- 1 tablespoon cornstarch
- 2 teaspoons lemon juice
- 1 teaspoon almond extract
- pinch salt
Instructions
- Preheat the oven to 375 °F (190 °C). Line a muffin pan with 12 muffin liners. I recommend using foil or regular paper liners. These pies stuck to the bottom of my glassine baking cups.
- In a medium mixing bowl, stir together the oat flour, oats, cinnamon, brown sugar and salt. Stir in the melted coconut oil until well combined.1 1/4 cups (115 grams) oat flour, 2 cups (180 grams) rolled oats, 1 1/2 teaspoons ground cinnamon, 2/3 cup (133 grams) brown sugar, 1/4 teaspoon salt, 3/4 cup (168 grams) oconut oil
- Pat about 3 tablespoons (40 grams) of the crust mixture up the sides and on the bottom of each muffin liner.
- Bake for 8-10 minutes or just until they start browning.
- Remove from the oven and cool for 10 minutes while preparing the filling.
- In a medium mixing bowl, stir together all the filling ingredients. Spoon a little over 2 tablespoons of mixture over each pre-baked crust and top with the remaining oat mixture (about 1 tablespoon per pie).2 cups sweet cherries, 2 tablespoons granulated sugar, 1 tablespoon cornstarch, 2 teaspoons lemon juice, 1 teaspoon almond extract, pinch salt
- Bake for another 14-16 minutes or until the topping has lightly browned.
- Remove from the oven and let cool for about 10-15 minutes or until cool enough to handle. Use a knife to carefully remove the pies from the molds and then remove the paper wrappers. If you have difficulties getting them out of their wrappers because the pies are too soft, let them cool slightly and then place in the refrigerator for about 10-20 minutes. If you don’t remove the wrappers now, the pies may or may not stick to them once cool (it depends on the wrappers you use).
- Serve warm, room temperature or cold.
- Store at room temperature for up to 1 day. Refrigerate for up to 4 days. These hold their shape well at room temperature but if transporting or they’ll be sitting in the heat, chilling the pies first for a few hours is recommended.
Notes
- If you use unrefined rather than refined coconut oil, these pies may have some coconut taste to them.
- The nutrition information provided is calculated as a courtesy and is only an estimate. I am not a licensed nutritionist or dietitian. For the most accurate nutritional data, consult a professional or use your preferred calculator.
- Source: My post on My Baking Addiction – Gluten-free Mini Cherry Pies.
Nutrition
Categories:
Dairy-free, Gluten-free, Gluten-free Pie Recipes, Pies and Tarts, Summer Recipes, Vegan, Vegan Pie Recipes, Whole Grain,


These mini pies were super duper delicious! Thanks so much for such a simple and healthy recipy. I’ll be making them again, I’m sure, maybe with blueberries instead of cherries. The cherry tree is empty ;) But full of wild blueberries around ;)
I’m so happy you liked the pies! And wild blueberry pies sounds amazing. I used to live in Sweden and we had wild blueberries there. It was always fun to come home from the forest and make some dessert with them. :) Thanks a bunch for your comment!
I just made these again, with plums instead of cherries because the plum tree is completely full this time of the year. They turned out amazing, they won’t last long ;) Thanks again for such a wonderful recipe!
Thank you for delicious recipe! What can you substitute cornstarch with?
You’re welcome! :) Arrowroot powder / starch should work. You might need a little less but I’m not sure since I haven’t tried it in this recipe. I’m guessing 2 1/2 teaspoons would be a good amount.
Just wanted to let you know I made your GF/Vegan Apple Crumble for @ yesterday. We liked it very much. I drizzled some homemade caramel on it and of course vanilla ice cream. We do that in North GA. HA!! I have a blackberry cobbler in the oven now. My husband will have ice cream with that too. Ha!! He picked 4 cups of blackberries. One year he picked about 15 gallon I think it was. I still have a good many in the freezer from all those. We don’t have that many now.
Haha. I’m happy you enjoyed it! Did you make the grain-free apple crisp with almond flour? Or the apple crumbles for two with oat flour? I’m curious. :) And wow, that sounds like a lot of blackberries! You all are lucky. They cost a fortune here! Thanks so much for your comment and your feedback. :)
I agree – the more streusel, the better! That’s a great tip about using coconut oil rather than butter to deal with the sticking issue.
Who knew that the difference was so huge?! Crazy.
So adorable! Perfect dessert to bring along to a Summer picnic or bbq. Thanks for another great recipe Erin!
Thanks, Emma! And I totally agree – these are ideal for BBQs. :)
I love that you thoroughly tested this recipe and shared what works and what doesn’t…and I love how delicious it looks too!
Thanks, Martha! I just hope people find it helpful. :)
Love that cherry filling! These look delicious!
Thanks, Marjory!
These mini pies look so cute and yummy! =)
Thank you, Gemma!
Yum!!! I just made homemade caramel and this makes me want to try these using apples with cinnamon and put some caramel on them. HA!!!
Oooh. Yeah. I’m totally doing that in the fall!
These are so adorable!
Those look amazing. Wish I had a few to pack in our saddlebags for our bike trip this weekend!
I had approximately 23,634 last weekend to share. Such bad timing! ;)
What adorable little pies! Those look awesome, I am sure they are great after such careful testing :)
Thanks! I’m always paranoid about stuff not working out for others so I’m a little obsessive with the testing. ;)
Oh my these are perfect! I love all of the ingredients!
Thanks, Lauren! :)
Tried and true! Just the type of recipe I love :) Thanks for the tip on not using butter in these!
No problem! I’m happy you found it useful. :)
If these were tested 8x, three is no doubt in my mind that they are spectacular. Not that there was any doubt to begin with! I love the fruitier (as opposed to syrup-ier) pie fillings, so these look great!
Aww, thanks, Nora! I love the jammy kind but these were great, too. :)