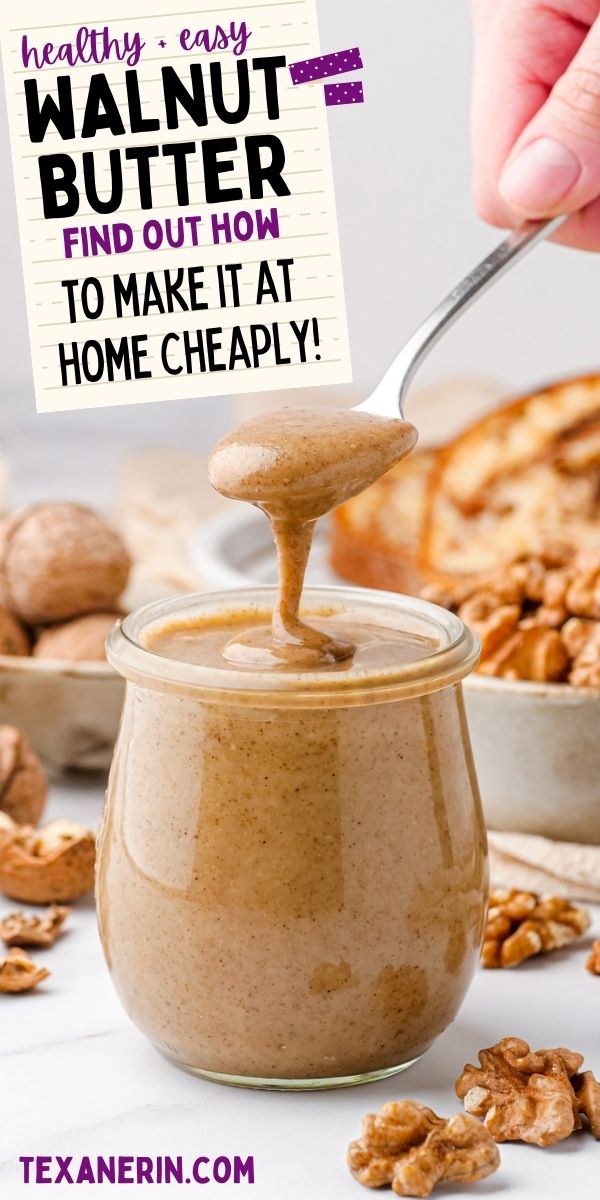
Learn how to make walnut butter with just walnuts and a food processor! Also find out the trick to making it less bitter, how to cook with it and the benefits of eating walnut butter.
I’m trying to be a bit healthier these days. Or a lot healthier.
That means more truly healthy nut butter and less of this candy-like maple almond butter.
So here’s a homemade nut butter that you rarely see in stores – walnut butter!
If you google walnut butter recipes, you’ll find a lot of them that look like a weird, oily, clumpy paste. I got that, too, when I tried making it with the nut butter jar of my high-speed blender.
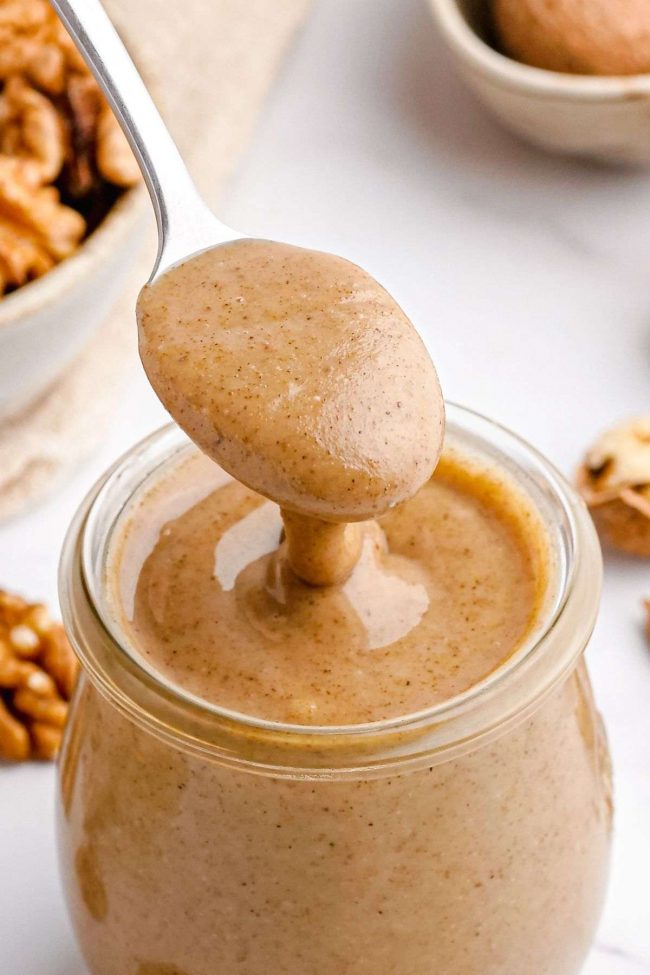
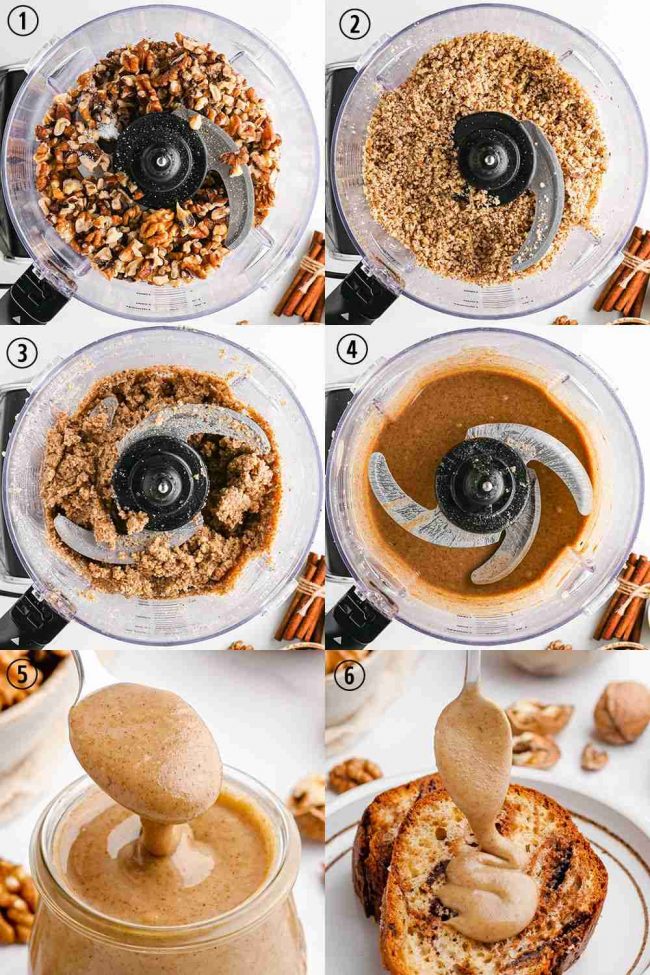
You can see in the video, though, that it is possible to get it runny! You need a food processor. And to keep processing after it’s in that weird clumpy stage.
One time I didn’t fill the food processor high enough and that batch didn’t work out, either. The walnut bits splattered on the sides of the food processor bowl after a few seconds of processing.
I used a silicone spatula to push the walnut bits back down and it’d only process a few seconds before I needed to do it again. Depending on your food processor, walnut butter takes about 3-6 minutes to make, so a few seconds at a time isn’t going to work.
Make sure to fill the bowl with nuts well past the blade! Then add quite a bit more to be safe. The amount you’ll need depends on how large your food processor is.
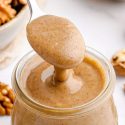
I stopped processing it once it looked similar to almond butter. If you want it even runnier, you can continue processing. It’ll get much more liquidy than almond butter.
What you would do with such a runny nut butter, I don’t know.
But before you skip down to the recipe for directions, I recommend reading the post so you can decide which type of walnuts you want to use.
What type of walnuts to use
You’ve got three options.
- Raw walnuts
- Roasted walnuts
- Soaked + roasted or soaked + dehydrated (and still raw) walnuts
Those are in order of most bitter to least bitter. Walnut butter isn’t like almond butter or peanut butter in that almost everyone will enjoy it with just a bit of salt and nothing else.
It’s quite bitter.
For my husband and me, the first two options are too bitter to eat plain. In other walnut butter recipes, people say they love it raw or roasted and without added sweeteners. Some people are more sensitive to bitter tastes so it could be that you might like it, too.
What I found confusing is that the other posts about walnut butter don’t even talk about the bitterness! So it’s entirely possible we’re just extra sensitive.
Making it less bitter
You know when you add sugar to something sour, it becomes sweet? It doesn’t work the same way with bitter foods.
Adding sweetener will help offset some of the bitterness but the amount of sweetener needed to completely mask a bitter taste is huge.
Luckily, there’s something better than sugar when it comes to suppressing bitterness and that’s salt! So make sure to add a bit of salt to your walnut butter.
Raw walnuts vs. roasted
Do you really like raw walnuts in their natural state? If not and you find them bitter, roasting walnuts will help with that. Soaking helps even more!
Some say that using high heat destroys the enzymes and many of the health and nutritional benefits of walnuts (more on those at the end of the post). And here’s an article about raw vs. roasted nuts.
It’s a hard choice but if the option is roasted and palatable versus raw and I can’t eat them because they’re too bitter… I choose roasted.
If you’ve soaked the walnuts and you don’t want to roast them, you could also use a dehydrator. If you don’t have one, you can set your oven on really low, but then it takes a long time and I’ve read that this is very difficult to do and keep them raw. So I just roast mine.
Soaking walnuts – really?! Do I have to?
If I’m making nut or seed butter to give to my son, I soak the nuts or seeds first. There are all kinds of benefits to soaking your nuts, seeds and grains.
You can read more about the reasons in this article on how to sprout nuts and seeds.
Not only are there the health benefits, but as I’ve already mentioned, the walnut butter will be less bitter. And if you want to use this as a spread, that means you won’t need to add any sweetener! Or maybe just a little.
By soaking your walnuts, the tannins, which are responsible for the bitter taste, will be rinsed away and the result is tastier, more buttery walnuts.
But to answer the question… no. You don’t have to soak them. It’s annoying and time-consuming, I know. But there are health + huge taste benefits so I personally consider it a must.
Add-ins
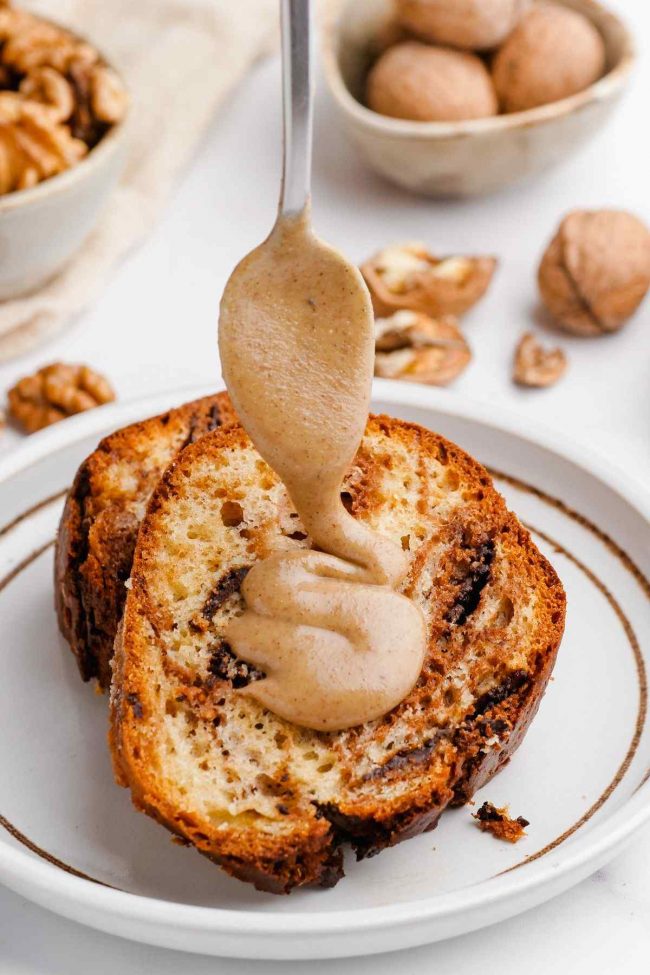
If you want to add some sweetener or cinnamon to your walnut butter, do that after it’s runny.
But it’s important to note that if you add a liquid, it will thicken! Judging by what I see when googling walnut butter recipes, some people don’t mind that.
Be careful with what kind of liquids you add. Maple and honey don’t cause it to seize up. You might get other results with different sweeteners.
If you use coconut sugar or another granulated sugar, it will not dissolve. So it’ll have a bit of crunch to it. However, it won’t seize up.
For me, walnut butter is too bitter without sweetener. However, I don’t like raw nuts. If you do, you might like your walnut butter plain.
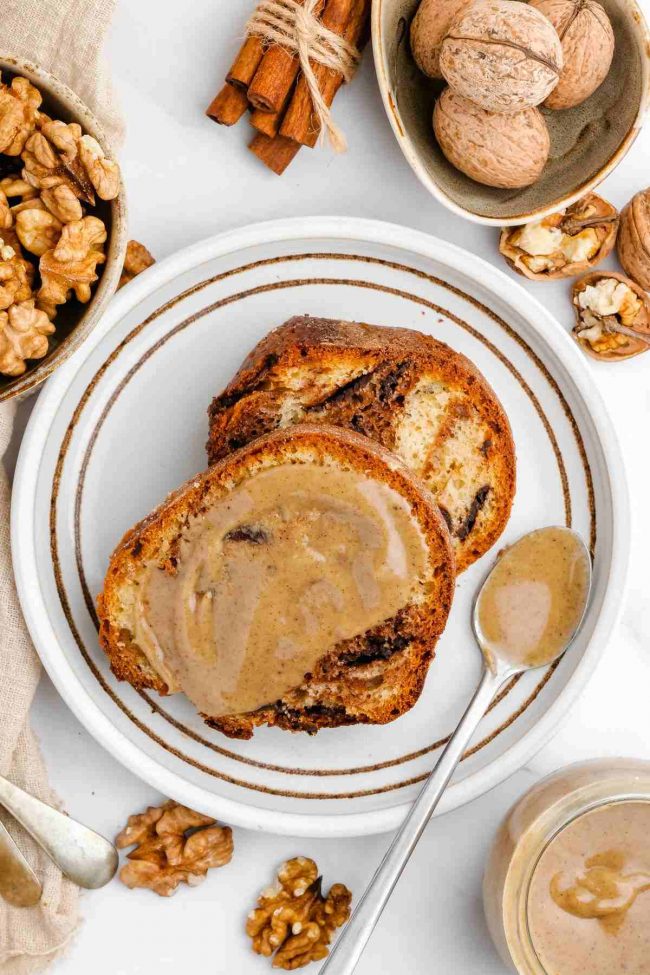
What to use walnut butter in
I wouldn’t say that walnut butter is as versatile as almond butter in baking. And you can’t use it as a direct sub in all my almond butter recipes because of the bitterness issue.
And if you’ve read any of my recipes with nut butters, then you know they’re often not interchangeable from a textural standpoint.
But don’t let me hold you back from experimenting! I’d just recommend making a half recipe of something before wasting expensive ingredients.
What you don’t want to do is pick a recipe that’s only a nut butter plus a few other ingredients, like these gluten-free peanut butter cookies or this peanut butter fudge.
Pick a recipe that’s not hugely based on the nut butter.
I experimented with a few of my favorite recipes. Here are the results. Note that the photos are from the original posts.
Fudge
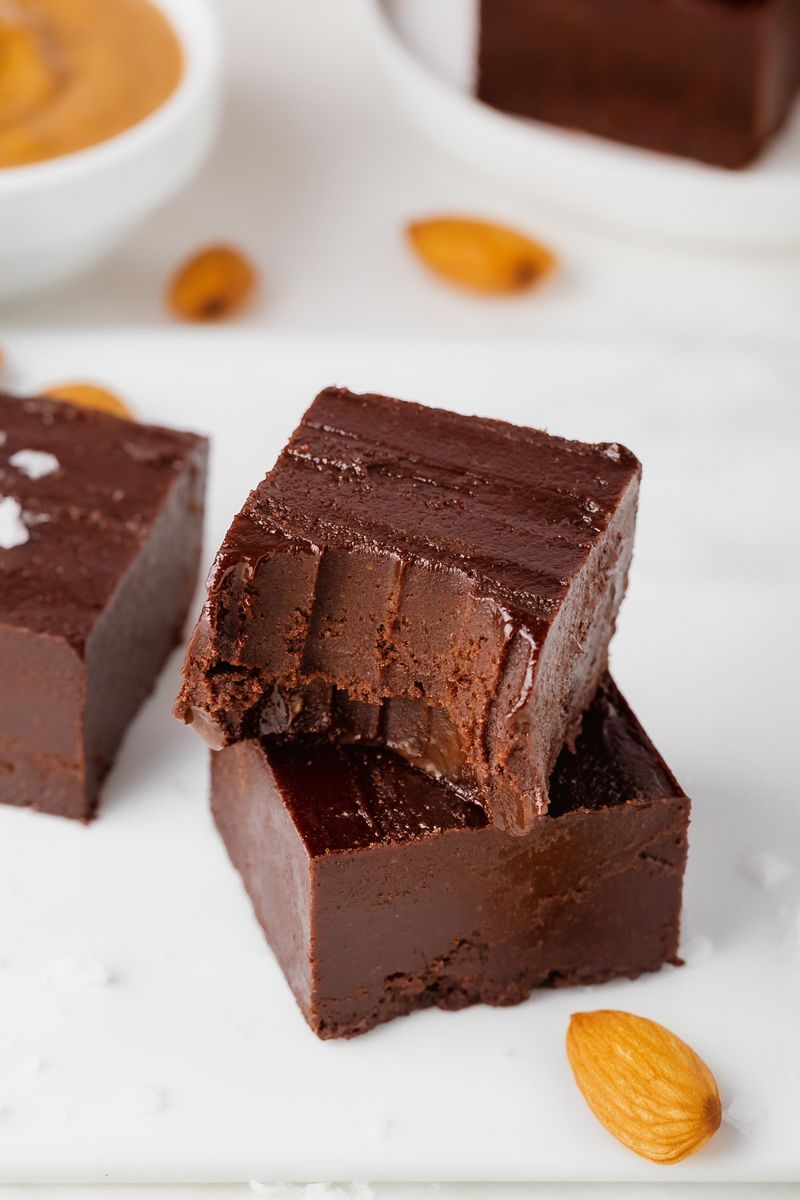
I tried it in my paleo fudge, which calls for almond butter. This goes against the rule above about not using a recipe with just a few ingredients, but I was thinking that all the cocoa powder would cover up the bitterness (which was actually quite a stupid thought since cocoa powder is bitter).
The texture is perfect. I made it once using the weird clumpy paste from my failed high-speed blender attempt and another time using soaked + roasted walnut butter that was the texture that you see in the pictures.
Using raw, unsoaked walnut butter, the result was still bitter. Even with all that maple syrup! I added extra salt and that improved it quite a bit. So much so that we really liked it.
Using soaked and roasted walnut butter, it was perfect. But it had a very strong walnut flavor. If you love walnuts, it’s great! The fudge needs to sit for a few hours for the flavors to come together, though.
It’s definitely walnut chocolate flavored fudge rather than just chocolate fudge, which is what you have when you make it with almond butter.
Cookies
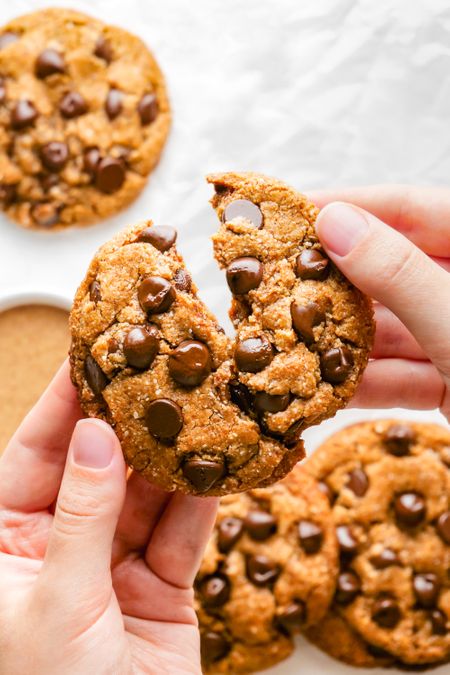
I wanted to test it in something baked so I went with my most popular cookie recipe, these paleo chocolate chip cookies.
They didn’t hold their shape as perfectly as the almond butter version. The results were also a bit softer and not 100% perfect like the original version. This is exactly why I’m always harping on about nut butters not being interchangeable.
But they still looked pretty good, especially for healthy cookies, and the taste was great. But like with the fudge, just combining them with other ingredients isn’t going to magically make the bitterness disappear.
It’s there, just a tiny bit, but much less noticeable than eating it plain. If you use soaked nuts, the cookies won’t be bitter at all.
Bliss balls
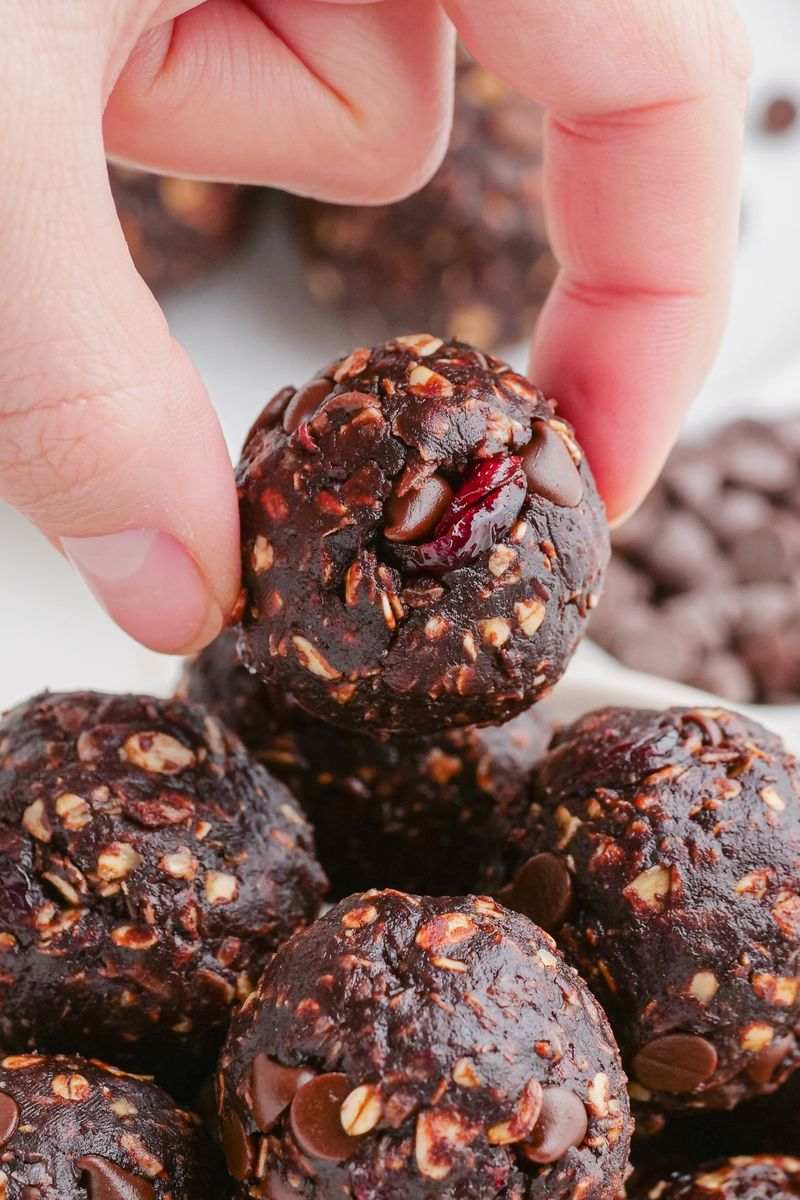
I thought these bliss balls would be a good candidate because that recipes calls for quite a few ingredients.
They were! You may want to add a little more salt. They taste more earthy than the almond butter or sunflower seed versions.
Two Healthy Kitchens also used it in her no-bake maple walnut oatmeal snack bites and they look great. Start off with Step 2 and use 104 grams of your homemade walnut butter.
Other stuff
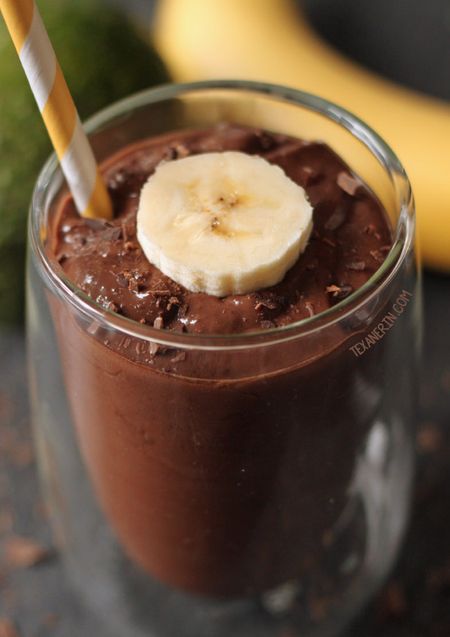
You can put it in smoothies. I probably wouldn’t want it in something fruity like this raspberry smoothie but would put it in this chocolate avocado smoothie.
I’ve seen it suggested as a drizzle over ice cream or in salad dressings but I can only imagine using soaked walnut butter for those.
Benefits of walnuts
You might be wondering why you should go to the trouble of making walnut butter when you can just go to the store and get yourself some almond butter.
As I mentioned in my almond butter benefits post, almond butter is also super healthy. I like to eat a bit of walnut butter for the antioxidants, omega-3 fats and to have variety in my diet.
Some of the biggest benefits of walnuts:
- Antioxidant activity is higher than any other common nut
- Highest level of omega-3 fat of any nut
- Different nutrient and plant compounds can help decrease inflammation, which is a key culprit in many chronic diseases, like some types of cancer, Alzheimer’s and heart disease
- Supports weight control
- May contribute to lower blood pressure
- Promotes a healthy gut
- Could reduce risk of some types of cancers
- Can help manage type 2 diabetes
- May lower risk for type 2 diabetes
Amazing, right?! We could all probably use some more walnuts in our diet.
If you’ve read this far – wow! Thanks for sticking in there. If you’re ready to get started, read more below for any questions you may have.
And please, if you try it, let me know what you think about the bitterness issue! Did you find it bitter or not?

Questions about how to make walnut butter?
Equipment:
- Can I use a regular blender or a high-speed blender?
No. A regular blender doesn’t work for any type of nut butter and when I used the nut butter jar of my Blendtec to make walnut butter, it never broke down.
It was just clumpy and weird. You need a food processor if you want it to break down into a liquid. - What kind of food processor do I need?
My food processor is 1,000 watts and does a great job but one with at least 700 watts should work. It might work in one with fewer watts. Before you buy one, I recommend reading the reviews and searching to see what people have said about making nut butter.
I’ve read a few different guides and it seems like most people recommend this Cuisinart.
Nuts:
- Can I use pre-roasted or flavored walnuts?
Yes to pre-roasted. I haven’t tried flavored ones but I believe that’d work.
- Do I have to roast the nuts?
Please read the post. ;)
- How full should I fill the food processor? What if I only want a small amount?
If you don’t fill the processor enough, you won’t get anywhere. You need enough nuts so that the blade is fully covered, and then add quite a bit more.
If you don’t need much, freeze what you don’t need in the next 2 months. - How much walnut butter does X cups of walnuts yield?
1 cup of walnuts = 104 grams. 1 cup of walnut butter = 272 grams. So you need about 2.5 cups of walnuts for 1 cup of walnut butter.
Adding things to the butter:
- Can I add liquid stuff like honey, vanilla, etc.?
Yes. Add it after the walnut butter is runny. It’ll thicken the walnut butter so it won’t be runny any longer.
I recommend maple syrup, honey and vanilla. I’ve only tried alcohol-based vanilla and that worked. I’m not sure if other types of vanilla would work. - Can I add spices and salt?
You can! A little cinnamon is nice.
My recommendation is to make your walnut butter and once it’s your desired runniness, pour some in a little bowl, add a little of whatever you want to add, and see if it works. This is a much better way than adding something to your walnut butter and ruining your whole batch! - Don’t I need to add oil? Lots of other recipes say to add oil!
You don’t need a fancy new food processor to make walnut butter. Just keep processing, take breaks if necessary, and don’t give up!
I have never ever needed to add oil to any kind of nut butter I’ve made over the last 10 years. If you want to add oil, you certainly can.
Storage:
- Does it have to be refrigerated?
Definitely refrigerate it! The oil in walnuts can go rancid more easily than other types of nuts.
If you need to keep it at room temperature for up to about a week, that should be fine. - How long does it stay good?
I’m seeing store-bought walnut butters saying 4-6 months after opening but they have added sugar. I’m going to be more conservative and say 2 months.
Also be sure to always use a clean spoon. If you use something that was previously in jam, your mouth, whatever – your butter will mold in no time. Also make sure not to use walnuts that were about to expire if you want your butter to last for a while. - Can I freeze walnut butter?
Yes! For up to 4-6 months. Make sure to use an air-tight container.
- Does it separate like some natural nut butters?
I’ve had that happen a few times. When the jar gets lost at the back of the refrigerator for months. But even if it doesn’t visibly separate, you should stir it before every use to make sure the oil is evenly distributed.
- How will I know if it’s gone bad?
You’ll be able to smell it. It’ll smell like oil paint, paint thinner, or something along those lines. You’ll know! Throw it out immediately. And if you didn’t notice a smell but it tastes bitter, that also means it’s rancid and time to throw it away.
Troubleshooting:
- My walnut butter isn’t coming together! What can I do and what did I do wrong?
Are you sure your food processor can handle making nut butters? If you are, you just need to be patient. Some food processors take longer than others.
Also, if you used roasted nuts, did you process the nuts while still warm (but not hot?). That helps the process along. Using room temperature walnut takes longer. If your processor is getting hot, take a break. Remove the bowl from the base, open the lid, and let sit for 10-20 minutes or until it’s cooled quite a bit. We don’t want you to kill your food processor!
Walnut Butter - The Ultimate Guide!
- Prep Time:
- Cook Time:
- Ready in:
- Yield: 1 3/4 cups
Ingredients
- 4 cups (420 grams) walnuts
- 1/4 teaspoon salt (add more to taste) + more if soaking
- Optional add-ins: honey, maple syrup or cinnamon
Directions
- Go to step 7.
- Place the walnuts and 1 tablespoon of salt in a large bowl or stainless steel pot. Cover with 8 cups of water. The nuts should be covered by about 2" of water as the nuts will expand. Cover with a tea towel, lid, a plate or whatever fits. It doesn't need to be air-tight.
- Let soak for 7-24 hours. Use a colander to drain them and rinse them very well. Do not reuse or drink that brown water.
- If using a dehydrator: place the walnuts in a single layer on the mesh tray that came with your dehydrator and dehydrate them at 115 °F (46 °C) for 6-24 hours, turning occasionally until crisp and dry. The time will depend on your dehydrator, its size, how full it is, and the climate. Once they're done, go to step 7.
- If you don't have a dehydrator, you need to roast them. Place the walnuts in a single layer on a baking tray and roast them for 10-13 minutes at 350 °F (175 °C), turning 2-3 times, until nice and toasty. Let cool 5 minutes before placing in the food processor. Go to step 7.
- If you didn't soak your nuts, you'll just need 6-10 minutes of roasting time. Stir them after about 4 minutes. Let cool 5 minutes before placing in the food processor. Go to step 7.
- Put the nuts in the food processor and process until creamy, scraping the sides of the bowl as needed, about 5-10 minutes. Do not overheat your food processor! Take breaks if your food processor starts to warm up too much. Once it's been working for about a minute, I remove the pusher so that the hot air can come out.
- In the first stage, you’ll have something that looks like walnut meal. Then it’ll form a thick, paste-like mass. Then it’ll break down into a liquid.
- Blend for another minute so it’s easily pourable and similar to almond butter. Don't process it so long that it's incredibly runny.
- Store in the refrigerator for up to 2 months or freeze for 4-6.
If using raw walnuts:
If soaking your walnuts:
If roasting raw, unsoaked walnuts:
To process them:
As an Amazon Associate, I earn from qualifying purchases. For more info, see my disclosure.
Join over 12,400 readers and sweeten up
your inbox with new posts for free!
This subscription is free of charge and can be canceled at any time.


17 comments on “Walnut Butter (your ultimate guide + recipe!)” — Add one!
6 comments are awaiting moderation!
Have you tried making brownies with walnut butter? Trying to find a sweet potato brownie recipe that doesn’t have almond or peanut butter. My dad can’t have either.
I haven’t tried it, sorry. But I imagine it’d work well!
I make alot of walnut butters using a high power kitchenaid blender and it works great. Been making it over 10 years. I do not like runny nut butters, mine is the consistency of creamy thick Greek yogurt, spreads beautifully and tast even better ! My favorite is adding some Himalayan sea salt, real organic maple syrup and some Ceylon cinnamon. OMG delicious, no food processor needed a high-quality high powered blender will work perfectly.
Your version sounds delicious! How do you prevent the maple from causing the walnut butter to seize up? Thanks so much for you comment!
I made the walnut butter and added a fair amount of gochujang—a major staple of Korean cuisine. I was doing the same with peanut butter until, for health reasons I had to give up peanuts. I add my fave sugar free sweetener to taste and ground golden flaxseed, and cooked buckwheat groats, lentils, yellow split peas, and chickpeas. Sounds weird…tastes great, and is my major daily source of protein. (Not to mention fiber!) Thank you for the lesson on how to make the walnut butter!
This is so handy! You really covered every angle. I don’t love walnuts because of their texture but I like their flavor so I bet I’d love this!
That’s super interesting about the bitterness issue — I’ve always found them bitter . . . now I shall roast them a bit! THANKS
Love the trick to making it less bitter! I love this more than almond butter, YUM.
So easy! And perfect for those of us who aren’t fans of peanut butter…
What a great idea! I never thought of making walnut butter. I can’t wait to try this. My friends have a walnut tree & I never know what to do with all the walnuts they bring me!
Erin, I know I can always trust your recipes. Thanks for figuring out how to make this truly creamy version of walnut butter!!
Love this article and helpful information regarding sprouting and roasting for best nutrients and taste. Thanks so much!
You’re welcome! I’m really glad that you found it useful. :)
We Love walnut/cashew butter. I use about 1/3 cashews to 2/3 walnuts, roast them on a rimmed cookie sheet til hot (I can put my hand on the nuts after they have come out of the oven and leave it there for about 15 seconds). Then the whole thing goes in a 9 cup Cuisinart for about 3 – 5 minutes. It makes butter much faster than almonds for instance. The flavor is great because of the cashews, but is not nearly as expensive. we tried straight walnut and it seemed a little strong. Mine doesn’t come out nearly as runny as yours. Probably the cashews. But softer than almond. I do soak and dehydrate the nuts before warming them. It’s Wonderful!!
Wow, thanks for the tip! I had never thought to do a combination of nuts but it sounds great. Maybe it’ll help me like walnut butter without sweetener. ;) I find that cashew butter is the firmest and least runny of all nuts butter so that’s probably it. But when you google walnut butter recipes, most of them look quite thick and paste-like! I’m not sure why. Thanks a bunch for your comment!
What a great and informative article! I love stuff like this with all the do’s and don’ts and the why’s as well as the experimental results and the Q&A. Nice work Erin!
Thanks so much! I’ve never written anything that long and wondered if anyone would actually read it all. So I’m glad that someone did. :) Thanks for your nice comment! I hope you’re doing well.