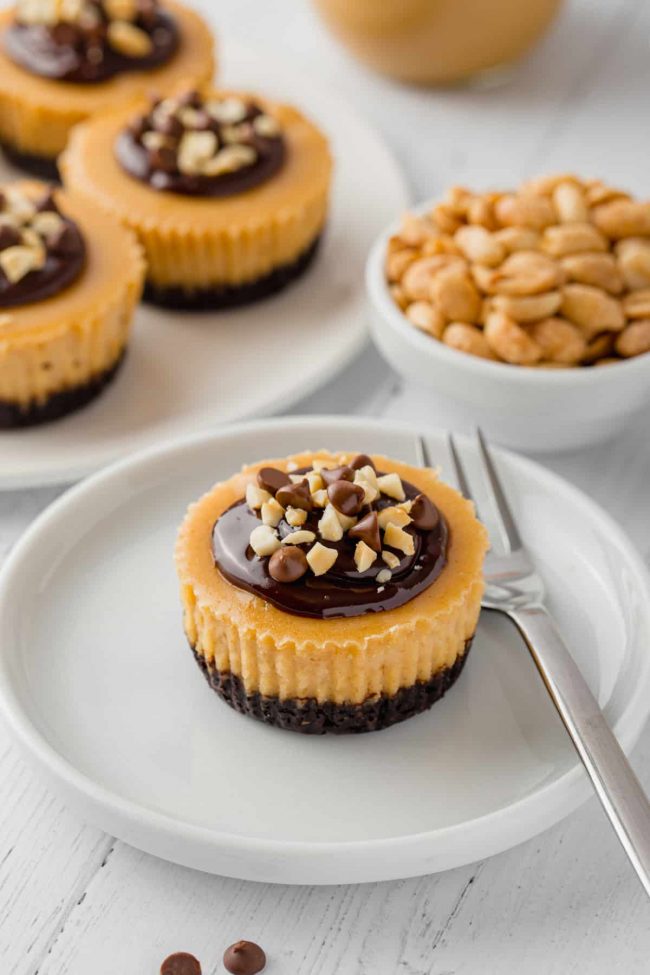
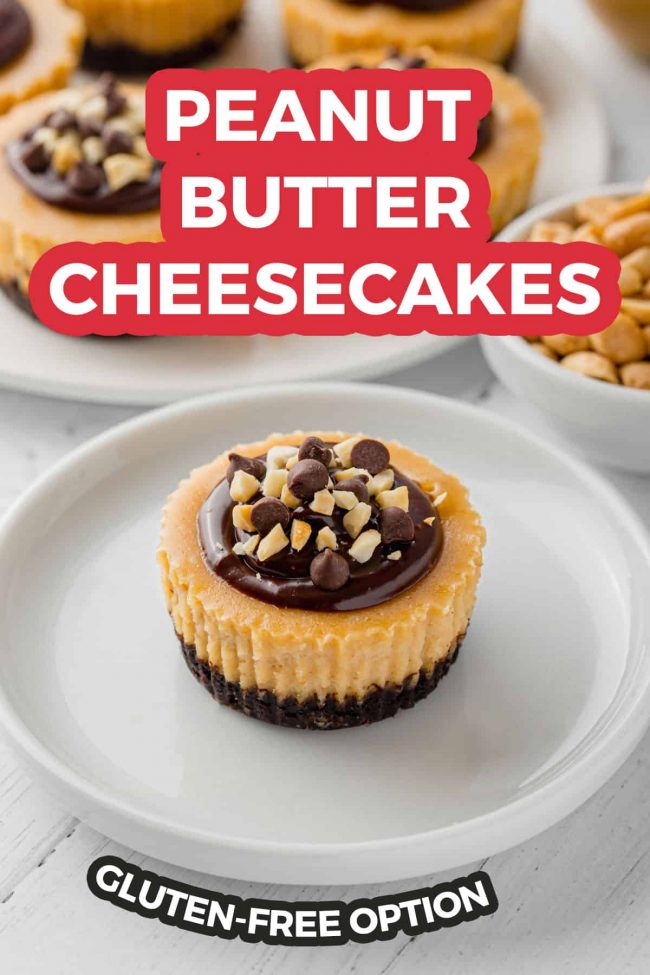
These mini peanut butter cheesecakes are made a little healthier with natural peanut butter and honey and the crusts can be made gluten-free, whole wheat or with all-purpose flour!
Want a dairy-free version (with a paleo version)? Try my vegan no-bake peanut butter pies. They’re banana-based but I swear… they’re so good.
Today I’m reposting yet another old recipe. Some of you might notice that I’ve been doing that a lot lately. I don’t really have another choice as I haven’t been able to taste properly since the beginning of November.
It started with a cold, then the cold went away (and more colds have come and gone), but my sense of taste still isn’t back 100%. I’d say it’s been at a constant 70% since the end of the first cold. At its worst, I could hardly taste anything so at least it improved. So yeah. I can’t test new recipes.
I have a doctor’s appointment soon but I don’t have much hope that the doctor will be able to help me. So I guess I’ll just kindly ask for your continued patience. :)
Now on to these mini peanut butter cheesecakes! Despite these cheesecakes being made with natural peanut butter, they have a regular cheesecake texture and don’t taste odd at all.
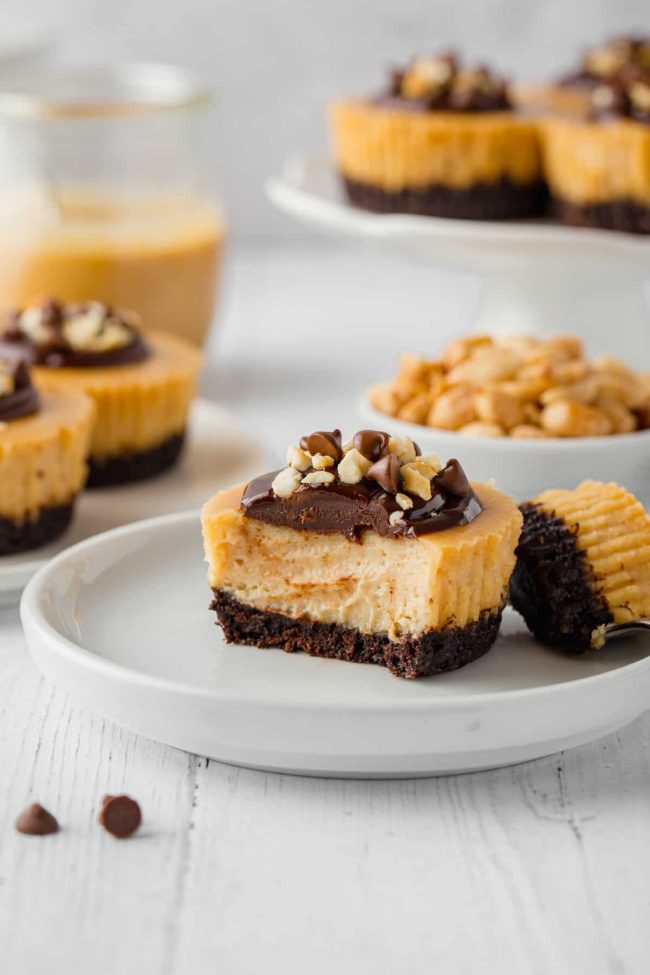
The cheesecake portion comes from my peanut butter cheesecake brownie bars. They look kind of weird but taste amazing.
I’m pretty proud of these cheesecakes (which hopefully doesn’t sound obnoxious!) as it seems like few peanut butter cheesecake recipes use natural peanut butter. At least that was true when I first made those brownie bars years ago!
Practically all the peanut butter cheesecake recipes I found use the commercial stuff with added fat and sugar. And the non-refrigerated “natural” peanut butter with added fat and sugar?
I don’t get how that’s considered natural peanut butter. I LOVE snacking on that stuff, by the way. But it’s not natural peanut butter. ;)
For more healthy peanut butter treats (or at least healthier), try these healthy peanut butter balls, chocolate peanut butter fudge or peanut butter protein balls. This 5-ingredient Buckeye Dip from A Mind “Full” Mom looks like another great option!
The crust is probably my favorite part. It’s like a totally homemade Oreo cookie crust. You can make it with whole wheat flour, all-purpose flour or if you want a gluten-free version – buckwheat flour!
If you make the cheesecakes with buckwheat, then they’re also 100% whole grain.
I dare say that this homemade Oreo cookie crust is even quicker and easier than crushing store-bought cookies and adding butter and sugar. And even better, there’s no food processor bowl to clean! I hate cleaning that thing.
It’s the same crust I used in these mini Irish cream cheesecakes. I was so in love with them that I made these mini peanut butter cheesecakes and three other kinds of cheesecake on the same night.
These mini cheesecakes are so much easier than a full-sized cheesecake. I swore I’d never make a full-sized one again but then I went and made a bunch of no-bake cheesecakes, like this vegan pumpkin cheesecake, vegan paleo chocolate cheesecake and this vanilla vegan cheesecake recipe I find that those are actually much easier in a springform pan.
Substitution questions about these mini peanut butter cheesecakes?
- Can I use something instead of cream cheese?
I’ve never used vegan or dairy-free cream cheese but guess that should work. I don’t think anything else would.
- Can I use something instead of honey?
I’d normally recommend maple syrup but honey is a bit thicker than maple, which I think is important in this recipe. Maybe brown rice syrup would work?
- Can I use something instead of peanut butter?
Nut butters aren’t always interchangeable and I can’t say that they’d all work the same in this recipe. If you try something out, please let us know in the comments how it comes out!
- Can I use something instead of eggs?
Not in this recipe. I link to several vegan cheesecakes in the post above if you need something egg-free. :)
If you try out these mini peanut butter cheesecakes, I’d love to hear how you like them!
Mini Peanut Butter Cheesecakes (gluten-free, grain-free, whole grain options)

- Prep Time:
- Cook Time:
- Ready in:
- Yield: 16 mini cheesecakes
Ingredients
- 1/2 cup (100 grams) granulated sugar or coconut sugar (cheesecakes will come out darker than the photos)
- 1/2 cup (62 grams) whole wheat flour, all-purpose flour or for a gluten-free version, use buckwheat flour
- 1/2 cup (58 grams) Dutch-process cocoa powder (regular cocoa powder probably also works)
- 2/3 teaspoon baking powder
- pinch of salt
- 6 tablespoons (84 grams) unsalted butter, softened
- 1 pound (454 grams) cream cheese (that's two 8-ounce packages)
- 1/2 cup (160 grams) honey
- 1 cup (256 grams) natural peanut butter (the kind with just peanuts and salt)
- 1/4 cup (60 milliliters) milk of choice
- 1 1/2 teaspoons vanilla extract
- 1/8 teaspoon salt
- 2 large (50 grams each, out of shell) eggs, room temperature
- 5 tablespoons heavy or whipping cream
- 1/2 cup + 2 tablespoons (106 grams) chocolate chips or chopped chocolate
- chopped peanuts and mini chocolate chips as garnish, optional
For the crust:
For the cheesecake:
For the chocolate topping:
Directions
- Preheat the oven to 350 °F (175 °C). Line muffin pans with 16 muffin liners. Note that this crust recipe does not work in a regular pie pan – only as mini cheesecakes.
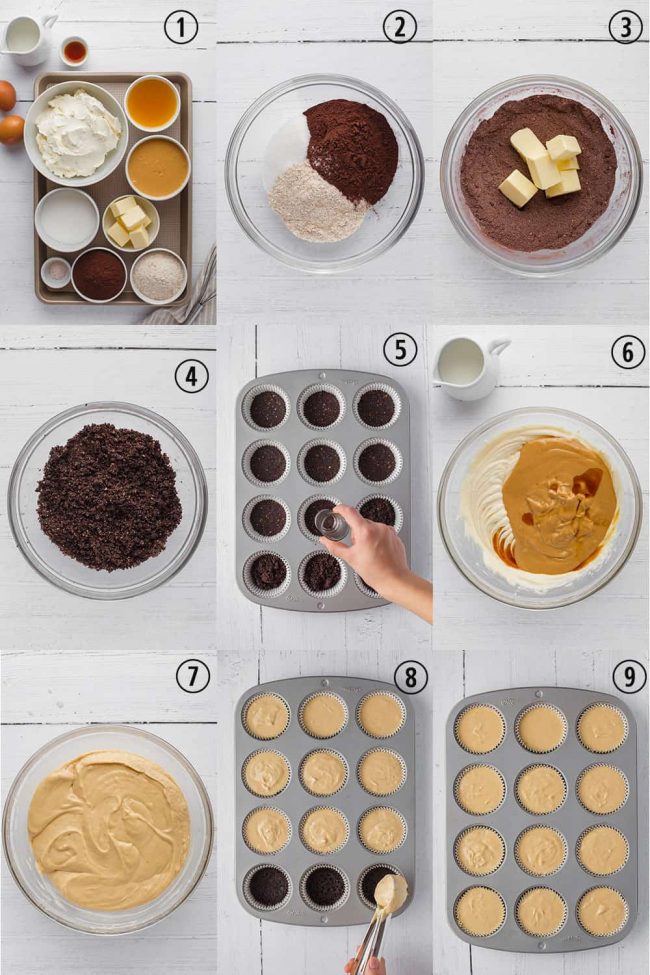
- In a medium mixing bowl, stir together the dry crust ingredients (sugar through salt). Then stir in the melted butter until totally combined. If it's sticky and hard to handle, let it sit for about 5 minutes. Roll into 18-gram balls, flatten with your palm, and place in each muffin liner.
- Press down the crusts, if necessary, so that they reach the edge of the liner.
- Bake for 3 minutes, turn the pan 180 degrees and bake for another 4 minutes. They'll be very, very soft and appear uncooked but the very top surface should appear baked and not doughy. Don't bake them too long - if they start bubbling, they've baked too long, and they fry and get weird.
- Remove from the oven and let cool for 10 minutes while you prepare the cheesecake.
- If using whole wheat or AP flour, bake for 11-13 minutes or until the crust no longer appears wet and move on to the next step. If using buckwheat, bake for 14 minutes.
- After baking, the crust will still be soft but will firm up as it cools. Let cool for 10 minutes while you prepare the cheesecake. I turned off the oven for about 5 minutes and at that point, it was at 275 ºF (135 ºC), which is the temperature you need to bake the cheesecakes at. You can alternatively immediately turn the temperature down to 275 ºF (135 ºC) after removing the crusts.
- Preheat the oven to 275 ºF (135 ºC) (if it's not already). With an electric hand mixer, beat the cream cheese and honey at medium speed until well combined. Add the peanut butter, milk, vanilla and salt and mix at low speed until combined. Add the eggs, one at a time, and stir just until well incorporated. Do not over mix!
- Fill each cup almost to the top with batter and bake for 20 minutes or until the middles of the cheesecakes are set and don't jiggle when the pan is tapped. Turn off the oven, open the oven door (at least 1 foot), and let the cheesecakes cool in the oven to prevent cracks from forming. Once completely cool (about 1½ hours), remove from the oven.
- Refrigerate for at least 2 hours or until ready to serve.
- In a small pan over medium-low heat, warm the cream just until it almost starts to simmer and then remove from the heat.
- Pour this over the chocolate chips and stir until all the chocolate chips are completely melted.
- Let cool for about 20-30 minutes or until room temperature.
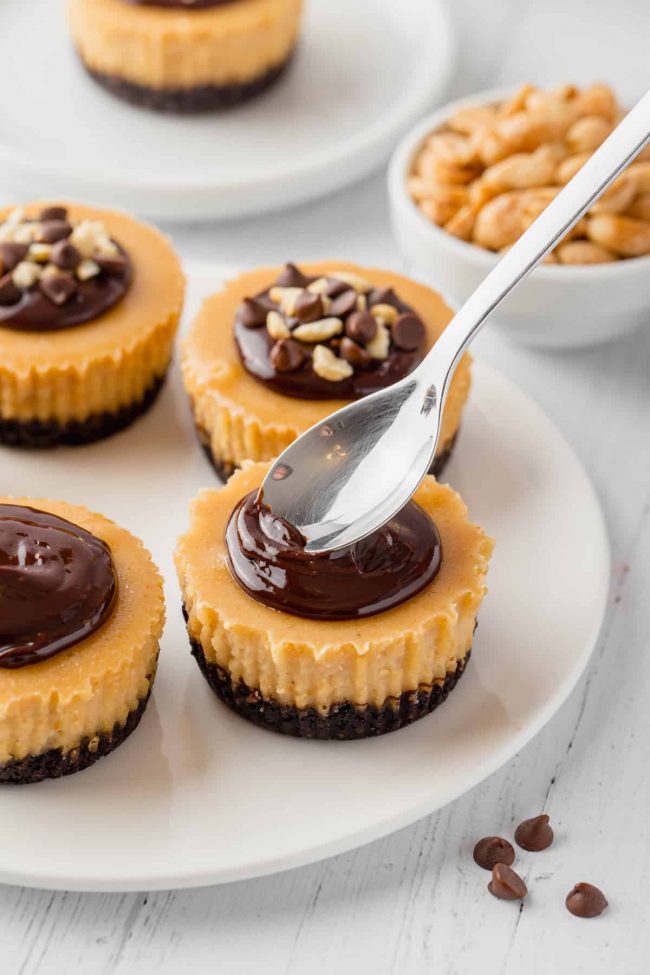
- Pour over the chilled cheesecakes.
- Top with chopped peanuts and mini chocolate chips, if desired.
- Refrigerate in an airtight container for up to 3 days.
For the crust:
For the cheesecake:
For the topping:
Join over 12,400 readers and sweeten up
your inbox with new posts for free!
This subscription is free of charge and can be canceled at any time.


53 comments on “Mini Peanut Butter Cheesecakes (gluten-free option)” — Add one!
1 comment is awaiting moderation!
Hi Erin! I’m going to try these today. Is there a certain type of milk you think works best? Thanks!
Hi Jessica! I usually say whole milk, but there’s enough fat in the cream cheese. So if you have a lower-fat milk, that works, too. If you have a choice, I’d go with whole milk. Thanks for your email yesterday! I’ll reply tomorrow. :) I hope you’ll enjoy the cheesecakes!
Wonderful! Thank you for everything!
Another hit!! This is so so good!
I just made 1 big cheesecake. I didn’t use your crust recipe bc I wanted to use almond and or coconut flour.
I used Lily’s dark choc chips for the topping and it was truly spectacular! My husband is hoarding it lol!
I told him this is not something I can make at last moment though since it needs time to cool and there are a few steps. Will make it again for sure!
I’m so glad that it worked well! Could you please share what crust recipe you used? I’d love to try it! And how long did you bake it (and at what temperature?) Did it crack after baking? Sorry for all the questions! Thanks for your comment. :)
How they are vegan? You used cream cheese… but ist look yummi
They’re not vegan and I never said that. Where do you see that?
Hi! I’m so excited to try this! I searched forever on Pinterest for a mini gf cheesecake that didn’t involve buying gf graham crackers or cookies for the crust. I found your pic there, but it lead me to a spam site. I’m not sure what that means—someone stole your pic? Not sure what you can do about it, either. I was still able to find your site by searching for the name of the recipe you had on the photo, though. I can’t wait to try these!
Hi there! I’m so happy you were able to find the recipe. :) Sometimes people take photos from others and upload them onto Pinterest and send them to spam sites. Unfortunately there’s nothing to really do about it. But thank you for letting me know! I hope you’ll enjoy the cheesecakes. I’d love to hear how they come out! I also have these mini cheesecakes if you prefer a different crust and regular cheesecake filling.
I want to say it looks so yummy and delicious! Is there a way to make it as one big cheesecake instead of mini ones?
Thanks, Eda! :) I’ve tried this crust in a pie pan and it unfortunately doesn’t work so I’m pretty sure it wouldn’t work in a springform pan, either. If you found a different crust to use, then the next problem would be that I don’t have a clue how long you’d need to bake the cheesecake for. Sorry I couldn’t be more of a help!
These cheesecakes look cute and very yummy!
Thanks, Medeja! :)
I would totally be proud of these mini PB cheesecakes! I’d love to have MANY of these!
Same here! I gave mine all away. Wish I hadn’t. ;)
Just made these for a dinner party tonight and I’m wondering when is best to remove the muffin liners? After they are cool? I’ve made mini cheesecakes before and the muffin liners took lots of cheesecake with them so I want to avoid that this time.
That’s funny you ask because I actually removed that line from the instructions. In the other mini cheesecakes I’ve made, it was easier to remove the liners before refrigerating. I compared removing them before and after chilling for this recipe and removing them after chilling was fine. At least with my wrappers! A little cheesecake will come off, no matter when you remove them, but not a lot (I think you can see it in the pictures). If you don’t mind removing the wrappers now, I’d do that, just to be on the safe side. I hope you’ll all enjoy them! :)
Thank you – that worked perfectly! I sampled one and they are delicious!
Awesome! I’m so happy that it worked and that you enjoyed them. :) Thanks for coming back to let me know!
Erin – YES! More grain free recipes! I’m all over this. These mini cheesecakes look so lovely! I bet you’re proud of them — I know I’d be if they were my creation!
Thanks so much, Rose! :)
You’ve paired three of my favorite things together here… I can’t get enough of peanut butter and chocolate. When you add in cheesecake my head just starts spinning and I turn into a meme: I can has?
I’m right there with you about “natural” peanut butter. I just want some peanuts and maybe some salt. Why do you have to ruin it with sugar and other weird stuff?
Haha. But that other stuff makes it taste SO good! It’s awful. ;)
These looks so delicious and I appreciate you giving the ingredient options for making them gluten free and grain free if someone’s dietary needs warrant it. Nice touch.
Thanks! I certainly try with the dietary-friendly recipes. :)
Not obnoxious at all! You did a great job and they look amazing! It’s nice to be proud of ourselves when we accomplish something!
Thanks, Nancy! I’m happy that I didn’t sound like a jerk. :)
These look like absolute perfection! Pinning most definitely.
Thanks for pinning!
Great recipe Erin! (I think I could eat the entire batch myself!)
I bet you could! But, like, over 4 days because it yields 16. :D
Mini means I’d eat MANY! These sound scrumptious.
Haha. Isn’t that the truth! Deceiving little things.
Girl what are you talking about?! Those cheesecakes look insanely delicious! And I hear ya..I love Peter Pan peanut butter but can’t bring myself to eat it anymore with all the weird ingredients in it!
Thanks! And I’m with you. The ingredients in the non-refrigerated types of peanut butter (and even some of those!) are just weird and gross. But man… so tasty. :(
These cheesecakes look perfect – you should definitely be proud. I love that you used natural peanut butter, too.
Thanks so much, Joanie! :)
These look awesome! Even better that they use natural peanut butter. Love the chocolate topping too :)
Thanks, June! By the way, I just noticed your email address. So awesome. :D
I love that you use natural peanut butter and I think they look awesome.
Thanks, Theresa!
You definitely should be proud of these cheesecakes! And “hallelujah” that these are made with natural peanut butter, rather than some of the sugar-packed brands.
Thank you! :) I actually love that type of peanut butter but it really irks me that some of them call it natural. It confuses people!
You had me at cheesecake!!!!
You can’t go wrong with cheesecake, right? ;)
These little cheesecakes are adorable!
Thanks, Kristi!
Am I crazy to say I would be satisfied just with your homemade cookie crust…oh, my goodness! Total decadence and all my favorite flavors in this mini cheesecakes. :)
Haha. I may have eaten some of the crusts plain and had to make more. ;)
You said the magic word – cheesecake!! I could never say no to these beauties!
Why would you want to?! ;)
I would be proud too! These looks so crazy delicious!!
Thanks, Stephanie!