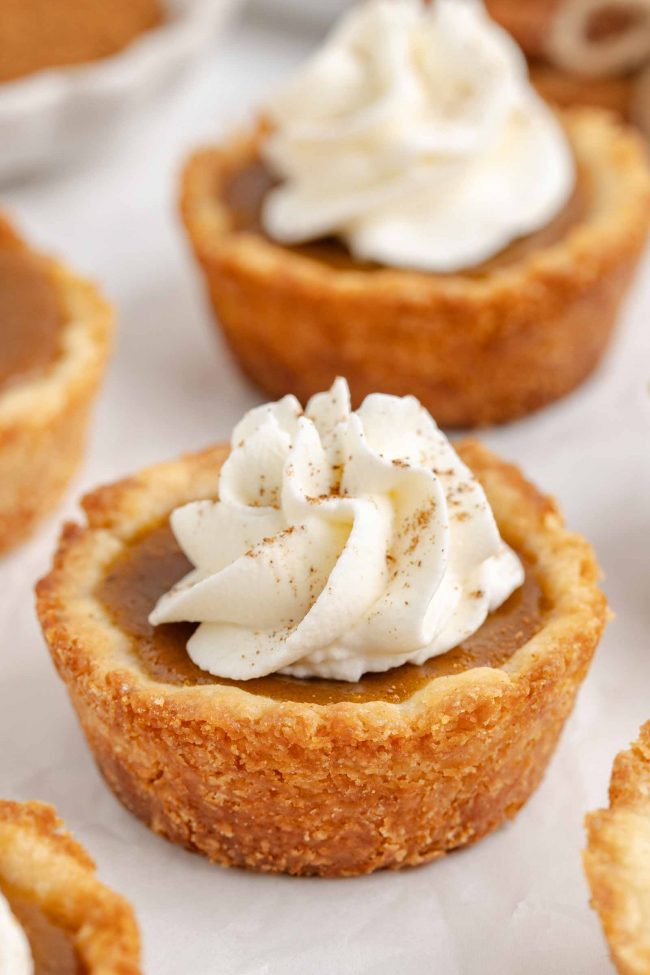
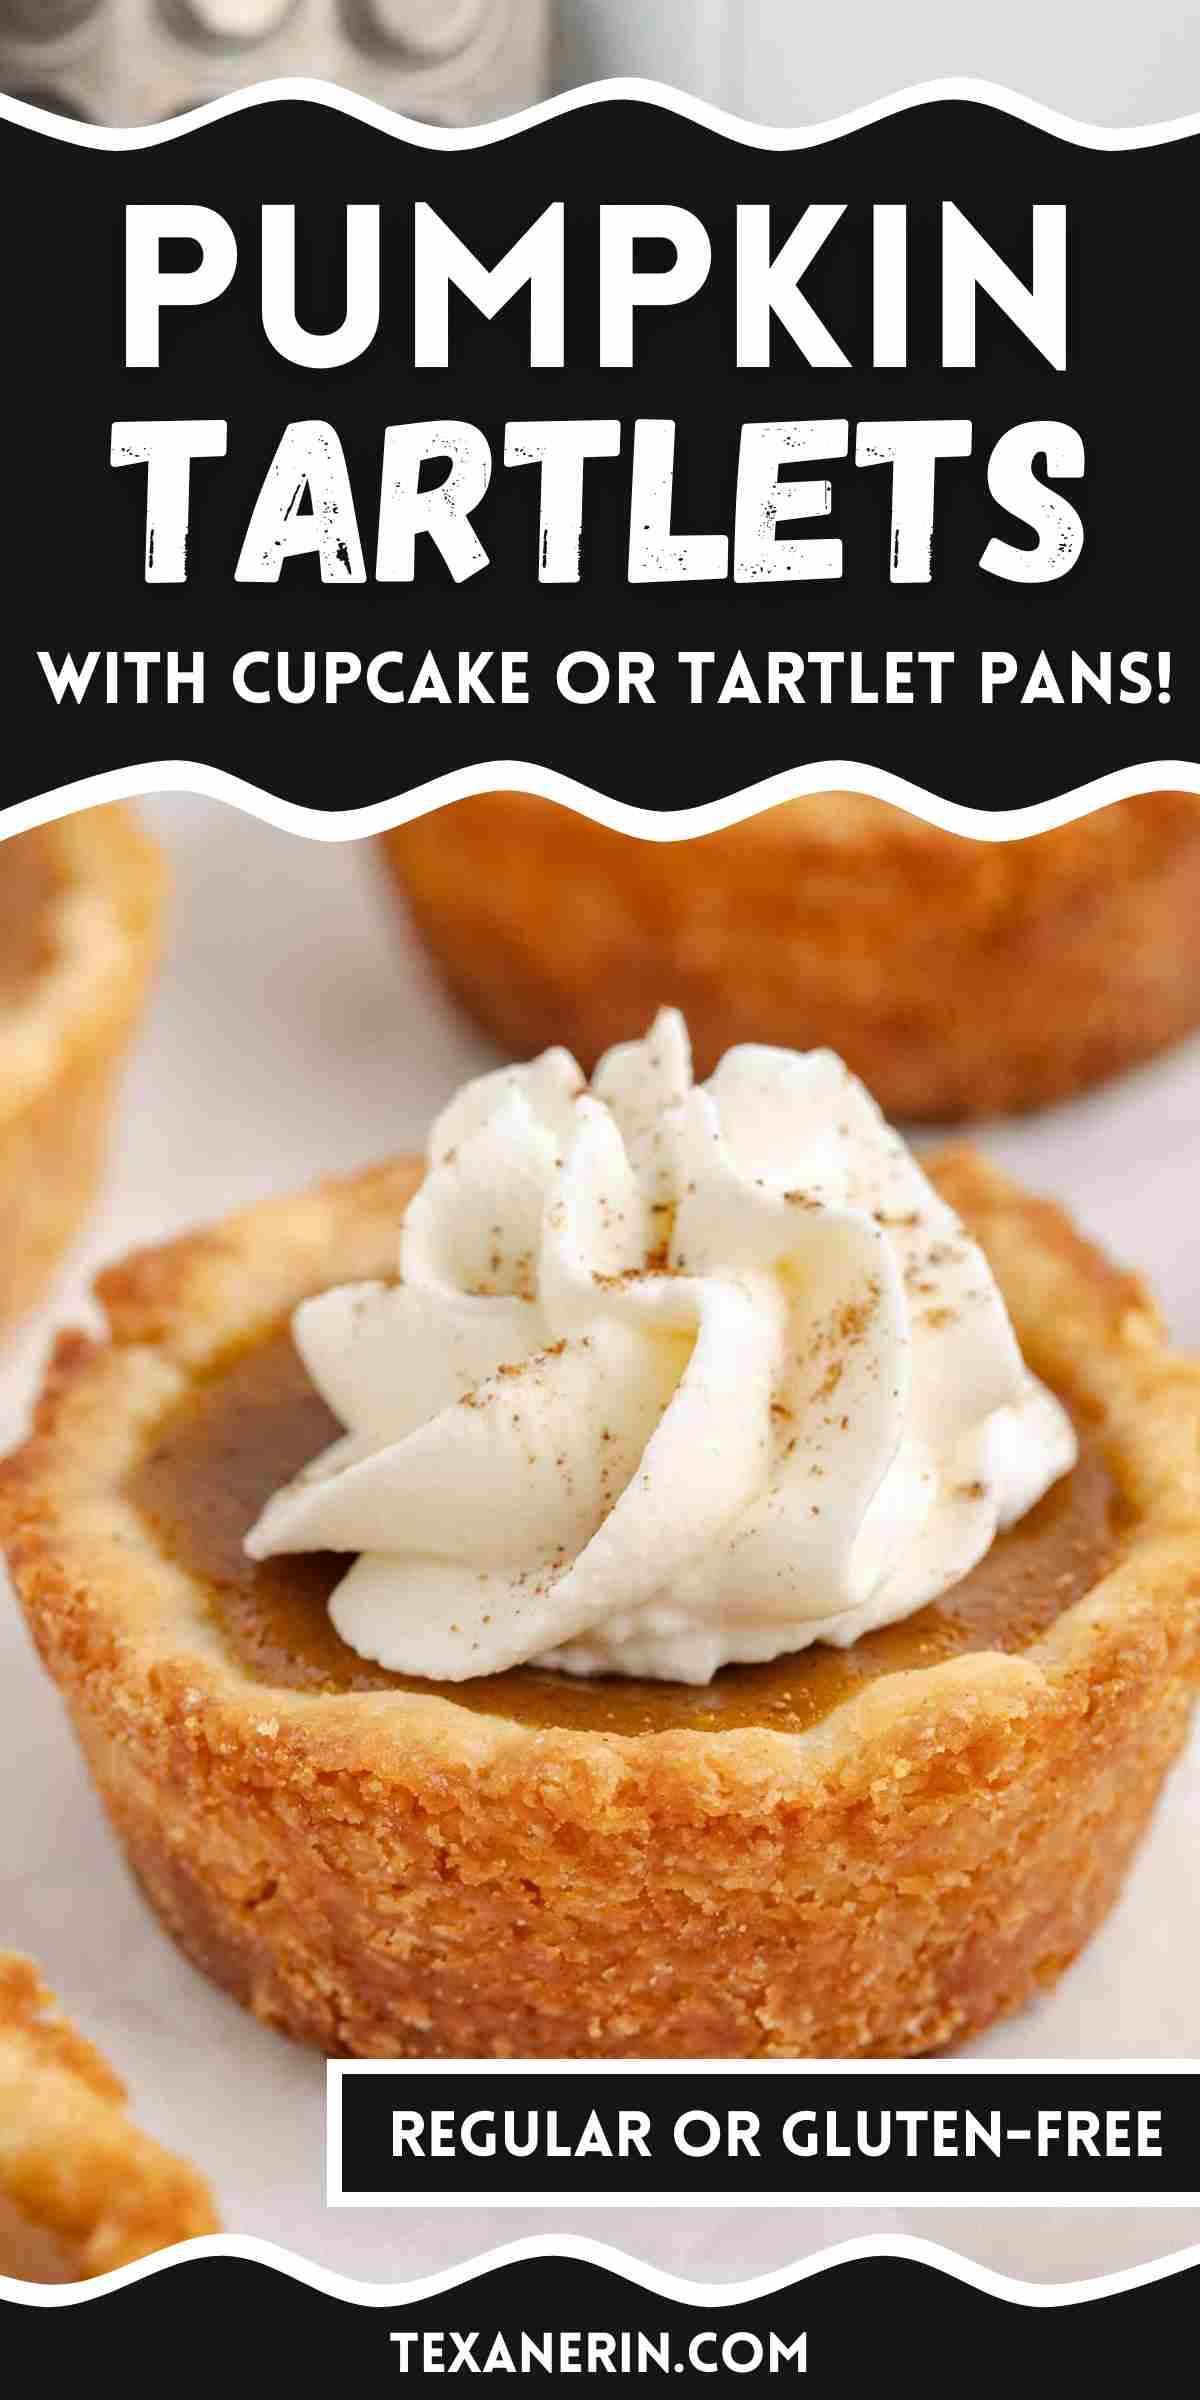
These pumpkin tartlets pack all the flavors of traditional pumpkin pie into a portable dessert that’s perfect for Thanksgiving and Christmas. I’ve provided instructions for baking them in mini tart pans as well as in a regular cupcake pan. You can use either gluten-free or all-purpose flour to make the tart crust.
On Friday, I shared these Apple Tartlets. If you’ve read that post, you can skim through most of this post as the crust info is exactly the same.
Only the filling is different. And that’s where the magic happens.
By very quickly cooking off excess moisture, the pumpkin filling transforms into a luscious, velvety texture that’s far creamier and more concentrated than your average pumpkin pie.
Each bite is smooth and spiced just right, with warm notes of cinnamon, nutmeg, and cloves wrapping around the natural sweetness of pumpkin. Paired with the crisp yet chewy crust, it’s a combination of textures and flavors that feels both comforting and luxurious.
If you find regular pumpkin pie boring and bland, you might like these! They’re almost like pumpkin pie cookie cups with a really lush and creamy filling.
Ingredients
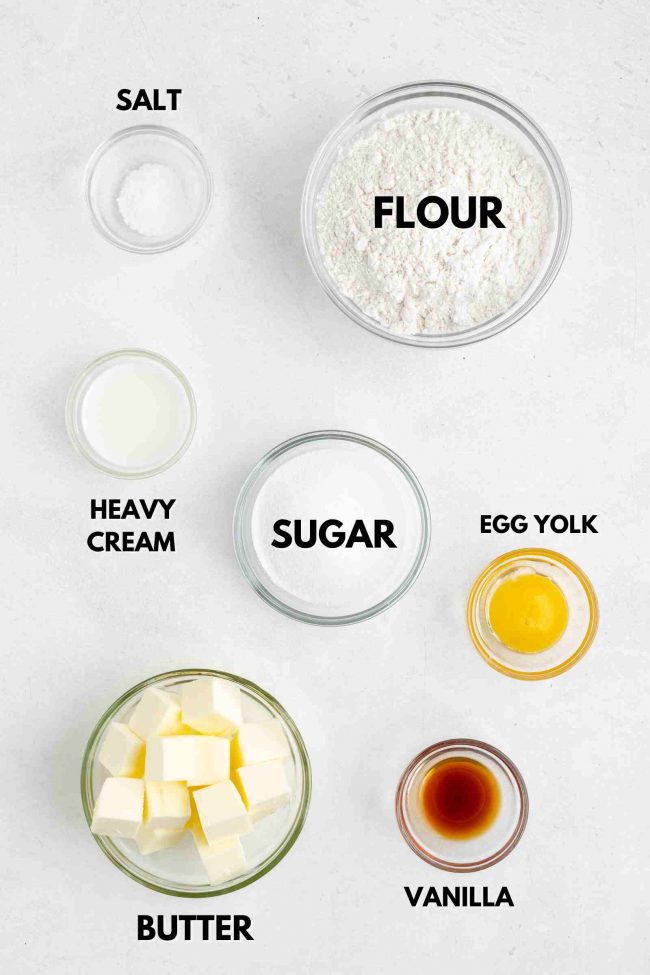
Here’s what you’ll need to make these pumpkin pie tartlets.
This is what you need for the crust.
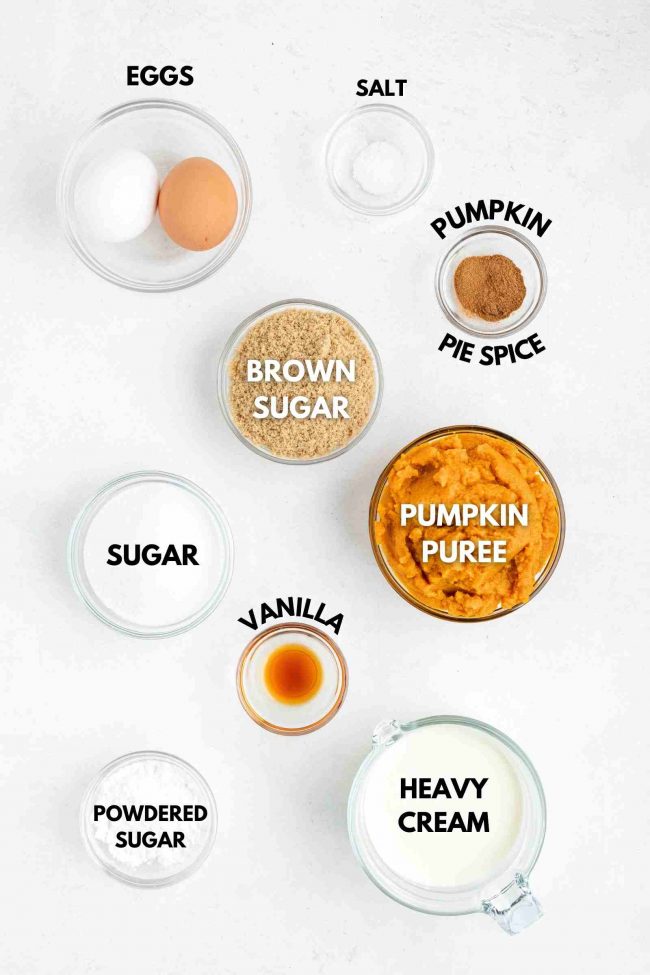
And for the filling.
For full measurements and the complete recipe, check out the bottom of the page.
As an Amazon Associate, I earn from qualifying purchases. For more info, see my disclosure.
Can I use something other than the egg yolk?
No, egg yolk is essential for the structure of this recipe. Unfortunately, half a chia or flax egg probably won’t work.
However, you could try using half of a Bob’s Red Mill Gluten Free Vegan Egg substitute “egg” if you’d like, although I haven’t tested that myself.
So there’s no vegan option for today’s recipe, but you could make this Paleo Vegan Pumpkin Pie instead. I’m not even vegan, and it’s my favorite pumpkin pie!
How to make pumpkin tartlets
The crust
As I mentioned in my Pecan Pie Cookies and Pumpkin Pie Cookies recipes, every step in the recipe is there for a reason.
If the recipe calls for pre-baking and cooling the crusts, it’s because the recipe didn’t work out well without those steps.
Skipping those steps resulted in mushy, unappetizing tartlets.
It’s surprising how many recipes overlook these steps. In those cases, the crusts are often underbaked or just raw.
The filling
Similarly, if you don’t cook the filling down first, the water can saturate the crust, leading to soggy results.
It would be ideal if you could just press the dough into the pans, mix the filling ingredients together in a bowl, spoon it into the raw dough, and bake.
But that’s not how this recipe works. If you want your mini pumpkin tarts to look like mine, you have to follow the recipe.
Trust me. It’s worth it. 😆
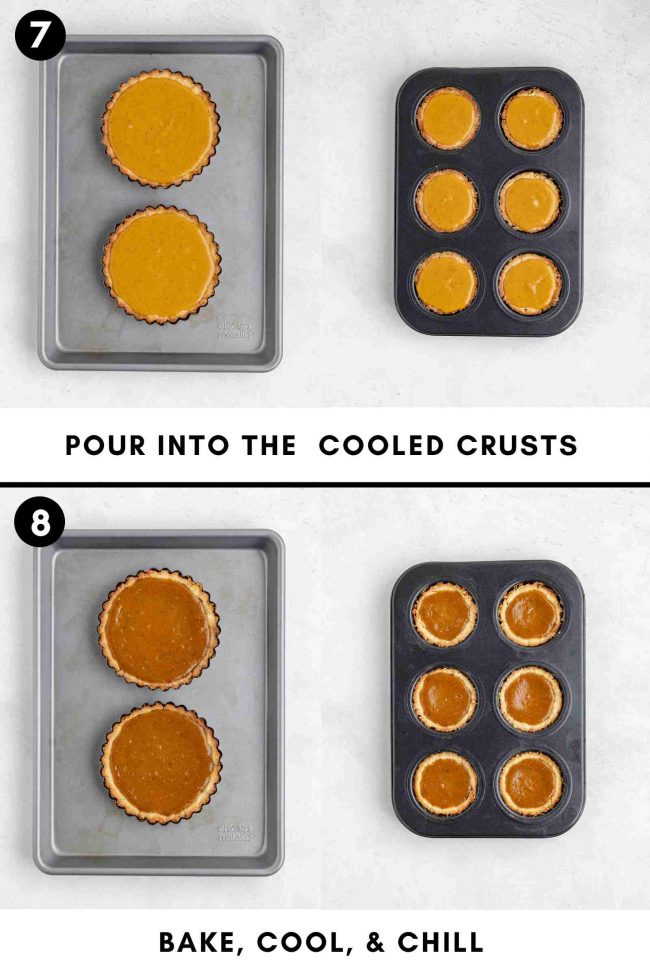
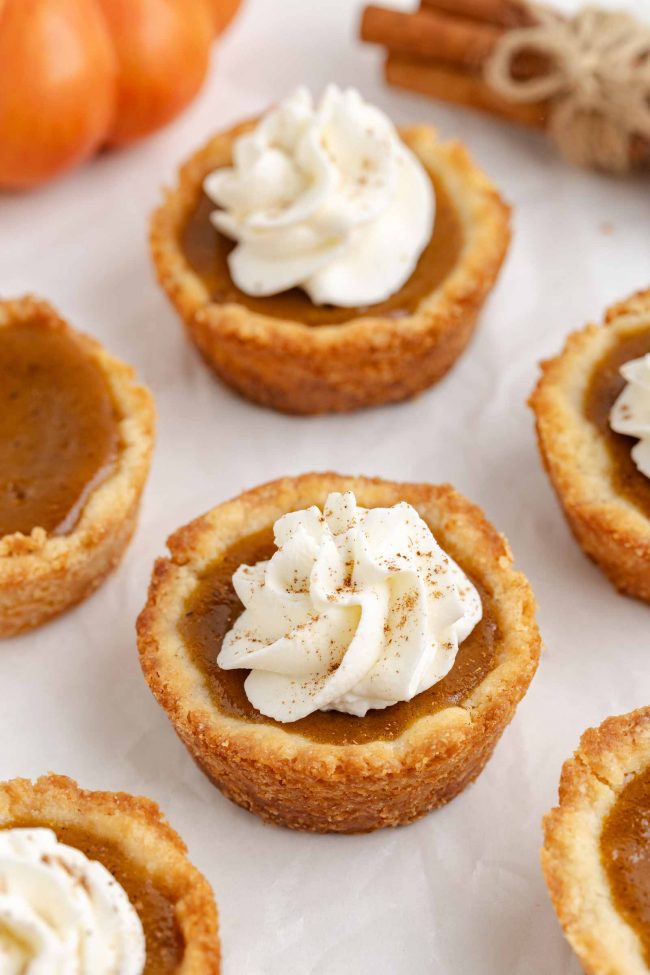
The baked cupcake tartlets on the right look a little sunken in, but it’s just how the light is hitting them. You can see in the other photos that they didn’t sink.
The crust
I used the same crust recipe for these tartlets that I used in my Blueberry Tartlets and Peach Tartlets recipes. It’s perfect for tartlets!
But I can’t take credit for it. After testing loads of tart crust recipes, I finally settled on this one from King Arthur.
I made a few adjustments, and it turned out amazing.
These crusts are delicious enough to eat on their own, which we did. And ate quite a lot of them. 🙈 The best tart crust I’ve ever had.
Although chilling the dough is optional, I found it essential for easier handling. The recipe suggests pie weights and docking the crust, but neither is necessary for these tartlets (though it’s required for full-sized tarts!).
I also tested a gluten-free version.
Many other recipes end up too crumbly, bland, or soggy after the filling goes in. But this one? Perfect.
Don’t be tempted to use softened butter. I know it’s easier to work with.
But cold butter is essential for achieving a flaky crust. The cold, cubed butter doesn’t fully incorporate into the flour, creating air pockets that melt during baking, resulting in a tender, flaky crust.
The filling
For traditional pumpkin pie, you usually just mix all the filling ingredients together and pour it into the crust.
I would suggest not doing that for these pumpkin tarts, but rather following the recipe because there’s a key step to making the pumpkin pie filling thick and luscious. It does add 7-8 minutes to the prep time, but it’s so worth it.
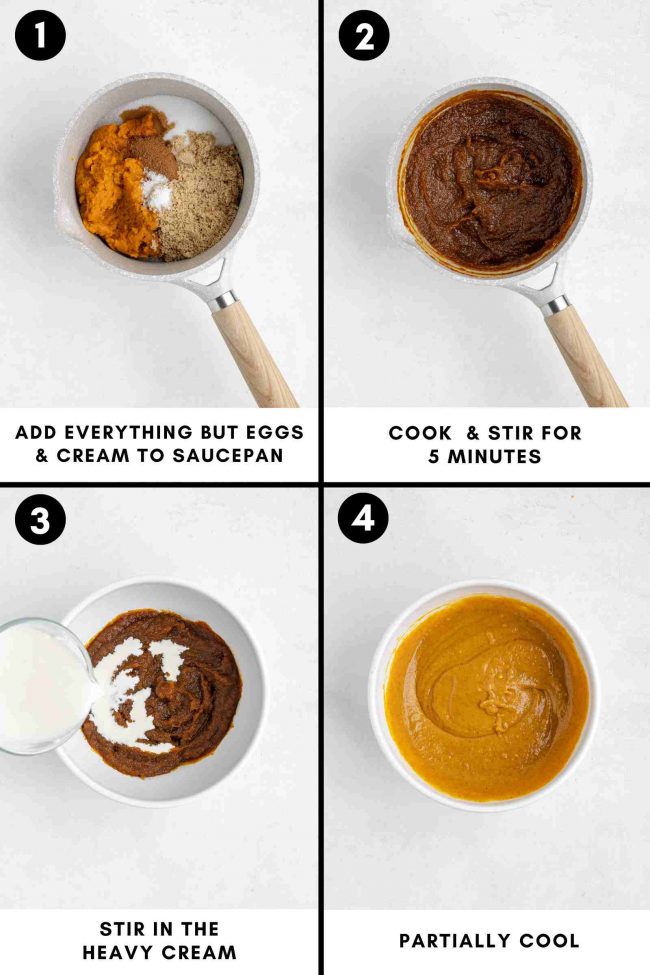
You heat everything, except for the cream and eggs, on the stovetop and stir for 5 minutes. This helps reduce the moisture, making the filling ultra silky.
The first filling I tried in these pumpkin tartlets was the one I used in my Pumpkin Pie Bars recipe. I started there because I thought it’d be great to skip the step where you cook the filling.
For that filling recipe, you just mix it all together. The tartlets came out way too soft and not crisp. I wanted a crisp, chewy and buttery tart shell.
So I switched over to the pre-cooked filling of my Crustless Pumpkin Pie.
Have I tried the filling without doing the pre-cooking step first? Nope.
Because I can see the moisture evaporating from the pot, and I know I don’t want that in my tartlets. All that extra water would make the tartlets soggy.
Tartlet pans or cupcake pans
Tartlet pans
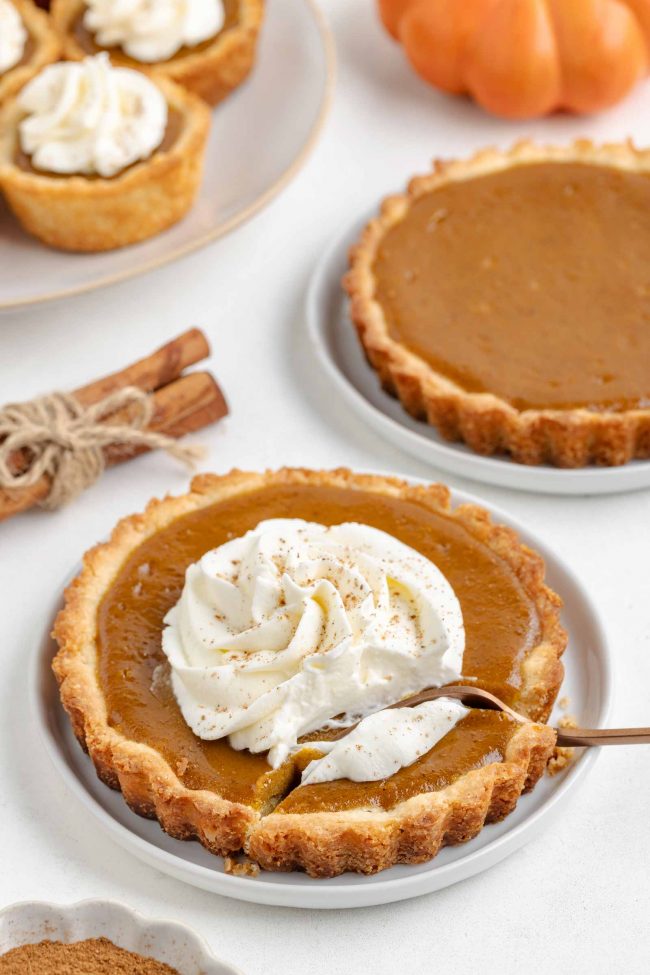
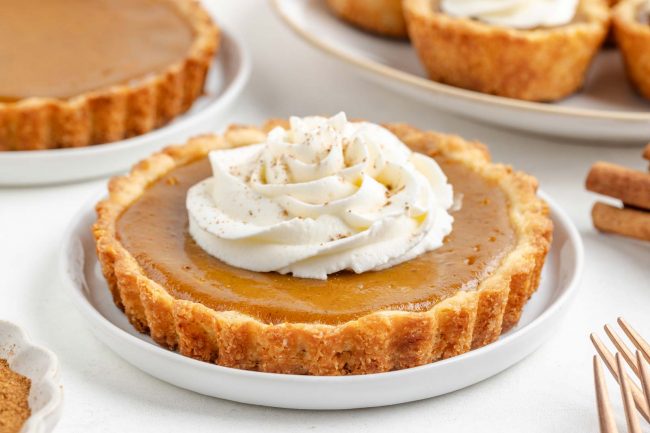
Tartlet pans are excellent for baking mini tarts, with their fluted edges adding a special touch and removable bottoms making it easy to remove them without much effort.
I used these Wilton Perfect Result 4.75″ (12 cm) Tart Pans, which come in a 6-pack.
I’ve had these pans for a decade, and they’re still in great condition. Remember to remove the tart from the pan before cutting to avoid scratching the pans.
If you can’t find that set, make sure to get mini tart pans with removable bottoms for easy removal.
Cupcake pans
Cupcake pans are a great option for Thanksgiving dessert. Since there are usually multiple desserts at Thanksgiving, it’s easier for people to try a few different options if you make individual treats.
I really don’t think many people would want a full-sized tartlet after Thanksgiving dinner, as it’s quite a lot to eat in one sitting.
Cutting the tartlets into 4 pieces works well. And the pieces are cute!
Removing the tartlets from cupcake pans can be more challenging than from tartlet pans, but it’s still easy as long as you grease the pans well.
Yield
The recipe yields 364 grams of dough.
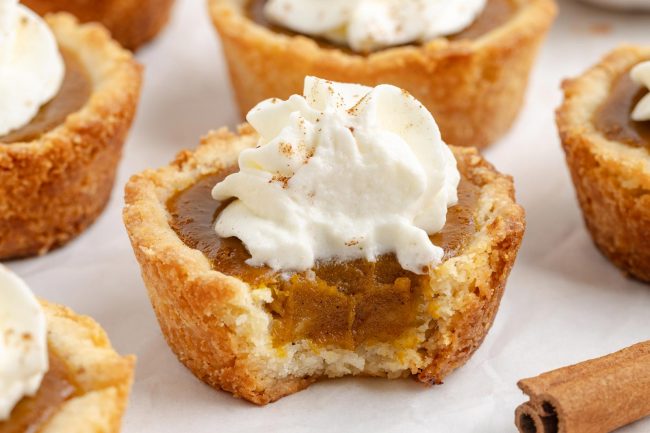
Using a cupcake pan, each cavity will require 40 grams of dough, which yields 9 tartlets.
Using tartlet pans, you’ll need 90 grams of dough, yielding 4 tartlets.
My cooked filling weighed 533 grams, but that will vary depending on how long you cook it.
You can use around 80 grams of pumpkin pie filling for each of the tartlet pan tartlets. You’ll have some filling leftover if making the tartlet pan tartlets.
You can pour that into a ramekin and cook it along with the tartlets. I have no idea of the baking time, though. That depends on a bunch of factors.
And you’ll need about 40 grams of filling for each cupcake pan tartlet.
Just to be clear – with this recipe, you can make either 9 cupcake pan tartlets OR 4 tartlet pan tartlets.
Not both. You’ll have to double the recipe if that’s what you’d like.
How to make ahead and store
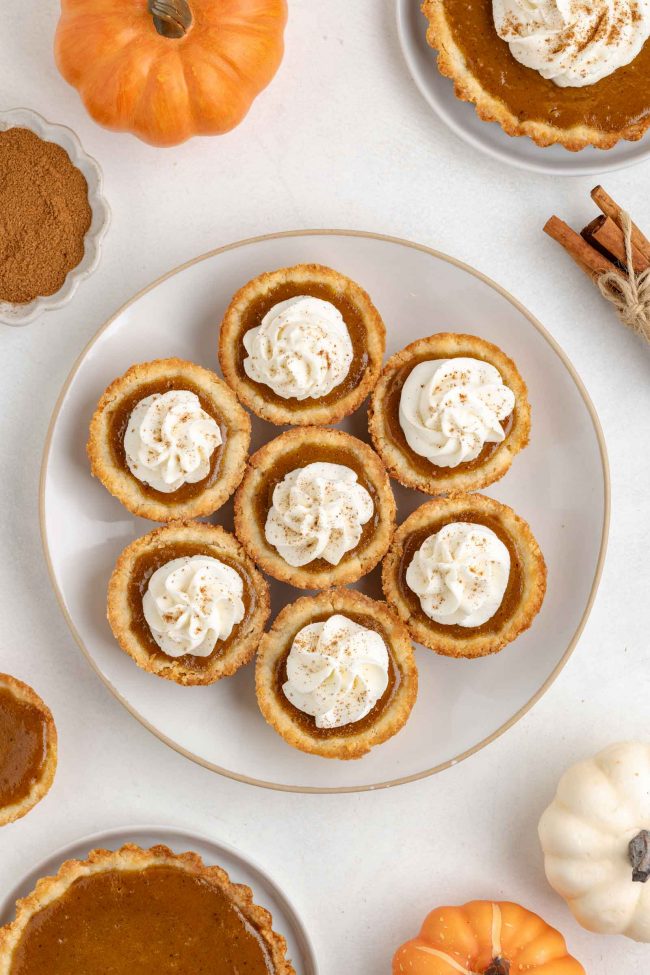
These pumpkin tartlets are excellent for prepping in advance.
- The dough – prepare the dough up to 3 days in advance, or freeze it for as long as 3 months. Let it thaw overnight in the refrigerator before using.
- Unbaked tart shells – press the dough into the tart pans, cover, and refrigerate for up to 3 days to save time later.
- Baked tart shells – store them at room temperature in an airtight container for up to 3 days, or refrigerate for a maximum of 5 days. For longer storage, freeze them for up to 3 months.
- Filling – store the pumpkin pie filling in an airtight container in the refrigerator for up to 3 days.
- Fully baked pumpkin tartlets without whipped cream on top – can be refrigerated for up to 3 days, and the crust remains firm and crisp.
You can also freeze them, but I wouldn’t recommend freezing the assembled tarts and defrosting for Thanksgiving dessert. As with all pie and tart dough recipes, fresh is usually better.
But freezing leftover tartlets? Definitely a good idea to freeze them before they go bad!
How to freeze assembled tartlets
Ensure the baked tartlets are completely cooled. Even a slight amount of warmth can create condensation, which will make them soft.
Arrange the cooled tartlets on a baking sheet, making sure they don’t touch.
Place the baking sheet in the freezer for 1-2 hours, or until the tartlets are fully frozen. This step helps them maintain their shape and prevents sticking.
Once frozen, individually wrap each tartlet in plastic wrap and then in aluminum foil. The double layer protects them from freezer burn and helps them stay fresh.
Transfer the wrapped tartlets into a freezer-safe bag or airtight container.
You can freeze the filled tartlets for up to 3 months.
To serve, allow them to thaw in the refrigerator for a few hours or overnight.
Troubleshooting
- If your tartlet crusts are mushy after baking them with the filling, it’s likely due to underbaking the crust or not pre-baking it long enough. Make sure to bake the crusts until golden and fully cooked before adding the filling.
- If the tartlet filling still looks runny after 5 minutes, try cooking it longer to reduce excess moisture. Make sure to let it cool completely before filling the tart crusts.
- If you have trouble getting the tartlets out of the pans, ensure that you’re greasing the pans well and letting them cool slightly before attempting to remove them. If using a cupcake pan, use a thin knife to gently loosen the edges before lifting them out.
Gluten-free option
These mini pumpkin tarts can be made with all-purpose or gluten-free flour.
For the gluten-free option, I used King Arthur Measure for Measure Gluten-Free Flour. And nobody knew that they were gluten-free! They’re sure to be a hit with everyone.
I haven’t tried any other brands in this recipe, so I can’t say for sure how they’d come out. If you feel like experimenting, you must use a blend that’s meant as a direct sub for all-purpose flour.
I hope you’ll enjoy these pumpkin tartlets! If you try them out, I’d love to hear your thoughts below in the comments. Thanks! :)
Pumpkin Tartlets
- Prep Time:
- Cook Time:
- Ready in:
- Yield: 9 cupcake pan tarts or 4 tartlets
Ingredients
- 1 1/4 cups (150 grams) all-purpose flour or for gluten-free, use King Arthur Flour Gluten-free Measure for Measure Flour
- 1/4 cup (50 grams) granulated sugar
- 1/2 teaspoon salt
- 1/2 cup (113 grams) unsalted butter, cold, cut into 1/2" cubes
- 1 large egg yolk
- 1 teaspoon vanilla extract
- 1-2 tablespoons milk1
- 1 cup + 2 tablespoons (273 grams) canned pumpkin puree
- 1/2 teaspoon vanilla extract
- 1/3 cup (66 grams) light or dark brown sugar
- 1/3 cup (66 grams) granulated sugar
- 1 3/4 teaspoons pumpkin pie spice
- 1/4 teaspoon salt
- 3/4 cup + 4 teaspoons (190 grams) heavy cream
- 2 large (50 grams each, out of shell) eggs
- 1/2 cup (114 grams) heavy cream
- 2 tablespoons powdered sugar
- 1/2 teaspoon vanilla extract
For the crust:
Filling:
Topping:
Directions
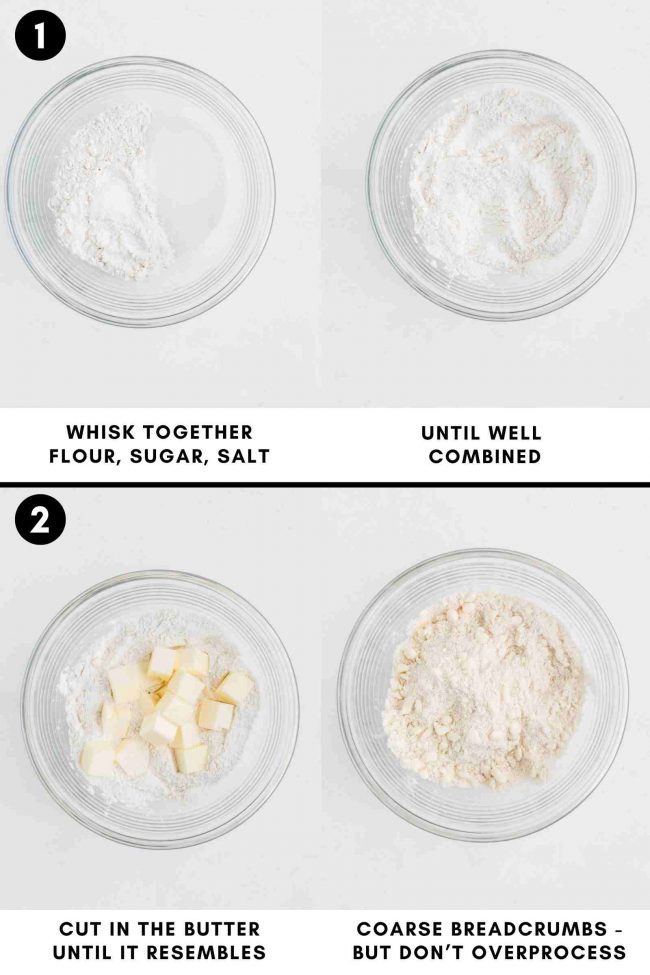
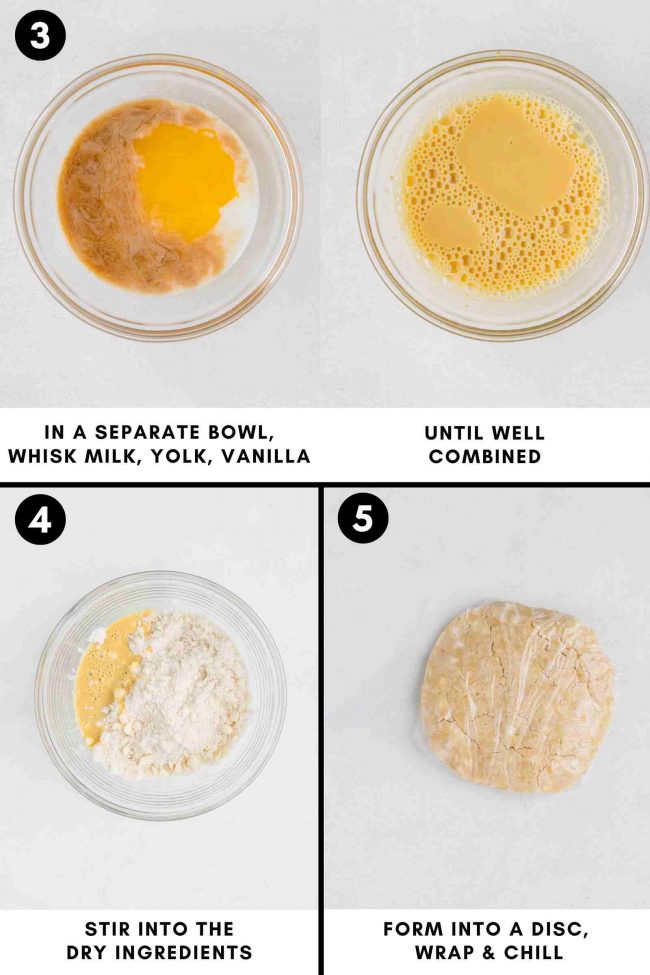
- In a medium bowl, whisk together the flour, sugar, and salt.
- Cut in the cold butter until the mixture resembles coarse breadcrumbs.
- In a separate small bowl, whisk the egg yolk, vanilla, and just 1 tablespoon of milk. Stir this into the dry ingredients.
- Use your hands to work the dough a bit and to bring the dough together. The dough should be crumbly but cohesive when squeezed. It won’t form a ball or a loose ball like with pie dough.
- I placed a piece of plastic wrap in a mixing bowl and then dumped the dough into there and wrapped it up into a very loose, crumbly disc.
- Chill for 1 hour or up to 3 days.
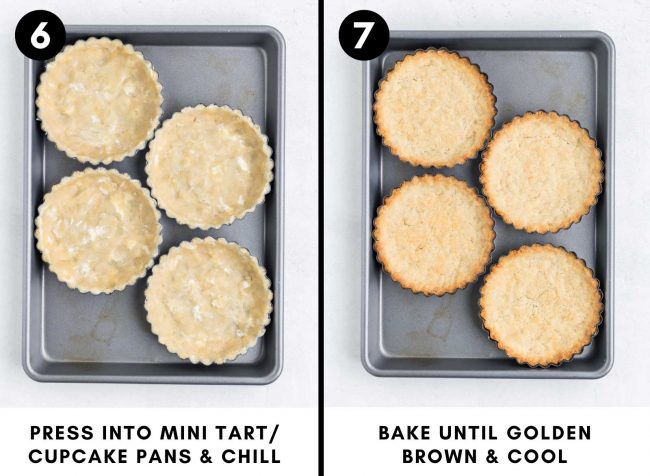
- Grease 4 non-stick mini tart pans with removable bottoms OR grease 9 cavities of a non-stick cupcake pan.
- To make the tartlet plan tarts - place 90 grams of the dough in the pan. Press up the sides and evenly over the bottom of the pan. Do the same with the other pans.
- To make cupcake pan tarts, use 40 grams of dough per cavity. Press it evenly up the sides and over the bottom.
- Place the pans in the fridge for at least 45 minutes, freeze for 15 minutes, or cover and refrigerate for up to 3 days. If you’re chilling them for 45 minutes, you can go ahead and start with the filling recipe below. When you’re done with the filling, come back up here.
- Towards the end of the chill time, preheat the oven to 375 °F (190 °C) and place a baking sheet large enough to fit the pans in the lower third of your oven.
- After 45 minutes of chilling or 15 minutes or freezing, place the tartlets directly onto the hot baking sheet and bake.
- Bake the cupcake pan tarts for 15-17 minutes or until golden around the edges, and the center bottom doesn’t look wet. That part won’t get browned. It’s fine if it cracks and puffs up a little. The tartlet pan tarts should be baked for 18-22 minutes, rotating halfway through if you notice them browning too quickly in certain areas until the sides are nicely browned and the bottom has browned a bit.
- Remove the baking sheet and tartlets from the oven and place them on a wire rack to cool for at least 30 minutes or overnight.
- In a medium saucepan over medium heat, add all the filling ingredients except the heavy cream and eggs.
- When it starts to steam, stir frequently for about 5 minutes. This step removes some of the moisture, making the filling even creamier.
- Remove from the heat, dump the filling into a bowl (that won't break when you dump something hot into it), and stir in the heavy cream.
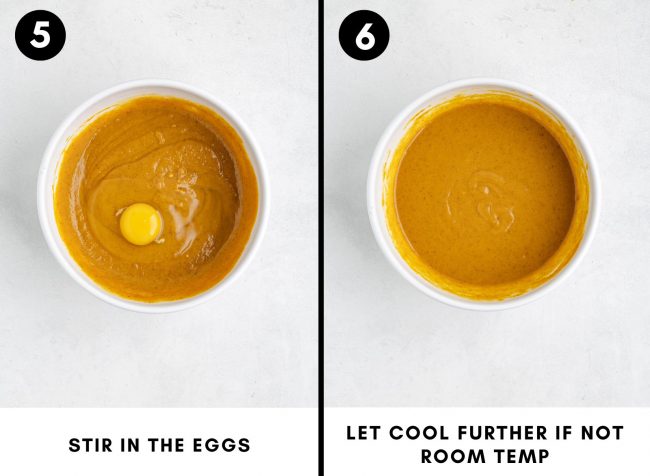
- Let it sit for 15 minutes or until no longer very hot (you don't want the eggs to scramble which will happen if it's too hot). If you have time, you can just let it sit for about 30 minutes and skip using an extra bowl.
- Whisk in the eggs one at a time, just until combined. There should not be streaks of pure egg because you'll have baked eggs pieces in your piece. They need to be incorporated, but not beaten too much, because that'll cause cracks. The filling should be room temp or cold when added to the cooled, baked shells - not warm. About 20 minutes before you’re ready to bake to assembled tarts, preheat the oven to 300 °F (150 °C). Place the baking sheets back in the oven in the same position as for the crusts.
- Pour 40 grams (or a little more) of pumpkin filling into each cooled cupcake tart crust and 82 grams (or a little more) of filling into each cooled mini tart pan crust. You’ll have some leftover.
- Bake the mini tart pan tarts for 21-25 minutes and the cupcake tart pan tarts for 25-27 minutes. They won’t appear raw in the center of the surface and won’t appear liquid. When you tilt the pan, they’ll appear set. The filling will firm up as it cools, but won’t get totally firm. If you want to be exact, they should reach an internal temp of 175 °F (79 °C).
- Let cool completely in the pans, about 1 hour, and then chill the tarts in their pans for at least 3 hours. This is needed to firm them up. You can also pop them in the freezer once they’re cool enough to not release a bunch of condensation. Once they’re thoroughly chilled, use a sharp knife to run along the edge of the cupcake pan tarts. They’ll come out easily. For the mini tart pan tarts, you can just easily remove the side and bottom pieces.
- The day of serving - in a medium or large mixing bowl, use a hand mixer or a stand mixer with the whisk attachment to beat the heavy cream, powdered sugar and vanilla. Start on low so it doesn't fly everywhere, and gradually increase the speed to high. Continue beating until you have stiff peaks. But don't overmix, or it'll break down into butter.
- Pipe the whipped cream on top of the tarts and add a sprinkle of cinnamon.
- Cover and refrigerate for up to 3 days.
To make the crust:
Prepare the tart shells:
Make the filling:
Assemble and bake:
Topping:
Notes
- You might need up to another tablespoon of milk to get the dough together. If it's too dry with 1 tablespoon of milk, add a teaspoon at a time rather than dumping in another full tablespoon.


4 comments on “Pumpkin Tartlets (with cupcake or tartlet pans!)” — Add one!
This is the best pumpkin pie filling ever! Thank you…. Everyone loved these on Thanksgiving! I will definitely be making these….my kiddos love anything pumpkin. Thank you for this recipe!
You’re welcome! I’m so very happy that they were a hit. :) And thank you for following directions and actually cooking the filling first. 😆 It really does pay off! Thanks so much for your feedback.
I made a triple batch of the cupcake version. Sooooo dreamy. That filling is everything! Love the trick to make it ultra creamy. My family is going to go crazy for these. Thank you!
You’re welcome! Oooh, a triple batch. That sounds time-consuming. 😆 I hope your family will like them as much as you did! Thanks for your comment and happy Thanksgiving. :)