

Spiderweb Cake
This spiderweb cake has rich chocolate layers, orange cream cheese frosting and an easy marshmallow spider web. It makes a dramatic Halloween cake but is much easier to decorate than it looks, with regular, whole wheat and gluten-free flour options.
This cake might look intimidating, but it’s surprisingly simple to make and easy to decorate.
The cake is the same base I use for all my chocolate cake recipes, including my Chocolate Heart Cake, Jack Skellington Cake, and Dairy-free Cake.
I also use a very similar chocolate cake base for this Ghost Cake, which is topped with purple cream cheese frosting, chocolate ganache and meringue ghosts.
It’s adapted from the recipe on the back of a Hershey’s cocoa powder box. It really is the perfect chocolate cake! And that’s why I keep reusing it.
The orange frosting and easy spiderweb are an easy way to transform this cake into the perfect Halloween treat. If you’re looking for something quicker, this Halloween Cookie Cake (but without the Meringue Ghosts) is a great option.

Ingredients
Here’s a look at all the ingredients you’ll need to make this spiderweb cake. For full measurements and instructions, scroll to the recipe box at the bottom of the page.
If you don’t have black cocoa powder, you can use more Dutch-process cocoa powder. Or regular cocoa powder.
Your cake will, of course, be lighter in color and flavor if using all Dutch-process and even lighter if using regular cocoa powder.

And here’s what you need to make the frosting and to decorate the cake.
Make sure to use gel food coloring if not using natural food coloring. Your frosting would come out too runny with regular, liquid food coloring.

Black cocoa
Black cocoa’s dark color and intense chocolate flavor set it apart from traditional cocoa. It’s what gives Oreo that special flavor.
If you want to make the most of your black cocoa, I have some additional recipes that feature it, like these Black Cookies, a Black Milkshake, and this Black Ice Cream.
Note that as black cocoa powder passes through your digestive system, it doesn’t lose color. There’s no need for alarm.
And as I said above, you can use regular or Dutch-process cocoa in its place. The purpose in this recipe is to just make the cake darker in color.

Why use mini marshmallows?
Mini marshmallows are preferred over jumbo marshmallows for a spiderweb cake because they melt more evenly and quickly, making it easier to create the delicate, thin strands that resemble a spiderweb.
Jumbo marshmallows take longer to melt and can result in thicker, clumpier lines that are harder to work with, whereas mini marshmallows allow for better control and precision when stretching them over the cake.
How to make it
As I mentioned earlier, the full directions are provided below.

This is just to give you a visual overview.

It is not meant as a substitute for the actual directions. ;)

I’ll say it again – this cake is really easy. If piping frosting onto a cake seems intimidating, this is the perfect recipe for you. You can’t really mess it up unless you get sloppy with the spiderweb.
I saw one person’s spiderweb cake that looked a bit like snot. Snot is not the look you’re going for. :D

What’s a crumb coat?
A crumb coat is a thin layer of frosting that seals in any loose crumbs, creating a smoother surface for the final frosting. It also helps the frosting adhere more effectively.
Freezing the cake layers makes for a cleaner crumb coat.
After applying the crumb coat, freeze the cake for at least 20-30 minutes before adding the final layer of frosting.

How to make the marshmallow spiderweb
You must use normal marshmallows! I was hoping it’d work with vegan marshmallows, but it didn’t.
I could only get something like 1″ spiderweb strands. I tried them with Koro marshmallows and the ones from a Germany company called Süss und Clever (for the 24 people reading from Germany – those marshmallows were incredible, by the way – my whole family dislikes regular marshmallows and loved these!)
I only found this out last minute. I had promised to bring a cake for my son’s last day of kindergarten, and I had to throw on some other decorations because the vegan marshmallows didn’t do the trick.
To create the spiderweb design, melt mini marshmallows in the microwave and stir. They should be smooth and stretchy.
Let the goo cool slightly so it’s not too hot to touch, put on food-handling gloves, then stretch small pieces between your fingers to form web-like strands.
Carefully drape the strands across your cake, layering them for a realistic marshmallow spider web effect.
If the marshmallows harden, reheat them briefly in the microwave again.
Use a toothpick to adjust and refine the web strands if needed.
Top with plastic spiders for the final spooky touch! But remove them before you serve.
Note that the spiders can stick to the webbing, so be careful when you take them off.

How to make ahead, freeze and store
Making the cake in stages over 2 days makes the process much easier, but you can certainly make it from start to finish in one day.
Chilled or frozen cake layers are also much easier to frost than layers stored at room temperature. I like to bake the cake layers and make the cream cheese frosting one day, then assemble and decorate the cake the day I plan to serve it.

Here’s how far ahead you can prepare each part:
- Individual cake layers – after baking, let the layers cool completely, wrap them individually in plastic wrap and place them inside a Ziploc bag. They can be stored at room temperature for up to 2 days, refrigerated for up to 3 days or frozen for up to 3 months. For easier handling, you can use the cake layers straight from the freezer when assembling. There’s no need to defrost them first.
- Cream cheese frosting – the frosting can be refrigerated for up to 4 days total or frozen for up to 3 months. Keep in mind that the 4 days is the total refrigeration time, including after the cake is assembled.
- The crumb-coated or fully frosted cake – you can assemble the cake, add the crumb coat and frosting, then freeze it for up to 1 week. Wrap it well in plastic wrap and place it in a large bag for extra protection.
- The decorated cake – add the marshmallow spiderweb as close to serving as possible because it becomes wet and sticky over time. Refrigerate leftover cake for up to 4 days.

Food coloring
You can use natural food coloring, such as Supernatural Kitchen Food Colors or Color Kitchen, for the frosting. I’ve tested this cream cheese frosting with both brands, and both produced nice, vivid colors.
They are quite expensive, so I usually stock up when I find them on sale. I used Color Kitchen for the orange frosting on the Jack Skellington cake below.

For the kindergarten cake below, I used Color Kitchen for the orange and green and Supernatural for the purple. The lighting in the photo isn’t ideal, but the colors were much brighter in person.

If you’re not using natural food coloring, use gel food coloring rather than regular liquid food coloring. Liquid coloring can make the cream cheese frosting too runny.
Gluten-free option
My go-to is usually King Arthur Flour Gluten-free Measure for Measure Flour, which often performs better than Bob’s Red Mill 1-to-1 Gluten-free Baking Flour, but not in this recipe.
After 7 failed attempts where the cake either collapsed as it cooled or turned out overly sticky, I switched to Bob’s Red Mill 1-to-1 Gluten-Free Baking Flour, and it worked right away.
For the gluten-free version, the only change you need to make is to use 2 1/2 cups + 2 tablespoons (363 grams) Bob’s Red Mill 1-to-1 Gluten-Free Baking Flour in place of the regular flour. No other ingredient amounts need to be changed.
Most marshmallows in the US are made with cornstarch rather than wheat starch, but ingredients vary by brand. If you’re making a gluten-free spiderweb cake, check the package to make sure your marshmallows are gluten-free.
More spider desserts
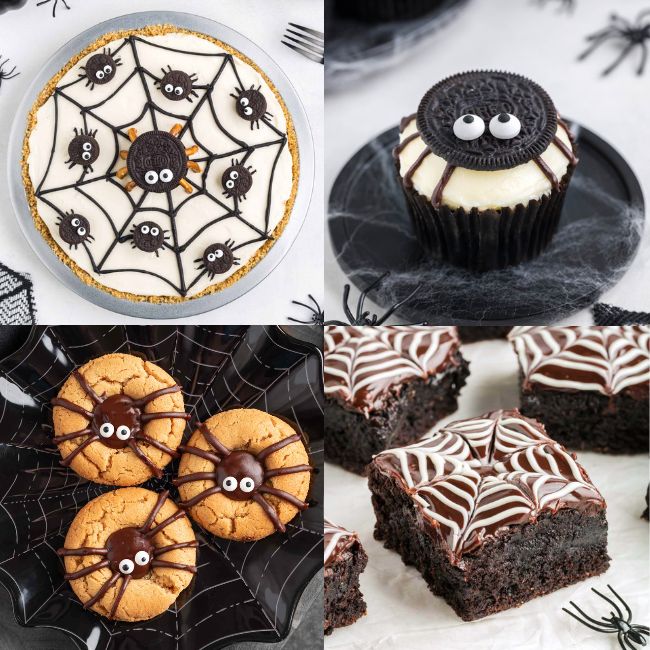
I hope you’ll enjoy this spiderweb cake! If you try it out, I’d love to hear your thoughts below in the comments. Thanks! :)

Spiderweb Cake for Halloween (Easy Marshmallow Web)
Ingredients
Cake:
- 3 cups (600 grams) granulated sugar
- 2 1/2 cups + 2 tablespoons (328 grams) flour see notes
- 3/4 cup + 2 tbsp (101 grams) Dutch-process cocoa powder
- 1/4 cup (28 grams) black cocoa powder or more Dutch-process cocoa
- 1 1/2 teaspoons baking powder
- 1 1/2 teaspoons baking soda
- 1 1/2 teaspoons salt
- 3 large eggs each 50 grams out of shell, room temp, or use chia eggs – see notes
- 1 1/2 cups (355 ml) milk see notes
- 3/4 cup (177 ml) olive oil or canola/vegetable oil
- 1 tablespoon vanilla extract
- 1 cup + 2 tablespoons (266 ml) boiling water
Frosting:
- 24 ounces (680 grams) full-fat cream cheese room temperature, see notes
- 1 cup + 2 tablespoons (253 grams) unsalted butter
- 3 3/4 cups (450 grams) powdered sugar or more if you like
- 1 1/2 teaspoons vanilla extract
- pinch of salt
- orange gel food coloring see notes
For the spiderweb:
- 2 cups (100 grams) mini marshmallows see notes
- plastic spiders
Instructions
Make the cake:
- Preheat your oven to 350 °F (175 °C). Line 3 round 8″ cake pans with parchment paper on the bottom and grease the sides.
- In a large bowl, stir together the sugar, flour, Dutch-process cocoa, black cocoa powder, baking powder, baking soda and salt. Add eggs, milk, oil and vanilla.3 cups (600 grams) granulated sugar, 2 1/2 cups + 2 tablespoons (328 grams) flour, 3/4 cup + 2 tbsp (101 grams) Dutch-process cocoa powder, 1/4 cup (28 grams) black cocoa powder, 1 1/2 teaspoons baking powder, 1 1/2 teaspoons baking soda, 1 1/2 teaspoons salt, 3 large eggs, 1 1/2 cups (355 ml) milk, 3/4 cup (177 ml) olive oil, 1 tablespoon vanilla extract
- Mix until combined, and then stir in the boiling water. The batter will be quite thin.1 cup + 2 tablespoons (266 ml) boiling water
- Divide the batter between the three pans. That’s 658 grams of batter per pan (675 grams per pan if using Bob’s GF flour).
- Bake for 24-28 minutes or until a toothpick comes out with some moist crumbs but no uncooked liquid.
- Let cool for 10 minutes in the pans, and then turn out onto a rack to cool completely; about 2 hours. My cakes weren’t flat, but not very rounded, either. If you want to, you can level them (I did not).
Prepare the frosting:
- In a large mixing bowl, beat the cream cheese and butter together with an electric hand mixer at medium speed until well combined. It’s okay if it looks a little crumbly.24 ounces (680 grams) full-fat cream cheese, 1 cup + 2 tablespoons (253 grams) unsalted butter
- Gradually beat in the powdered sugar until totally combined, and then beat in the vanilla and salt.3 3/4 cups (450 grams) powdered sugar, 1 1/2 teaspoons vanilla extract, pinch of salt
- Beat in a little orange food coloring at a time until you’re happy with the color.orange gel food coloring
Assemble the cake:
- Place the bottom layer of cake, rounded side down, on the serving dish.
- Spread 1 1/4 cups (288 grams) of frosting over the bottom layer, almost until the edge.
- Put on the next cake layer, rounded side down, and spread the same amount of frosting over the top.
- Place the third cake layer on top, rounded side up.
Crumb coat:
- Use 1/2 cup (115 grams) of frosting as a crumb coat. Keep the frosting refrigerated until ready to use. And if you ever think it’s not firm enough, place it back in the fridge.
- Spread it all around the cake.
- Place the cake in the freezer for 20-30 minutes after putting on the crumb coat (or 1-2 hours in the fridge). You can also refrigerate it overnight to help break up the workload.
- Then cover with the remaining frosting. Place the cake in the fridge for 4-8 hours, or overnight, so that it’s as firm as possible. How long you need depends on if the cake layers were frozen and if/how long you chilled the frosting before and during the decorating process. With my very warm kitchen and not chilling the cake or the frosting, 4 hours was enough to firm it up. 8 hours would have been better for a cleaner slice.
Make the spiderweb:
- Keep in mind that the marshmallow spiderweb can become wet and sticky over time, so it’s best to serve the cake within a few hours of decorating for optimal taste and texture.2 cups (100 grams) mini marshmallows
- Place the mini marshmallows in a microwave-safe bowl. Microwave on high for about 30-60 seconds, or until the marshmallows are completely melted. Stir well to ensure the marshmallows are smooth and stretchy.
- Allow the melted marshmallows to cool slightly, just until it’s not too hot to handle but still stretchy.
- Put on food-handling gloves, and take a small amount of the melted marshmallow between your fingers. Stretch the marshmallow between your fingers to create thin, web-like strands.
- Gently pull the marshmallow strands across the surface of your frosted cake, wrapping it around the sides and across the top to create a spiderweb effect. You can layer the strands in a crisscross pattern to achieve a more realistic web look.
- If the marshmallows start to harden, you can reheat them briefly in the microwave to regain the stretchiness.
- You can use a toothpick or small tool to help adjust or refine the web strands on the cake if needed.
- Add little plastic spiders. Be aware that they’ll stick to the marshmallow and pull some of it along with the frosting when removed.
- To make slicing through the marshmallow easier, use a serrated knife with a little oil on it, then use a sawing motion to cut the cake.
How to store:
- If you want to make the cake elements in advance, let the layers cool, wrap the layers individually in plastic wrap and place inside a Ziploc bag. They can be stored at room temperature for up to 2 days, refrigerated for 3, or frozen for 3 months. No need to defrost before assembling the cake.
- The frosting can be refrigerated for up to 4 days total or frozen for up to 3 months.
- You can assemble the cake, add the crumb coat and frosting and then freeze it for up to a week. I would wrap it in plastic wrap and then place it in a big bag, just to be safe. The spiderweb should be added as close to serving as possible. If you have any leftovers, it’s safe to refrigerate and freeze the cake with the spiderweb on it, but you probably won’t want to serve it as it’ll be a mess.
Notes
- You can use all-purpose flour, white whole wheat flour or whole wheat flour. If you’re gluten-free, use 2 1/2 cups + 2 tablespoons (363 grams) Bob’s Red Mill 1-to-1 Gluten-free Baking Flour
- To make the chia eggs for this recipe, mix together 3 tablespoons of ground chia seed with 1/2 cup + 1 tablespoon (133 grams) of water until well combined. Let sit for about 1-2 minutes or until goopy like regular eggs.
- You can use whatever type of milk you want. If using canned coconut milk, water it down so that it’s runny like regular milk.
- If you live outside of the US – you likely have a different type of cream cheese than in the US. US cream cheese is firmer and meant for baking, rather than the kind for toast, like in Europe. For 8 ounces (225 grams) of cream cheese, buy a 300-gram package (the stuff at Aldi, Lidl, etc. works just as well as Philadelphia), put it in the center of a clean tea towel or cheesecloth, and squeeze out the liquid until you have 225 grams of cream cheese. So for this recipe, buy 900 grams of cream cheese and squeeze out the liquid until you have 680 grams of cream cheese left. Also note that medium eggs in the EU = US large eggs. So if you’re in the EU, you need medium eggs.
- Make sure to use gel food coloring if not using natural food coloring. Your frosting would come out too runny with regular, liquid food coloring. You’ll likely need around 2-3 teaspoons of gel food coloring to get such a bright orange color.
- I tried this recipe with 2 brands of healthier vegan marshmallows, and it didn’t work. You need to use regular marshmallows.
- Cake base adapted from Hershey’s One Bowl Chocolate Cake
- The nutrition information provided is calculated as a courtesy and is only an estimate. I am not a licensed nutritionist or dietitian. For the most accurate nutritional data, consult a professional or use your preferred calculator.



Get New Recipes In Your Inbox!
Subscribe to get all the latest healthy sweets & treats delivered straight to you!