

Gluten-Free Pumpkin Pie (Easy or Elevated!)
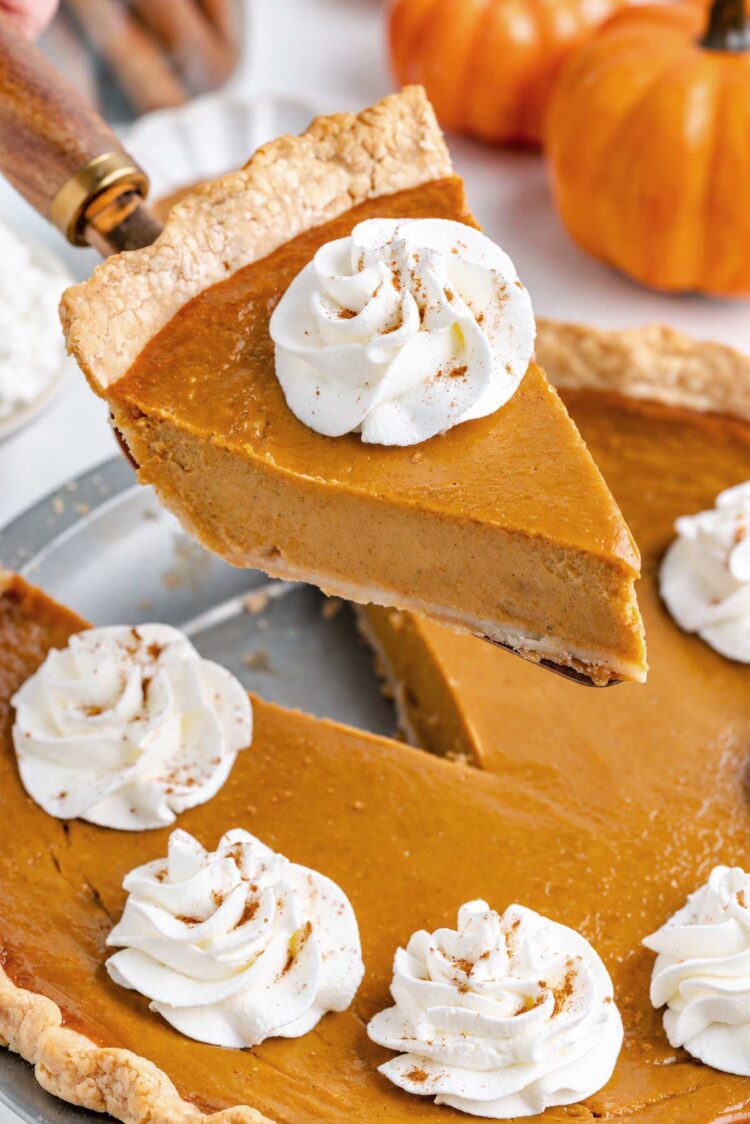
This gluten-free pumpkin pie has a creamy, warmly spiced pumpkin filling and a buttery, flaky crust that tastes just like traditional pie crust (it can also be made with all-purpose flour if you’re not gluten-free!). What makes this recipe different is that I’ve tested four ways to prepare it, and you can choose between an easy, classic pumpkin pie and an elevated version with an especially flaky, crisp crust and more concentrated pumpkin flavor. It also has a dairy-free option.
For the elevated version, I blind-bake the crust and briefly cook the pumpkin mixture on the stovetop before adding the milk and eggs. Or you can skip both steps and bake everything together for a traditional pumpkin pie. Both methods are tested, and I’ll explain why I prefer the elevated one.
I also tested four gluten-free flour blends to make sure you have options when it comes to making the pie crust!
Two Ways to Make This Gluten-Free Pumpkin Pie
The idea for this recipe came from my Crustless Pumpkin Pie. I love how creamy that filling is, thanks in part to cooking the pumpkin mixture on the stovetop before baking.
For this version, I adapted the filling slightly, using evaporated milk instead of heavy cream, and paired it with my super flaky Gluten-Free Pie Crust.
But I wanted to know if the extra steps really made a difference, so I tested four combinations:
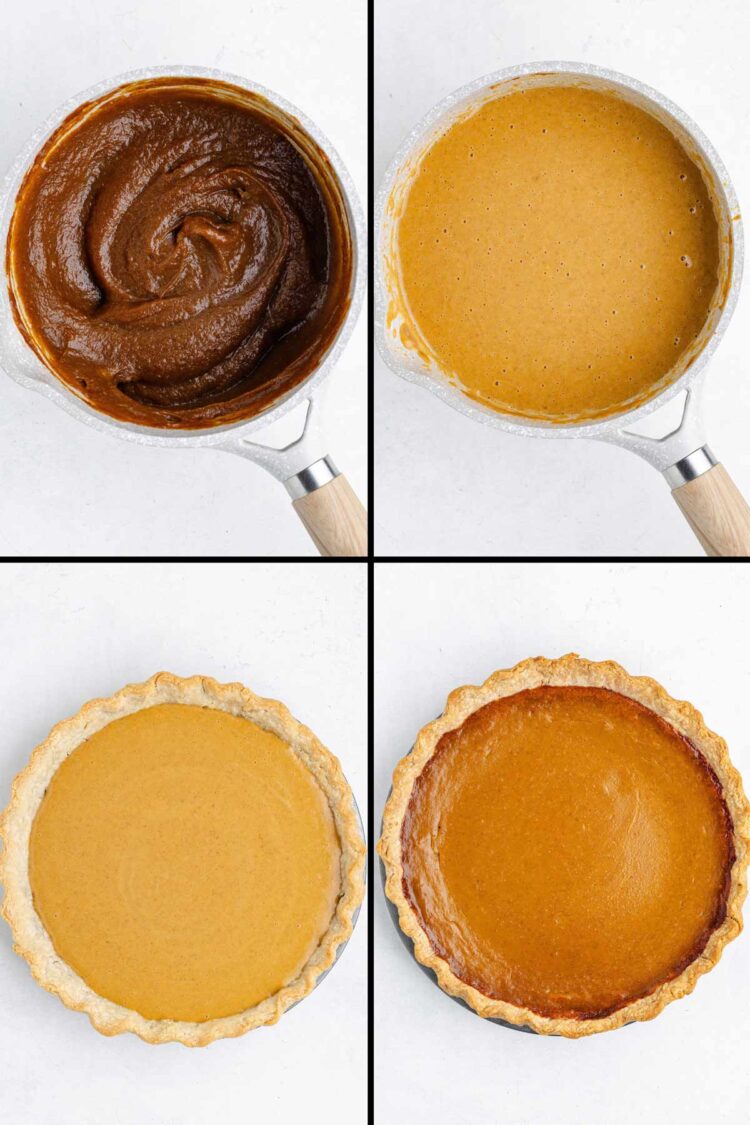
- Blind-baked crust + precooked pumpkin filling
- Blind-baked crust + uncooked pumpkin filling
- Unbaked crust + precooked pumpkin filling
- Unbaked crust + uncooked pumpkin filling
All four methods worked, but my favorite was the first: blind baking the crust and precooking the filling. The two steps complement each other, producing a crisper, flakier crust and a more concentrated pumpkin flavor.
If you’re short on time, you can skip both steps and make a traditional pumpkin pie instead. Both versions use the same ingredients, so you don’t need to change the recipe depending on which method you choose.
Option 1: The Elevated Version (My Favorite)
This is the version I’d recommend for Thanksgiving or whenever you want a pumpkin pie that’s a little more special.
Blind baking makes the crust crisper and flakier. Pumpkin pie filling is very wet, and pouring it into an unbaked crust can prevent the bottom from becoming as crisp as it could be. Baking the crust first gives it time to set and develop flaky layers before the filling goes in.
Precooking concentrates the pumpkin flavor. Cooking the pumpkin puree with the sugars, spices, vanilla and salt for about 5 minutes removes some excess moisture and gives the finished filling a richer, more concentrated flavor. Once the mixture has cooled to lukewarm, the evaporated milk and eggs are added.
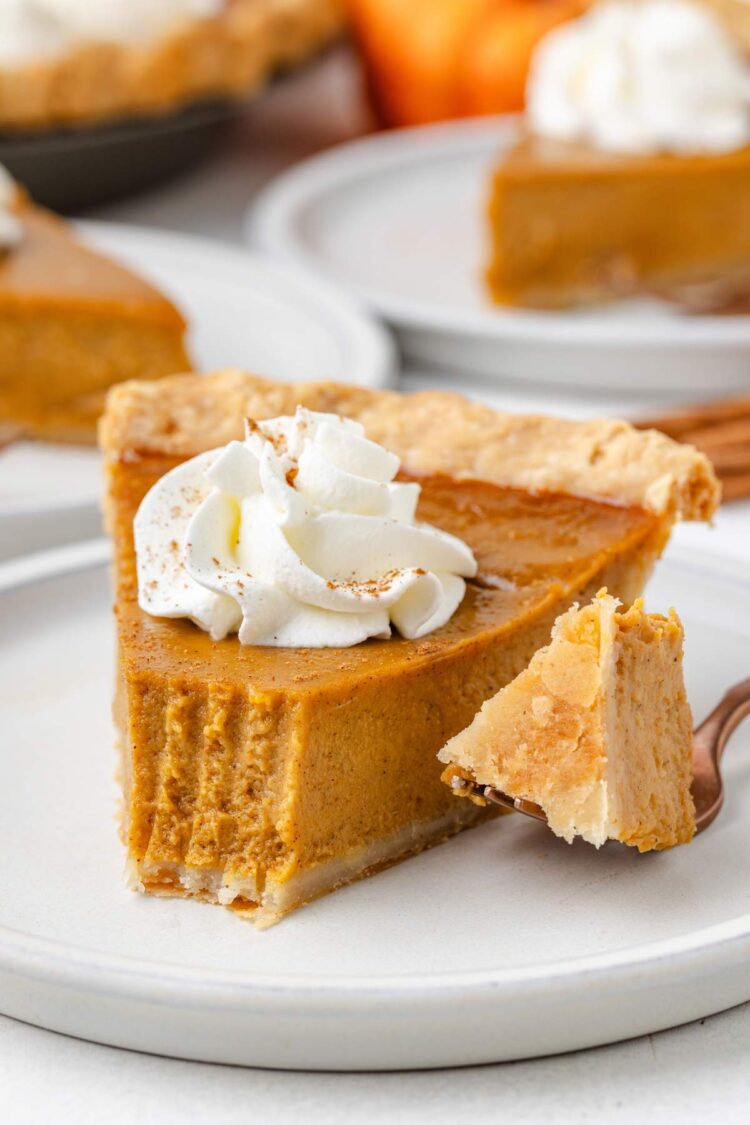
The result is a beautifully creamy pumpkin filling surrounded by crisp, buttery pastry. The contrast between the two textures is what makes this version different from a typical gluten-free pumpkin pie.
It takes a little more effort, but much of the time is hands-off while the crust chills and the pumpkin mixture cools. For me, the difference in the finished pie is absolutely worth it.
Option 2: The Easy, Classic Version
If you’d rather make pumpkin pie the traditional way, I’ve tested that method, too.
Simply prepare and chill the crust, whisk together the filling ingredients without precooking them, pour the filling into the unbaked crust and bake everything together.
You’ll get a classic pumpkin pie with a smooth, creamy filling and a gluten-free pastry crust. The bottom crust won’t be as crisp or flaky, and the filling won’t have the same concentrated pumpkin flavor, but it’s still a very good pie.
If convenience is your priority, choose this version. But if you have a little extra time, I really recommend the elevated method at least once. It’s the combination of the flaky, blind-baked crust and precooked pumpkin filling that makes this recipe different.
Ingredients
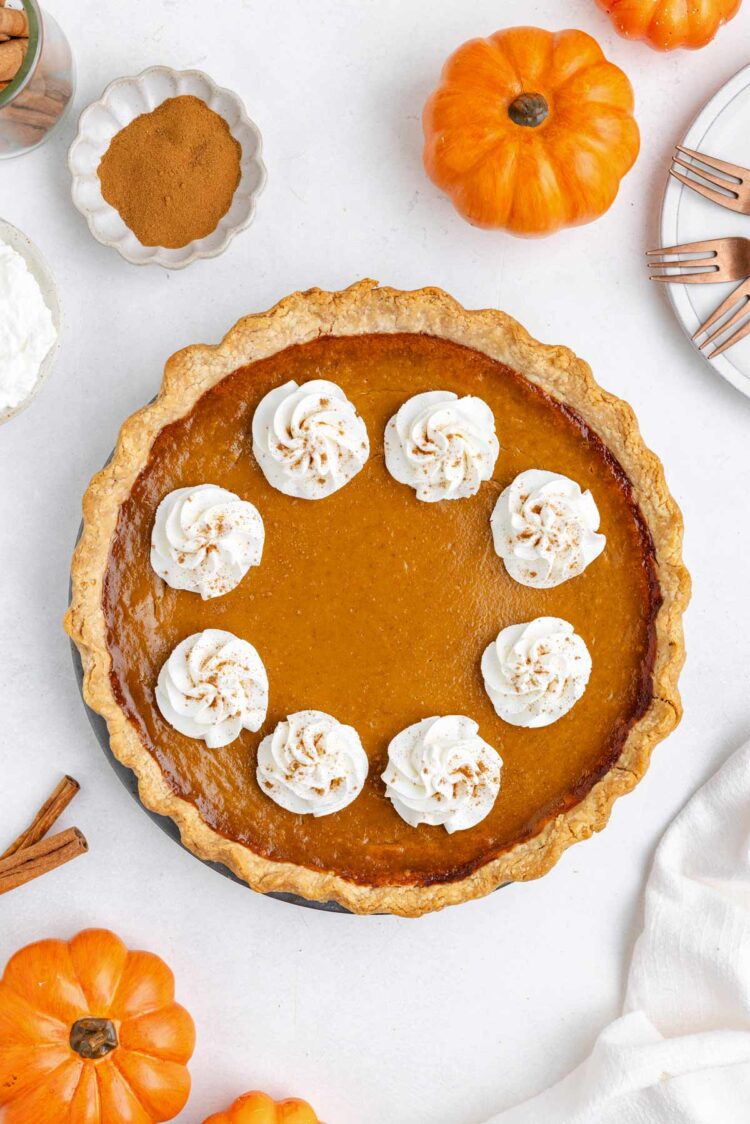
Please scroll down for the full recipe. These are just notes on select ingredients.
- Gluten-free pie crust – you’ll need one recipe of my homemade gluten-free pie crust, linked above. I highly recommend making it with Bob’s Red Mill Gluten Free 1-to-1 Baking Flour for the flakiest results. The crust contains a little sugar and vanilla, making it more flavorful than a plain pastry crust.
- Pumpkin puree – use a 15-ounce (425-gram) can of plain pumpkin puree, not pumpkin pie filling. I recommend canned pumpkin because its consistency is more predictable than homemade puree.
- Granulated and light brown sugar – the mixture of sugars adds sweetness and a little depth of flavor without overwhelming the pumpkin.
- Pumpkin pie spice – 2 1/2 teaspoons provide plenty of warm spice flavor without overpowering the pumpkin.
- Evaporated milk – use one 12-fluid-ounce (354-ml) can of evaporated milk, not sweetened condensed milk. Evaporated milk gives the filling a rich, creamy consistency. For dairy-free, use the same amount of full-fat canned coconut milk.
- Eggs – two large eggs help the filling set into a smooth, sliceable custard. Have them at room temperature, particularly if you’re using the precooked filling method. Egg subs won’t work here. If you need an egg-free Thanksgiving dessert, my Vegan Pumpkin Cheesecake is a rich, creamy make-ahead option that doesn’t require baking.
- Heavy whipping cream – this is just for the decorative topping. For dairy-free, you can use coconut cream or a non-coconut dairy-free whipping cream. See the dairy-free section below for alternatives.
Which Gluten-Free Flour Makes the Flakiest Pie Crust?
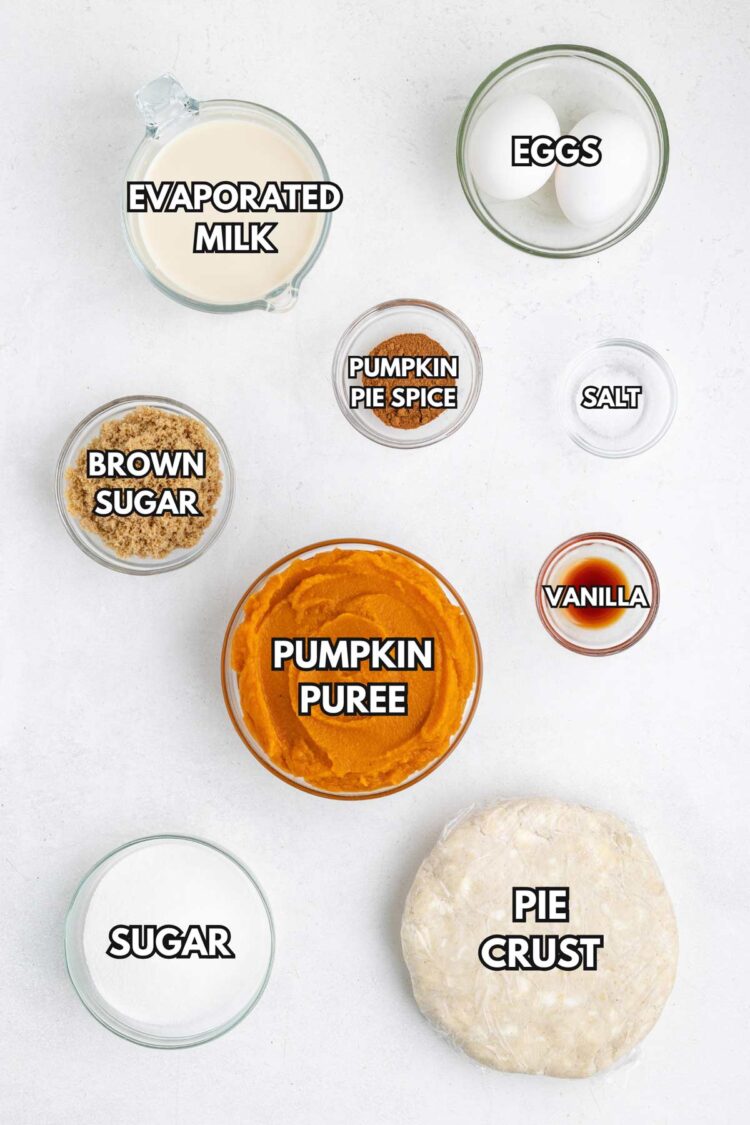
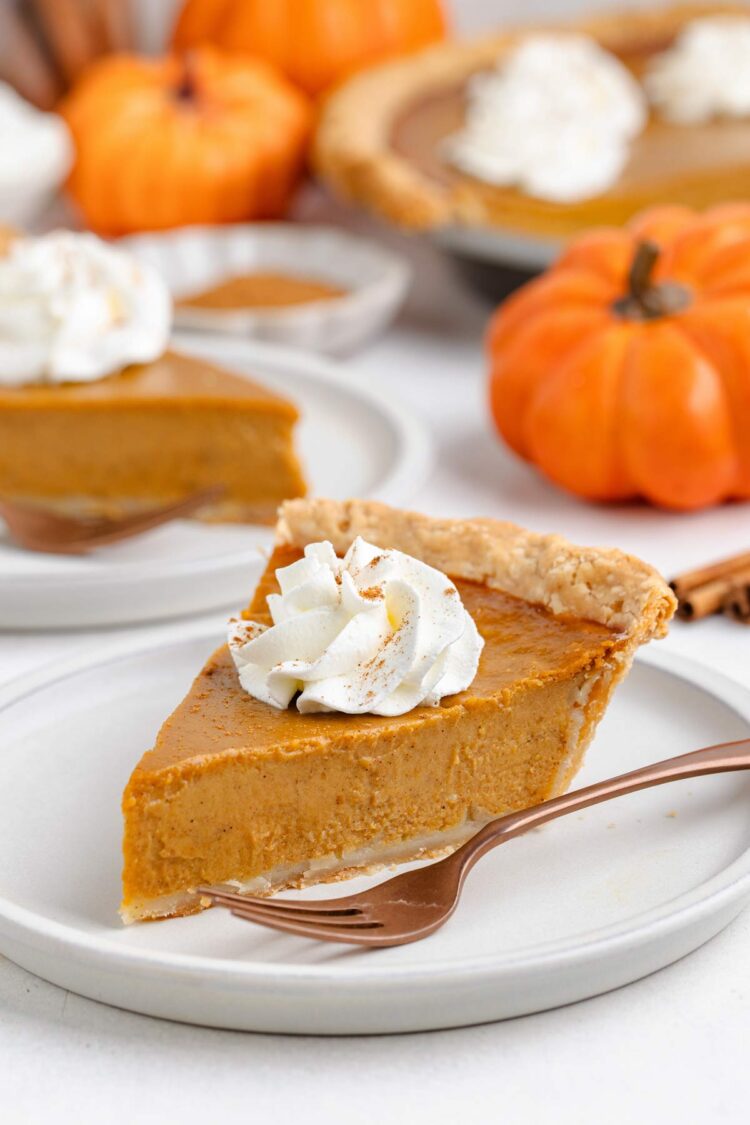
I tested this pie crust with four different gluten-free flour blends, and Bob’s Red Mill was the clear winner. It’s what was used for the pumpkin pie in the photos, and it produced a much flakier crust than any of the others.
- Bob’s Red Mill 1-to-1 Gluten-free Baking Flour – my favorite by far. The crust was buttery, crisp and exceptionally flaky. Even if you have to order it online, I think it’s worth it. Use 173 grams.
- Pillsbury Best Gluten Free Flour Blend – my second choice. The crust cracked a little more than the one made with Bob’s, but it wasn’t a problem. It tasted great, although it wasn’t nearly as flaky. Use 193 grams.
- Arrowhead Mills Gluten Free All-Purpose Flour – this one had a more shortbread-like texture than the others. It wasn’t nearly as flaky as the Bob’s version. Use 170 grams.
- King Arthur Gluten-Free Measure for Measure Flour – this version worked, but it was my least favorite. The crust wasn’t nearly as flaky as the Bob’s version, and it tasted and felt more noticeably gluten-free. Use 157 grams.
The gram amounts are different for each brand because gluten-free flour blends don’t all weigh the same by volume. These quantities are for one single pie crust, so be sure to use the weight listed for your particular flour blend rather than substituting the same number of grams.
All four blends worked, so you don’t have to abandon your pumpkin pie plans if you can’t get Bob’s Red Mill. But if you want the wonderfully flaky crust shown in the photos, that’s definitely the one I’d choose.
If you’re planning a gluten-free Thanksgiving dessert menu, my Gluten-Free Apple Pie is another great choice for anyone who loves flaky pastry. It has a double crust, a thick cinnamon-spiced apple filling and a dairy-free option.
What Kind of Pie Plate Is Best?
I recommend a metal pie plate for this gluten-free pumpkin pie, particularly if you’re making the elevated version.
Metal conducts heat efficiently, helping the bottom crust brown and become crisp. That’s particularly helpful with a wet filling like pumpkin custard.
A metal pie plate can also go straight from the freezer into the hot oven, which makes it ideal for blind baking a thoroughly chilled crust.
Glass and ceramic heat differently, and the bottom crust may not brown in quite the same way. More importantly, putting a frozen glass pie plate directly into a hot oven can cause it to shatter because of thermal shock.
Use a standard 9-inch (23-cm) metal pie plate rather than a deep-dish one. A deep-dish plate will give you a shallower filling layer and can change the baking time.
- Choose Bob’s Red Mill for the flakiest crust – of the four gluten-free flour blends I tested, it gave the best texture by far.
- Don’t skip chilling the dough – keeping the fat cold helps the crust develop flaky layers in the oven. Follow the refrigeration and freezing directions rather than rushing them.
- Preheat the baking sheet – placing the pie on a hot baking sheet helps transfer heat to the bottom of the pie plate.
- Don’t overbake the crust during blind baking – the bottom should be dry and just starting to brown. It will continue baking after the filling is added.
- Look for a gentle jiggle – the center should wobble like Jell-O rather than move like liquid. Waiting until it’s completely firm can lead to an overbaked, cracked filling.
How to Make It Dairy-Free
I used Violife plant-based butter in place of the regular butter in my gluten-free pie crust recipe.
You also replace the 12-fluid-ounce (354-ml) can of evaporated milk with the same volume of well-stirred, full-fat canned coconut milk. Use the thick coconut milk sold in cans, not the much thinner coconut milk sold in cartons for drinking.
Although coconut milk has its own distinctive flavor, the pumpkin and spices cover it up in the finished filling. I don’t notice a coconut taste in the pie itself.
Don’t use a thin plant-based milk, such as almond milk, as a direct substitute. It won’t provide the same richness as evaporated milk or full-fat coconut milk. It might not even set up properly.
Dairy-Free Whipped Cream
For the topping, you can use chilled coconut cream, provided it’s a brand that whips well enough to hold its shape.
While you can’t taste coconut in the pie filling, you can taste it in whipped coconut cream. If you don’t want your pumpkin pie topping to taste like coconut, I recommend using something else.
Good alternatives include:
- Oat- or soy-based whipping cream – look for a plant-based cream specifically made for whipping. Ordinary plant-based cooking cream generally won’t whip into stiff peaks. Check that the product is labeled gluten-free if needed.
- Ready-made dairy-free whipped topping – choose a non-coconut version and check the ingredients carefully, since some products contain milk-derived ingredients.
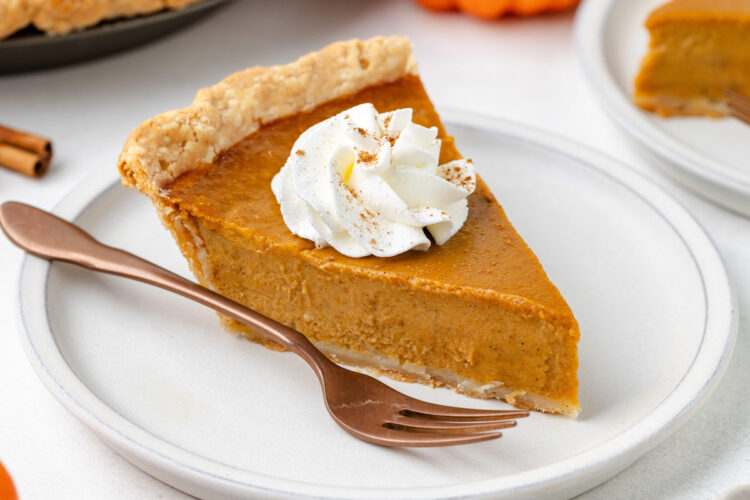
If you want the piped rosettes shown in the photos, use a dairy-free whipping cream that can hold stiff peaks. A softer topping is better spooned onto individual slices.
Check that all replacement products are gluten-free as well as dairy-free.
Troubleshooting
Why Is My Pie Crust Rubbery?
If you taste the crust while the pie is still warm, it can seem rubbery even when you’ve baked it correctly. I had this happen, but the rubbery texture disappeared after the pie had cooled and rested for several hours.
That’s why I recommend cooling the pie completely and refrigerating it for at least 4 hours before serving, rather than judging the texture straight from the oven.
If the crust is still wet or doughy after chilling, it may have been underbaked. Using a metal pie plate and blind baking the crust can help prevent that.
Why Did My Pumpkin Pie Crack?
Pumpkin pie is a custard, and custards can crack when they’re overbaked.
Remove the pie while the outer filling is set but the center still has a gentle wobble. It will continue to firm up as it cools.
A small crack doesn’t affect the flavor, and you can easily cover it with whipped cream.
How Do I Know When the Filling Is Done?
The outer portion of the filling should look set, while approximately the center 3-4 inches (8-10 cm) still jiggle gently when you nudge the pie.
Think of the way Jell-O moves when you shake it. That’s the kind of wobble you want, rather than a loose, liquid movement.
If the center still sloshes, bake for another 5 minutes and check again. Don’t wait for the center to become completely firm.
What if My Pie Crust Cracks During Blind Baking?
Gluten-free dough can be more delicate than traditional wheat-based dough, so small cracks are possible.
I’ve even baked the crust a little too long during testing, causing it to crack, and the finished pie was still fine. The filling didn’t seep through.
That doesn’t mean you should deliberately overbake it, but there’s no need to panic over a small crack. Just be sure the crust has cooled for at least 10-15 minutes before you fill it.
Make Ahead & Storage
- Make the dough ahead – the gluten-free pie dough can be prepared and refrigerated for up to 2 days before rolling.
- Bake the pie a day ahead – this is my preferred way to make it for Thanksgiving. It needs several hours to cool and chill anyway, and making it the day before gives the filling time to set fully.
- Refrigerate – cover the fully cooled pie and refrigerate for up to 3 days. Keep it refrigerated until serving.
- Decorate before serving – for the best-looking whipped cream rosettes, whip the cream and decorate the chilled pie shortly before serving.
- Freezing – I haven’t tested freezing the finished pie. Custard fillings and flaky gluten-free pastry can change texture after freezing and thawing, so I’d recommend refrigerating the pie instead if you’re making it for an important occasion.
- More Gluten-Free Thanksgiving Desserts For something easier, try my Gluten-Free Pecan Pie. It has a simple press-in oat flour crust instead of rolled pastry, and it can also be made dairy-free.
- My Gluten-Free Pumpkin Cheesecake has a super creamy filling and a homemade oatmeal cookie crust, so you don’t need gluten-free graham crackers.
- These Gluten-Free Pumpkin Bars are soft, fluffy and topped with cream cheese frosting. They’re also a great make-ahead option for Thanksgiving.
- My Cranberry Apple Crisp combines sweet apples, tart cranberries and a generous crumb topping. It can be made gluten-free, dairy-free and vegan, and prepared two days ahead.
Whether you choose the easy method or take the extra steps for the elevated version, I hope this gluten-free pumpkin pie earns a place on your Thanksgiving table. If you have the time, I really recommend trying the blind-baked crust and precooked filling. The contrast between the flaky pastry and creamy pumpkin filling is worth it!
Gluten-free Pumpkin Pie
Ingredients
Crust:
- 1 1/4 cups (173 grams) Bob's Red Mill Gluten Free 1-to-1 Baking Flour, plus more for rolling see notes for other options
- 1 tablespoon granulated sugar
- 1/2 teaspoon fine sea salt
- 1/2 cup (113 grams) unsalted butter, cold and cut into 8 pieces see notes for the dairy-free version
- 1 teaspoon cold vanilla extract
- 1/2 teaspoon cold apple cider vinegar
- 2 1/2 to 5 1/2 tablespoons (37-81 grams) cold water
Pumpkin Filling:
- 1 can (15 ounces / 425 grams) pumpkin puree
- 1/2 cup (100 grams) granulated sugar
- 1/4 cup (50 grams) packed light brown sugar
- 2 1/2 teaspoons pumpkin pie spice
- 1 teaspoon vanilla extract
- 1/4 teaspoon salt
- 1 can (12 ounces / 355 ml) evaporated milk
- 2 large eggs 50 grams each out of shell, room temperature
Decoration:
- 2/3 cup (160 ml) cold heavy whipping cream
- 1 tablespoon powdered sugar
- 1/4 teaspoon vanilla extract
- pumpkin pie spice for dusting
Instructions
Prepare the Crust (Both Versions):
- In a food processor fitted with an S-blade, pulse together the flour, sugar and salt. Add the cold butter and process on the lowest speed until pea-sized pieces remain. Do not overprocess.1 1/4 cups (173 grams) Bob's Red Mill Gluten Free 1-to-1 Baking Flour, plus more for rolling, 1 tablespoon granulated sugar, 1/2 teaspoon fine sea salt, 1/2 cup (113 grams) unsalted butter, cold and cut into 8 pieces
- Drizzle the cold vanilla and vinegar over the mixture. With the processor on low, add 2 1/2 tablespoons of cold water. Process briefly until the dough looks shaggy and holds together when pinched. Add additional water, 1 teaspoon at a time, only as needed. Do not process into a smooth ball.1 teaspoon cold vanilla extract, 1/2 teaspoon cold apple cider vinegar, 2 1/2 to 5 1/2 tablespoons (37-81 grams) cold water
- Transfer to plastic wrap, shape into a disc about 1 inch (2.5 cm) thick, wrap and refrigerate for at least 45 minutes or up to 2 days.
- Lightly flour a sheet of parchment paper and place the unwrapped dough on it. Dust lightly with flour, cover with plastic wrap or another sheet of parchment and roll into a circle about 1/2 inch (1.25 cm) wider than the rim of a standard 9-inch (23-cm) pie plate.
- Remove the upper covering, invert an ungreased 9-inch (23-cm) metal pie plate over the dough and flip both together. Remove the parchment and gently fit the dough into the bottom and sides without stretching. Fold the overhang under and flute the edges or press with a fork. Do not prick the bottom.
Method 1: Elevated Version
- Loosely cover the shaped crust and freeze for 15–20 minutes.
- Meanwhile, combine the pumpkin puree, both sugars, pumpkin pie spice, vanilla and salt in a medium saucepan. Heat over medium until steaming, then cook for about 5 minutes, stirring frequently and scraping the bottom, until slightly thickened. Remove from the heat and cool to lukewarm, stirring occasionally. Do not add the evaporated milk or eggs yet.1 can (15 ounces / 425 grams) pumpkin puree, 1/2 cup (100 grams) granulated sugar, 1/4 cup (50 grams) packed light brown sugar, 2 1/2 teaspoons pumpkin pie spice, 1 teaspoon vanilla extract, 1/4 teaspoon salt
- Preheat the oven to 400 °F (205 °C) with a baking sheet on the lower-third rack.
- Line the frozen crust with parchment paper and fill with pie weights or dried beans. Place on the hot baking sheet and bake for 20–23 minutes, until the edges are lightly browned.
- Carefully remove the parchment and weights and bake for another 5–7 minutes, until the bottom looks dry and is just beginning to brown. Remove the crust and reduce the oven temperature to 350 °F (175 °C), leaving the baking sheet inside.
- Once the pumpkin mixture is lukewarm, stir in the evaporated milk, then whisk in the eggs one at a time until evenly combined. The mixture must not be hot when adding the eggs.1 can (12 ounces / 355 ml) evaporated milk, 2 large eggs
- Allow the crust to cool for at least 10–15 minutes before pouring in the filling. If any filling doesn’t comfortably fit, bake the extra in a separate oven-safe ramekin.
- Place the pie on the hot baking sheet and bake at 350 °F (175 °C) for 45–55 minutes. The outer filling should be set, while the center 3–4 inches (8–10 cm) jiggle gently like Jell-O, not slosh like liquid. Shield the crust edges with foil if needed.
- Transfer to a wire rack and cool completely, about 2–3 hours, then refrigerate for at least 4 hours before serving.
Method 2: Quick Classic Pumpkin Pie
- Refrigerate the shaped, unbaked crust for at least 15 minutes. Do not blind bake.
- Preheat the oven to 425 °F (220 °C), with a baking sheet on the lower-third rack.
- In a large mixing bowl, whisk together the pumpkin puree, both sugars, pumpkin pie spice, vanilla and salt. Whisk in the evaporated milk, followed by the eggs, until evenly combined. No precooking is necessary.1 can (15 ounces / 425 grams) pumpkin puree, 1/2 cup (100 grams) granulated sugar, 1/4 cup (50 grams) packed light brown sugar, 2 1/2 teaspoons pumpkin pie spice, 1 teaspoon vanilla extract, 1/4 teaspoon salt, 1 can (12 ounces / 355 ml) evaporated milk, 2 large eggs
- Pour the filling into the chilled crust. Place on the hot baking sheet and bake at 425 °F (220 °C) for 15 minutes. Without removing the pie, reduce the oven temperature to 350 °F (175 °C) and continue baking for approximately 40–50 minutes, until the outer filling is set and the center 3–4 inches (8–10 cm) jiggle gently like Jell-O, not slosh like liquid. Shield the crust edges with foil if needed.
- Transfer to a wire rack and cool completely, about 2 hours, then refrigerate for at least 4 hours before serving. The crust can seem rubbery while warm, but the texture improves after cooling and chilling. The pie is best made a day ahead. Refrigerate, covered, for up to 3 days. Add whipped cream shortly before serving.
Decoration and Storage (Both Versions):
- Shortly before serving, combine the cold heavy cream, powdered sugar and vanilla in a mixing bowl. Beat with an electric mixer, starting on low speed and gradually increasing to high, until stiff peaks form. Do not overbeat.2/3 cup (160 ml) cold heavy whipping cream, 1 tablespoon powdered sugar, 1/4 teaspoon vanilla extract
- Transfer the whipped cream to a piping bag fitted with a Wilton 1M or similar large open-star tip. Pipe 8 large rosettes around the edge of the chilled pie and lightly dust with pumpkin pie spice.
- For the cleanest slices, cut the pie while cold, using a sharp knife and wiping the blade between cuts.
Notes
- Dairy-free – use 113 grams Violife plant-based butter in the crust with approximately 3 tablespoons (plus more, if needed) cold water. Replace the evaporated milk with 12 fluid ounces (354 mL) full-fat canned coconut milk. Use coconut cream or a non-coconut dairy-free whipping cream for the topping. The pie itself doesn’t taste noticeably of coconut, but coconut whipped cream does.
- Flour – Bob’s Red Mill (173 grams) produced the flakiest crust and was used in the photos. Other tested options are Pillsbury Best (193 grams), Arrowhead Mills (170 grams) and King Arthur Measure for Measure (157 grams). Pillsbury was my second choice. Arrowhead had a more shortbread-like texture. King Arthur was my least favorite but still does the job.
- European butter – use 110 grams butter plus 3 grams additional cold water instead of 113 grams butter.
- Pie plate – a standard 9-inch (23-cm) metal pie plate is best for a crisp bottom crust and safe freezer-to-oven transfer.
- The nutrition information provided is calculated as a courtesy and is only an estimate. I am not a licensed nutritionist or dietitian. For the most accurate nutritional data, consult a professional or use your preferred calculator. The values given don’t include the whipped cream.




Get New Recipes In Your Inbox!
Subscribe to get all the latest healthy sweets & treats delivered straight to you!