

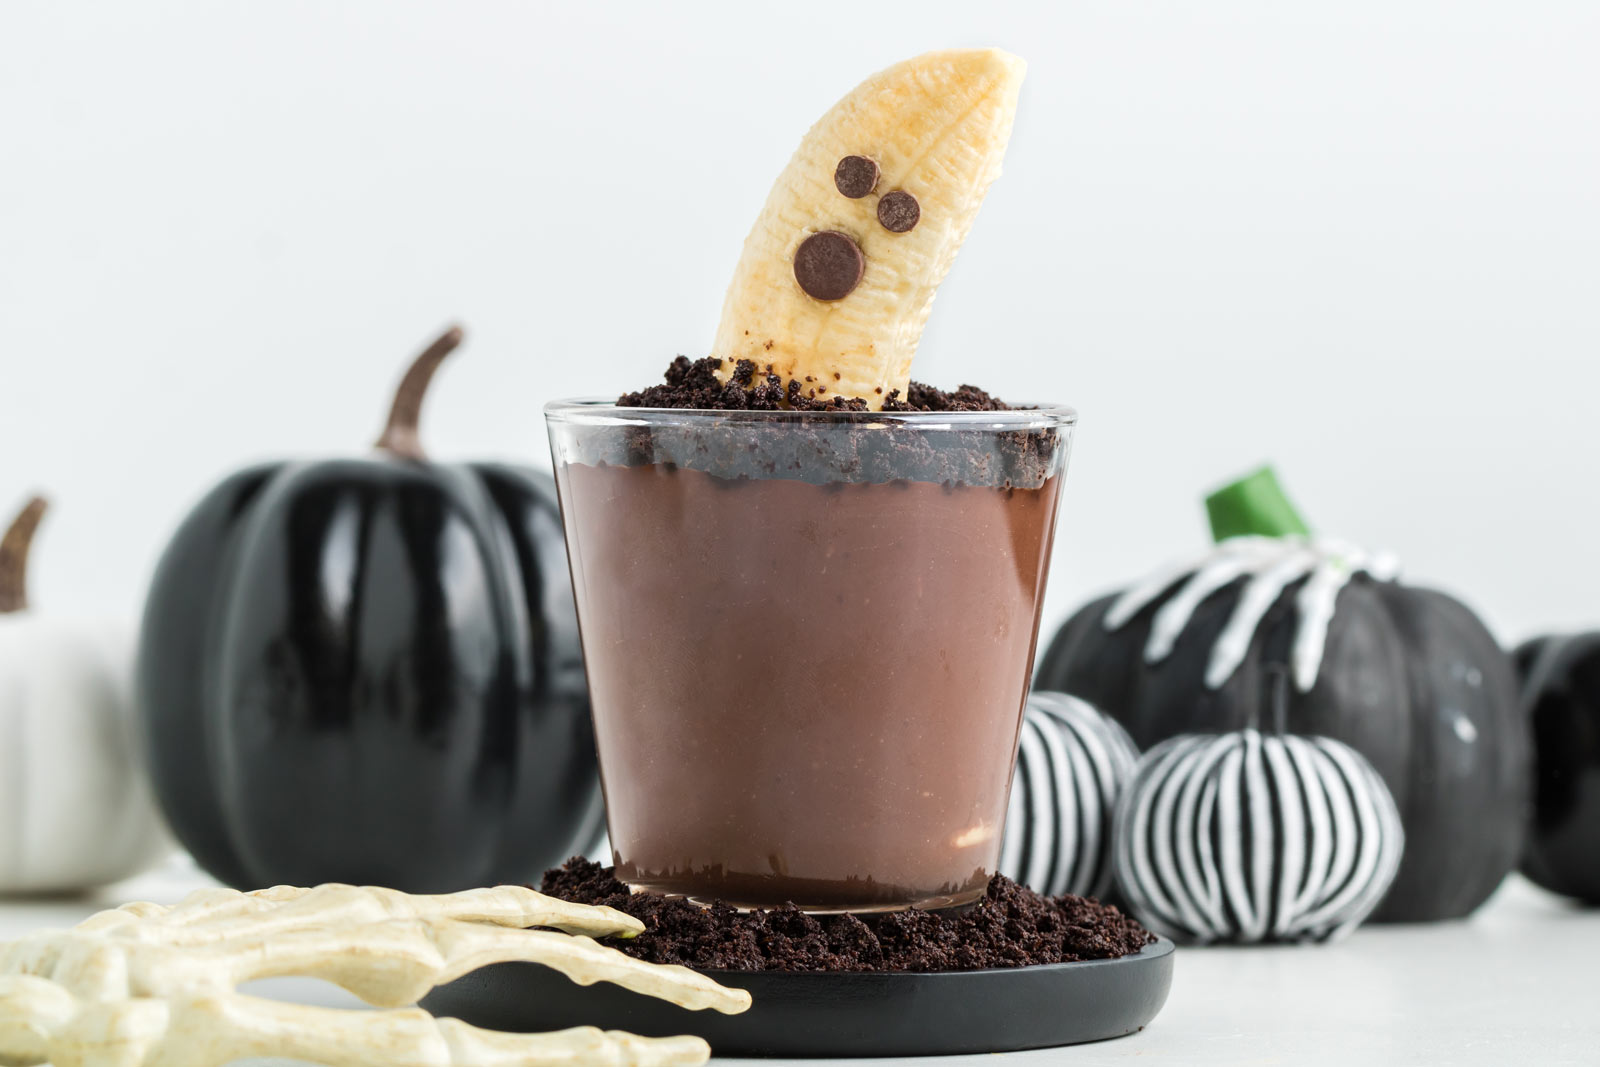
Halloween Dirt Cups
These Halloween dirt cups are easy to make with rich and creamy chocolate pudding, homemade chocolate cookie crumbs, and banana ghosts to treat kids of all ages. They’re also easy to make gluten-free and paleo. The recipe is vegan as written, but regular milk and butter can be used, if preferred.
I’m having lots of fun with my Halloween recipes this year. I posted these ghostly Gluten-free Halloween Cupcakes and these Gluten-free Mummy Hand Pies recently, and today we’ve got this delicious dirt pudding.

This recipe combines two recipes plus some extra ingredients to make it Halloween-y. First, I started with this Gluten-free Pudding as the main ingredient. It’s a super simple recipe with basic ingredients, but if you don’t want to make that recipe, you can make any pudding you’d like. I list some alternatives below.
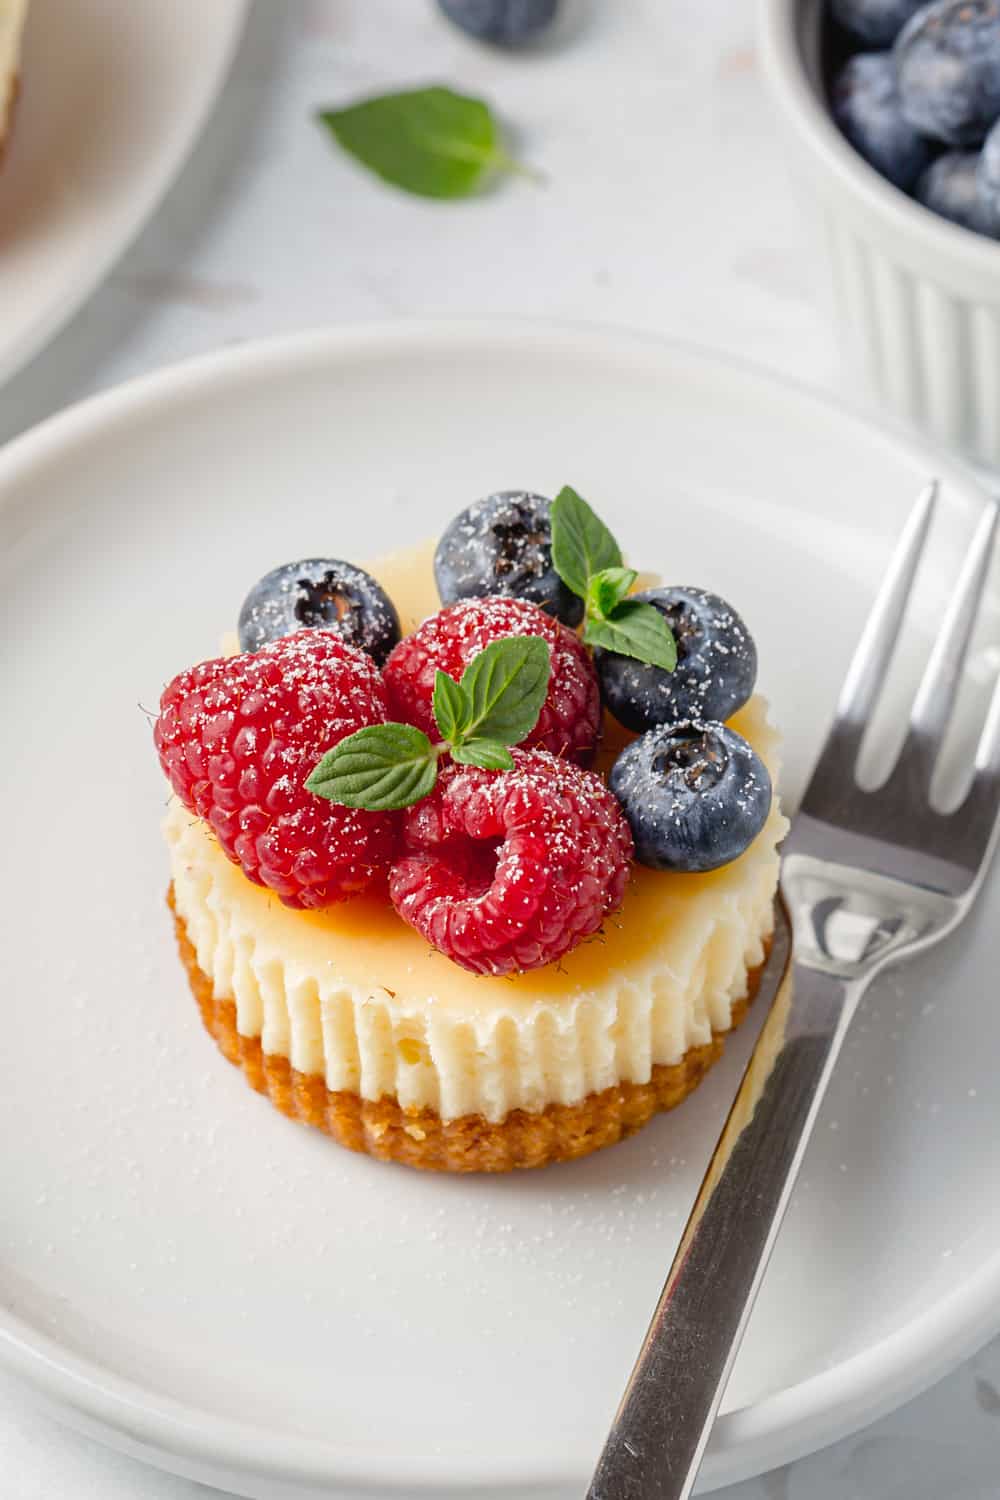
For the chocolate cookie crumbs, I used the base of these Mini Irish Cream Cheesecakes, which, by the way, are perfect individual holiday treats!
By combining the two recipes and adding the banana and chocolate chips for the face, you’ve got healthy Halloween treats without having to use a lot of tricks in the kitchen.

Ingredients
- Coconut sugar – you can use brown sugar in the pudding, if you prefer, but I think coconut sugar is better for the cookie crumbs. It results in a more crumbly texture.
- Cocoa powder – I used Dutch-process because it has a great, dark, chocolaty taste. Natural cocoa powder, like Hershey’s, would also work.
- I do not recommend raw cacao powder! Check out this post if you’re interested in the difference between → Cacao vs. Cocoa.
- Cornstarch – if you don’t want to use cornstarch, then you could use my Chocolate Chia Pudding recipe, which doesn’t have any starch, or my Vegan Chocolate Pudding, which calls for arrowroot starch, instead of the recipe below.
- Milk – you can use any kind of milk you like. I used cashew milk.
- The pudding is pretty rich, but if you like it even more luscious, you can use canned coconut milk instead. If you’re not vegan, you can, of course, use regular dairy milk.
- Coconut oil – if you don’t want any coconut flavor, then use refined coconut oil. If you don’t mind the coconut taste, then you can use unrefined.
- If you’re not vegan, you can use butter for both the filling and crust instead of coconut oil.
- Flour – I’ve tested the crumbs with buckwheat flour, coconut flour, King Arthur Flour Gluten-free Measure for Measure Flour and Bob’s Red Mill Gluten-free 1-to-1 Baking Flour. They all worked equally well! If you’re not gluten-free, then you can use all-purpose flour, white whole wheat flour or regular whole wheat flour.

- Bananas – these form the body of the ghost. I can’t think of anything that would work in their place.
- Chocolate chips – these form the face. Make sure to use paleo or vegan chocolate, if needed.
- Vanilla + salt
- Optional – gummy worms – Project 7 Sour Worms are a great vegan option for these dirt cups. You may also see them sold as Joyride Sour Gummy Worms.
If you don’t need them to be vegan, the ingredients in SmartSweets Gummy Worms aren’t that bad. There aren’t any paleo gummy worms that you can buy, but these Homemade Paleo Gummy Worms use all-natural ingredients, and the red ones would look really great in these dirt cups!
How to make dirt cups
First, you make the pudding. By the way, it’s really important not to taste it with a spoon and put it back in the pudding! It’ll make the pudding break down into a runny mess.
While that’s cooling and chilling, prepare the crust.
First, mix all your dry ingredients together.

Then add the coconut oil and vanilla. Mix until totally combined.

Pat it into the pan.
If it’s sticky and you’re having issues, then wash your hands (assuming they have bits of dough on them), leave them a bit wet, and pat the dough down. That should work better.

When you remove the cookie base from the oven, it’ll look crazy. Some parts may be bubbling, while others may be completely greasy and wet. It’s a mystery. Once it cools, it firms up.
Let it cool, and then use the bottom of a flat glass to crush the crust to form crumbs. Or remove the crust from the pan, and use a rolling pin. Whatever you like!

Right before serving, it’s time to make the ghosts. If you’re making these dirt cups for a party, it’s fine to have them sit out for a few hours. I’m sure they’ll be grabbed up fast!
The first time I made a ghost, I cut the banana too small, and the face was too low. To avoid this mistake, hold the banana up to the serving cup, and cut it according to the size of the cup.
Regular dirt cups use Cool Whip to lighten the pudding, and that’s why you usually see them layered. I tried layering the pudding cups using 1/4 cup pudding, 1 tablespoon of crumbs, and more pudding + crumbs, but the pudding wasn’t thick enough and covered up the crumbs.
So I put the banana ghost into the pudding and sprinkled 1 tablespoon of crumbs around that. If you add the crumbs before adding the banana, the banana pushes down most of them into the pudding.

How to make ahead of time
The pudding and crumbs can be prepared up to 4 days in advance. Refrigerate the pudding in an airtight container.
Crush the crust to form crumbs, and then store them in an airtight container.
Then, right before serving, cut up the bananas to make the ghosts.
Paleo option
All you have to do is leave out the gummy worms (or use the homemade recipe I linked to above, where I talked about ingredients) and use 3 tablespoons of coconut flour instead of normal flour in the cookie crust.
Make sure to use coconut sugar and coconut oil, as listed in the recipe, instead of brown sugar and butter.
And also use paleo chocolate chips and use one of these pudding recipes: Chocolate Chia Pudding or Vegan Chocolate Pudding.

Other healthier Halloween treats
I have loads of fall recipes! Here are some of my favorite healthier treats for Halloween.
- These Whole Wheat Witch Fingers are terrifically spooky! They’re made with a simple strawberry jam for a spooky effect with a gluten-free option.
- This Halloween Cake with Eyeballs is the scariest recipe I have. If you want to spook your friends, this cake will definitely do it. Gluten-free and egg-free options.
- This Pumpkin Fudge is super quick and easy to make with just 4 ingredients, and it’s no cook! Can be made vegan or dairy-free.

- These Spider Cupcakes for Halloween are super cute! They’re made with a pumpkin cupcake base and cream cheese frosting. Inludes grain-free, gluten-free, whole grain, and all-purpose flour options.
- These Mini Pumpkin Cheesecakes never fail! Made in a muffin tin, they’re super easy to make with a chocolate cookie crust and are perfect mini-desserts for the season. Can be made with gluten-free, whole wheat or all-purpose flour.
- These adorable Frankenstein Cupcakes are one of my latest Halloween treats on my other blog, Easy Wholesome. They can be made traditionally or a little healthier. I used all-natural food colors for that sweet green face of Frankenstein. Gluten-free option.
I hope you get a kick out of these Halloween dirt cups! Enjoy. :)

Halloween Dirt Cups
Ingredients
For the pudding:
- 1/2 cup (100 grams) coconut sugar or brown sugar
- 1/4 cup (29 grams) Dutch-process cocoa powder
- 1/4 cup (31 grams) cornstarch
- 1/4 teaspoon salt
- 2 3/4 cups (650 ml) milk of choice
- 2 tablespoons (28 grams) refined coconut oil
- 1 teaspoon vanilla extract
For the crumbs:
- 1/2 cup (100 grams) coconut sugar
- 1/2 cup (62 grams) flour see notes
- 1/2 cup (58 grams) Dutch-process cocoa powder
- 1/8 teaspoon salt
- 5 1/2 tablespoons (77 grams) refined coconut oil soft
- 1 teaspoon vanilla extract
To assemble:
- Pudding
- Crumbs
- 3 (or 5) bananas
- 10 vegan chocolate chips mini + 5 regular-sized
Instructions
Prepare the pudding:
- Combine the coconut sugar, cocoa powder, cornstarch and salt in a medium saucepan until no lumps remain.1/2 cup (100 grams) coconut sugar, 1/4 cup (29 grams) Dutch-process cocoa powder, 1/4 cup (31 grams) cornstarch, 1/4 teaspoon salt
- Stir in the milk, turn the heat to medium, and while stirring occasionally, bring to a simmer.2 3/4 cups (650 ml) milk
- Let simmer for up to about a minute or until the pudding coats the back of a spoon. Do not let it simmer too long or it’ll break down later. It’s important to not taste the pudding with a spoon and put it back in the pudding! It’ll make the pudding break down into a runny mess.
- Remove the pan from the heat and stir in the coconut oil and vanilla extract. Let cool to room temperature, stirring every 15 minutes or so, then place plastic wrap over the pudding to prevent a skin from forming. Let chill for about 2-3 hours. While it’s chilling, prepare the crumbs.2 tablespoons (28 grams) refined coconut oil, 1 teaspoon vanilla extract
- Store covered in the fridge for up to 4 days.
Prepare the crumbs:
- Preheat the oven to 350°F (175 °C) and line an 8"x8" pan with a piece of parchment paper. Note that this crust recipe does not work as a regular pie crust, so don't try using it in a pie pan.
- In a large mixing bowl, mix together the sugar, flour, cocoa powder, and salt. Stir in the coconut oil and vanilla with a large spoon until well combined. If you have difficulties incorporating the oil, use your hands. It’ll be dry and crumbly, possibly sticky.1/2 cup (100 grams) coconut sugar, 1/2 cup (62 grams) flour, 1/2 cup (58 grams) Dutch-process cocoa powder, 1/8 teaspoon salt, 5 1/2 tablespoons (77 grams) refined coconut oil, 1 teaspoon vanilla extract
- Press the mixture onto the bottom of the prepared pan. If it’s sticky and you’re having issues, then wash your hands (assuming they have bits of dough on them), leave them a bit wet and pat the dough down.
- Bake for 10 minutes. When you remove it from the oven, it might look crazy. Some parts may be bubbling, some parts may totally greasy and wet. Once it cools, it firms up.
- Let cool completely, about 1 hour, and then use a glass to smash the crust to form the cookie crumbs.
Assemble the dirt cups:
- Do this right before serving so that your bananas don’t start to brown. If you’re making them for a party, it’s fine to have them sit out for a few hours.
- Place some pudding in a clear serving cup/small glass. I used ½ cup of pudding.
- The ghost will go from the bottom of the cup and peek out about 2-3”. Cut off a bit from the banana – however much you need in order to create a nice ghost.
- Stick in 2 mini chocolate chips for eyes and 1 regular-sized chocolate chip for the mouth.
- Stick the banana ghost into the pudding.
- Sprinkle 1 tablespoon of crumbs around the ghost.
- Repeat for the remaining 4 dirt cups.
- Serve immediately. If you want to make them in advance, the pudding and crumbs can be made 4 days ahead of time. Then right before serving, make the ghosts and assemble the dirt cups.
Notes
- Note that it’s best to weigh coconut sugar! Some brands are light and coarse and some brands (like the one I use) are very fine and dense.
- I used unsweetened cashew milk. If you’re not vegan, you can use regular whole milk.
- I used refined coconut oil because I didn’t want any coconut flavor. If you don’t mind coconut flavor, you can use unrefined coconut oil.
- Flour – I’ve tested the crumbs with buckwheat, with King Arthur Flour Gluten-free Measure for Measure Flour and Bob’s Red Mill Gluten-free 1-to-1 Baking Mix. They all worked equally well! If you’re not gluten-free, then you can use all-purpose flour, white whole wheat flour or regular whole wheat flour. For a paleo version, you can use 3 tablespoons (24 grams) of coconut flour instead of the aforementioned options.
- If your coconut oil is melted at room temp, put it in the fridge for a few minutes – if yours is super firm, then put it in the microwave at half power for maybe 10 seconds.
- If you want the best-looking ghosts, make sure to have 5 bananas so that you can choose the best end of each banana. If you don’t care so much about how the ghosts look, then you can use both ends of 3 bananas.
- The pudding recipe yields 2 1/2 cups of pudding. I used 1/2 cup per dirt cup, so I got a yield of 5 dirt cups. If you use a different pudding recipe, pay attention to how much it yields.
- For paleo, make sure to use paleo chocolate chips and one of these pudding recipes: Chocolate Chia Pudding or Vegan Chocolate Pudding.
- The nutrition information provided is calculated as a courtesy and is only an estimate. I am not a licensed nutritionist or dietitian. For the most accurate nutritional data, consult a professional or use your preferred calculator.


These Halloween dirt cups look like dirt and are delicious. Chocolate pudding rocks! Perfect treat for my favorite celebration. Because of the sweets of course!
OMGosh LOOK HOW ADORABLE these are!!! Seriously, I love how simple the recipe is and just how playful it is too! Definitely a keeper!
These Halloween dirt cups are so much fun! They will be a hit at Halloween parties.
My son just saw these while I was reading and said “those look so FUN and I love FUN food!” Lol. Guess I’ll be making these for the party :)
These dirt cups are a great and perfect treat for this coming Halloween festivity! The cuteness is just awesome! Kids will definitely love this in an instant!
Such a creative concept. Perfect for chocolate lovers. My Kids would love to try this out.