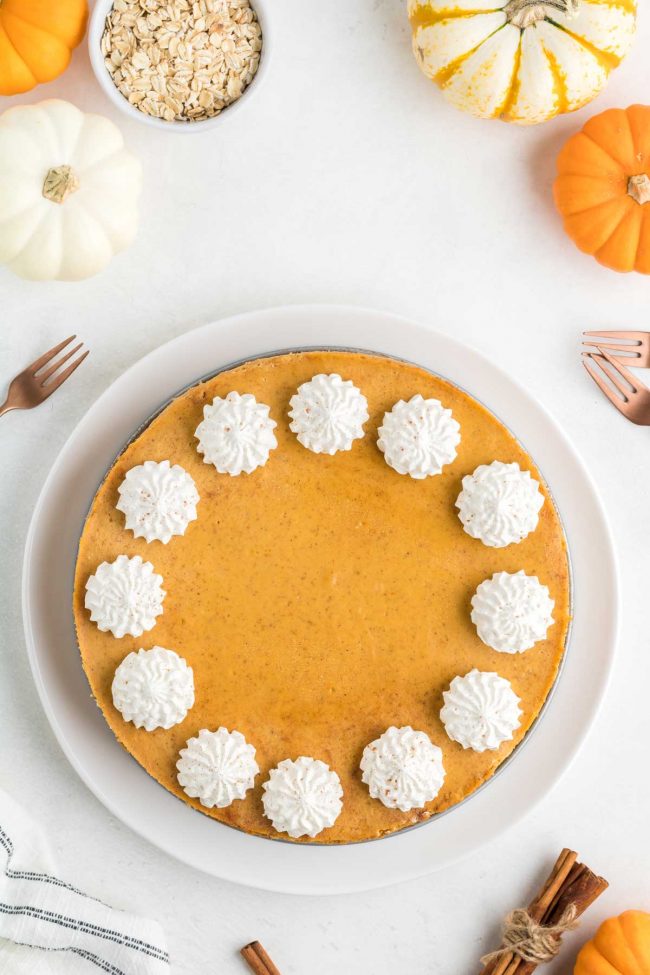
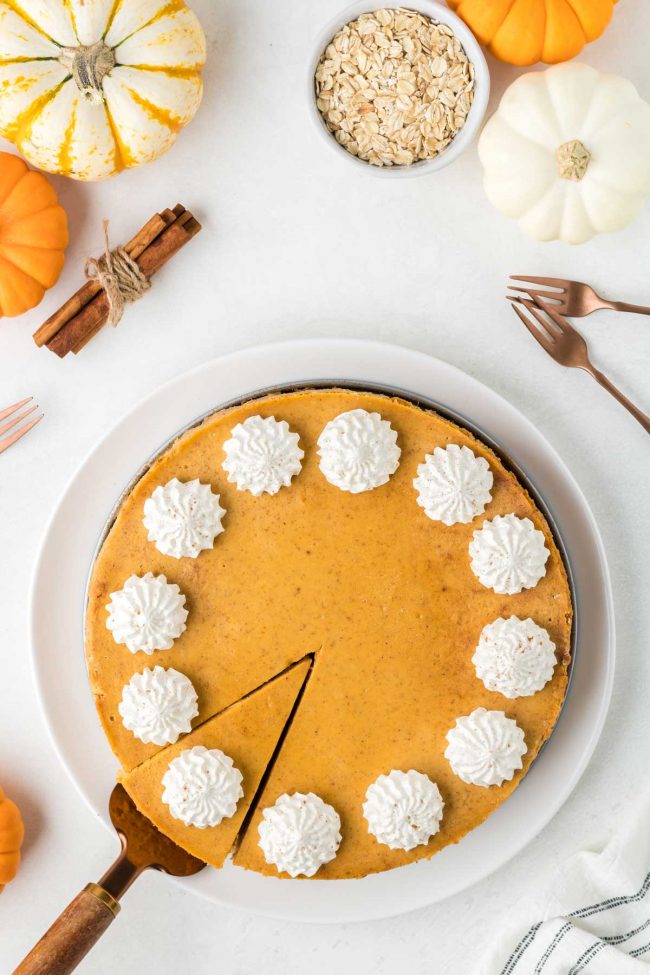
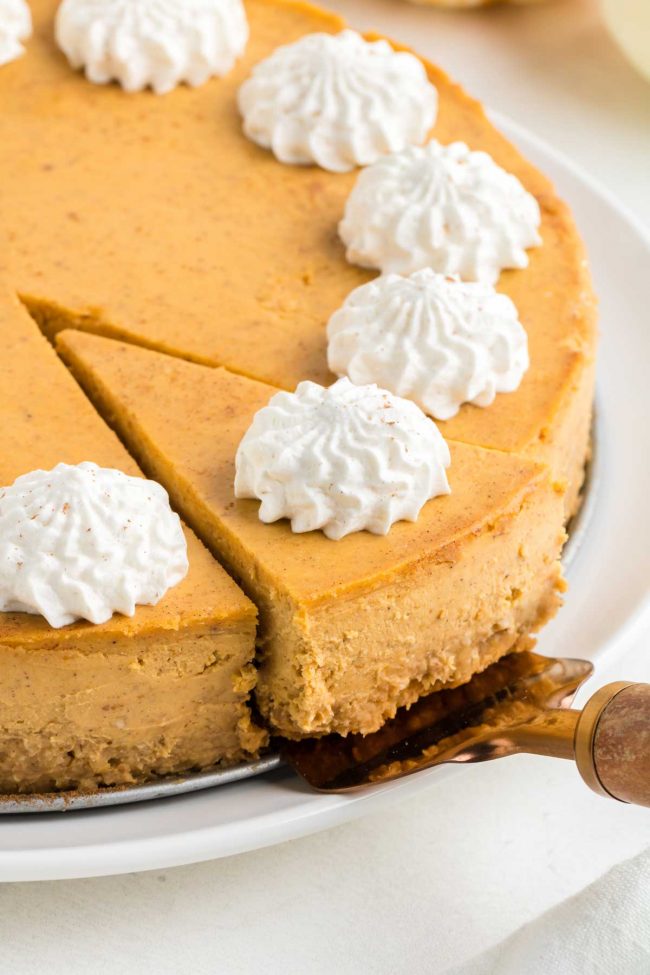
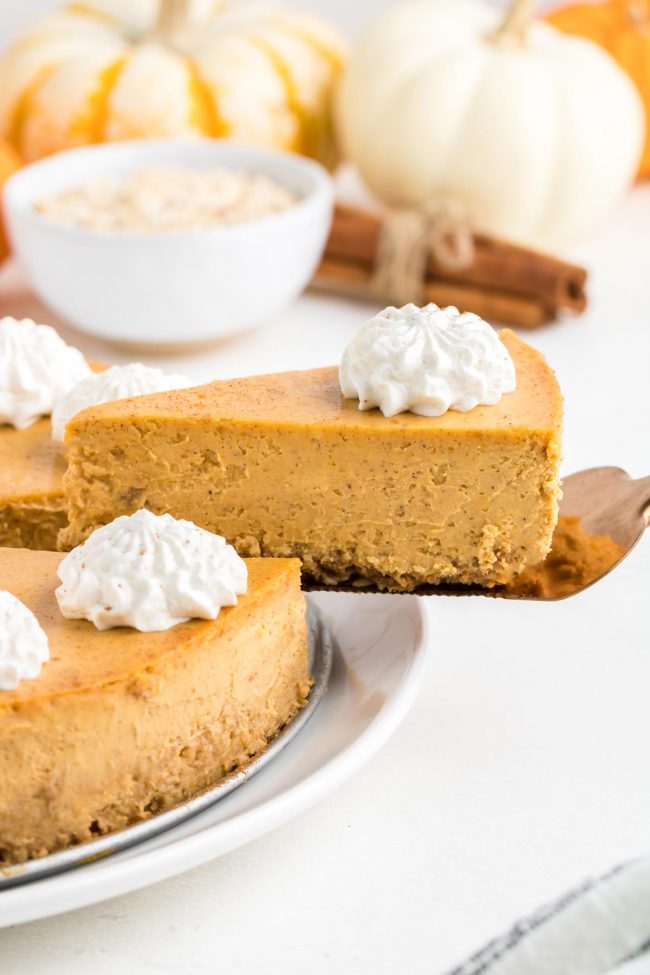
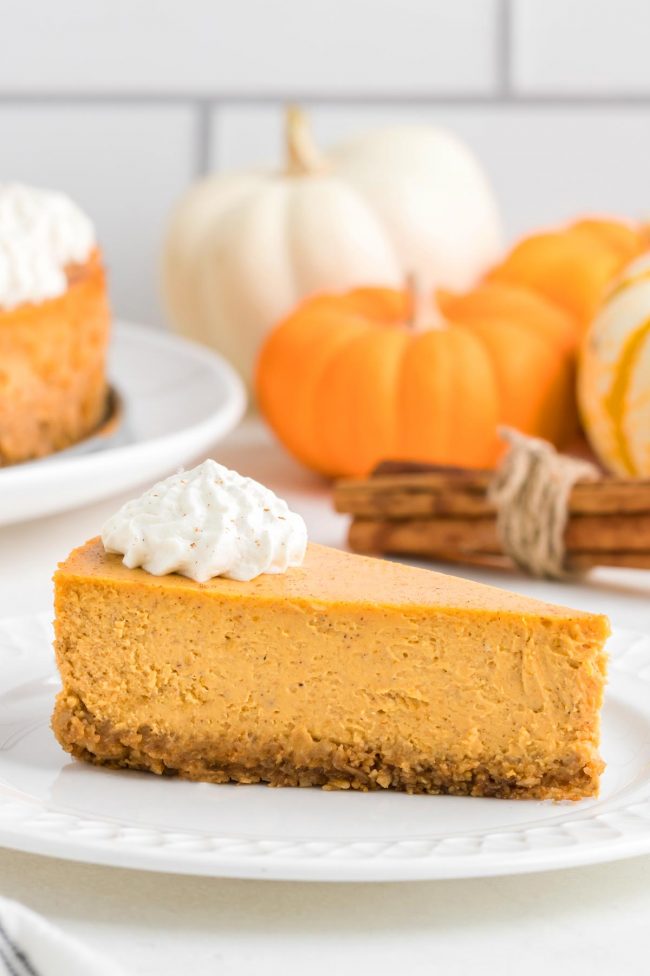
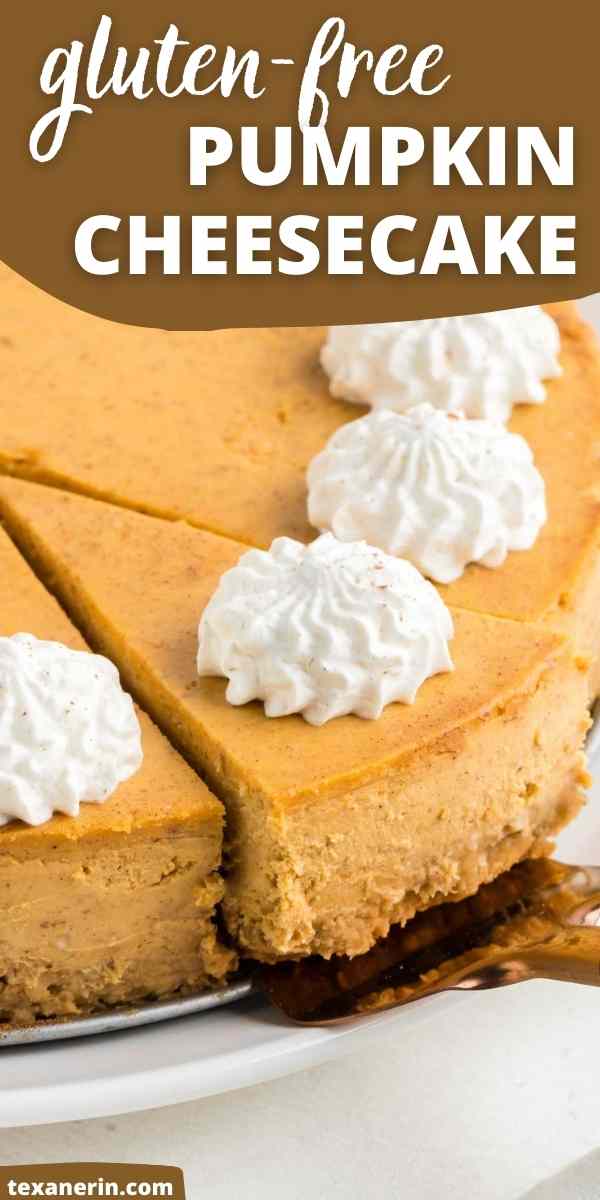
This gluten-free pumpkin cheesecake has a super creamy texture with just the right amount of pumpkin pie spice! The crust is also super quick and easy to make and uses just basic ingredients.
For my paleo and vegan readers, I already have this Vegan Pumpkin Cheesecake, which is still a favorite of mine that I make every year. For the dairy lovers, this recipe is for you.
Homemade oatmeal cookie crust
It seems as though most gluten-free pumpkin cheesecakes use store-bought graham crackers to make the crust. I wanted to make a totally homemade crust, and I think this crust is even tastier than a graham cracker crust!
It’s pretty close to an oatmeal cookie in taste and texture, but it’s more crust-like. And it has somewhat of a graham cracker crust taste.
I posted two Gluten-free Cheesecake Crust recipes yesterday, and the one I used in today’s recipe is one of them. If you have any questions or want to learn more about the crust, then be sure to check out that post.
Ingredients
For the cookie crust, you’ll need gluten-free oats, coconut sugar or brown sugar, cinnamon, salt, butter and vanilla.
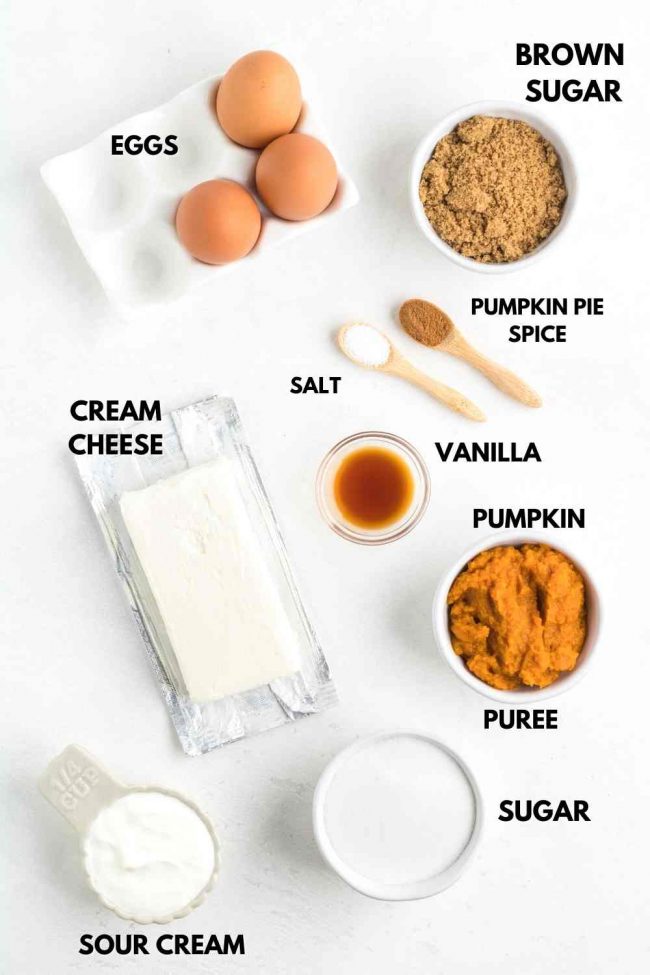
I go into detail about each cheesecake filling ingredients below, but here’s an overview of what you’ll need for the cheesecake filling.
And make sure to use pumpkin puree and not pumpkin pie filling!
Also, I strongly recommend using canned pumpkin puree as it’s more consistent than homemade. Homemade varies so much in how thick it is.
If there’s too much water in your puree, you need to strain it a bit until it resembles canned pumpkin puree. You can see how I did it in my Homemade Pumpkin Puree post.
Can I omit the pumpkin?
Nope! The recipe won’t work. Please find a vanilla cheesecake recipe and add pumpkin pie spice if that’s what you want.
Can I use coconut sugar in the filling?
Sorry, but that’s also something I can’t recommend until trying it myself. I think it’d be good tastewise, but I’d be afraid of it cracking.
Can I omit the pumpkin pie spice?
Yes, but I would highly recommend using at least 1 1/2 teaspoons of cinnamon in its place. The amount is just a guess, though.
To make 1 tablespoon of pumpkin pie spice
No need to buy store-bought pumpkin pie spice if you don’t have any! You can simply use the below mix in today’s cheesecake recipe.
- 2 teaspoons ground cinnamon
- 1/2 teaspoon ground ginger
- 1/2 teaspoon ground nutmeg
- 1/8 teaspoon ground cloves or allspice

Sour cream sub?
Since using sour cream in my keto cheesecake recipe, I’m all for it. It adds extra moisture and tang.
If you don’t want to use sour cream… I don’t know. I’ve seen many people say that you can use heavy cream or full-fat Greek yogurt in its place.
If you’re up for experimenting, you can try that. If it’s important that this cheesecake not have cracks, then I wouldn’t risk it.
Egg sub?
There isn’t a good sub for eggs in a baked cheesecake like this. If you eat dairy, but not eggs, I have this wonderful Eggless Cheesecake.
It uses cornstarch in place of the eggs, but it’s not a direct sub. So, nothing like 1 tablespoon of cornstarch for each egg.
I made other adjustments to the recipe to get the perfect texture and to get it to hold together properly.
Do I have to use a water bath?
I always used to groan at the thought of cheesecake water baths. And I never did them. Until this cheesecake.
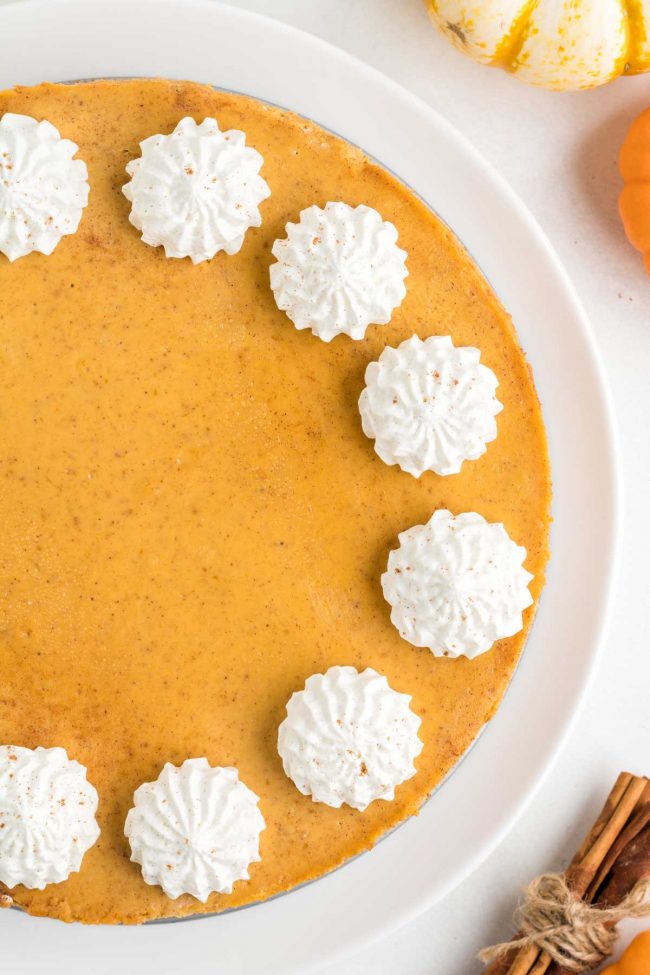
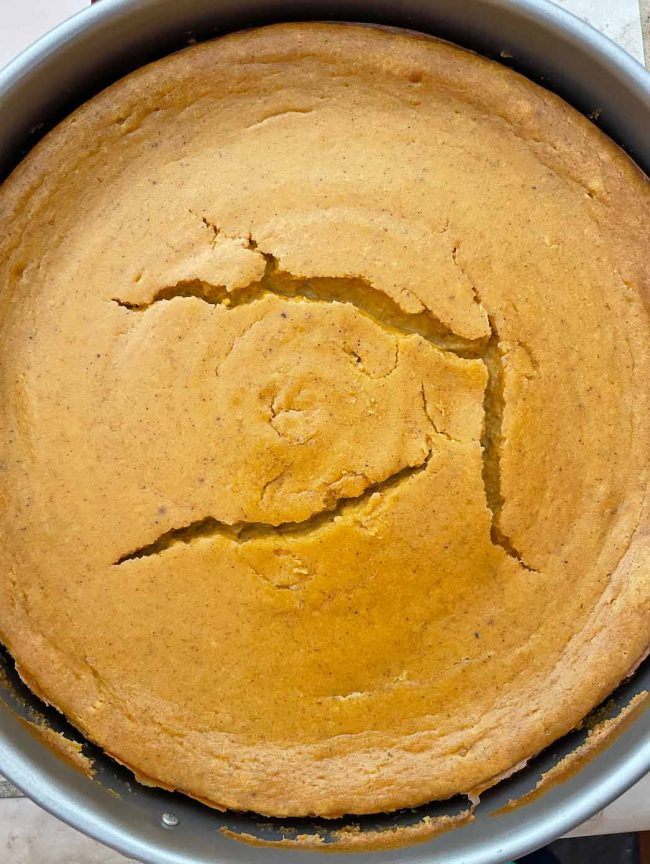
If you don’t mind your cheesecake looking like the photo below, then you can skip the water bath. It came out of the oven looking perfect and then cracked during the 2-hour cool down out of the oven.
If you prefer your cheesecake to look like the other photos in this post, then you must use a water bath.
I’ve only ever posted two full-sized non-vegan cheesecakes: this Keto Cheesecake and this Keto Pumpkin Cheesecake.
I’m not sure if I just had tremendous luck with them, or if the difference is that I used keto sweeteners, but they came out looking perfect without a water bath.
When you see photos of a cheesecake being baked with a water bath, and then photos of the same cheesecake baked without one, you’ll be convinced, too. Here’s a great post all about water baths and lots of comparison photos.
Now that I’ve used a water bath, it’s not scary. It’s one of those things that you do once, and then it’s no big deal. It adds 5 minutes of prep time. That’s it!
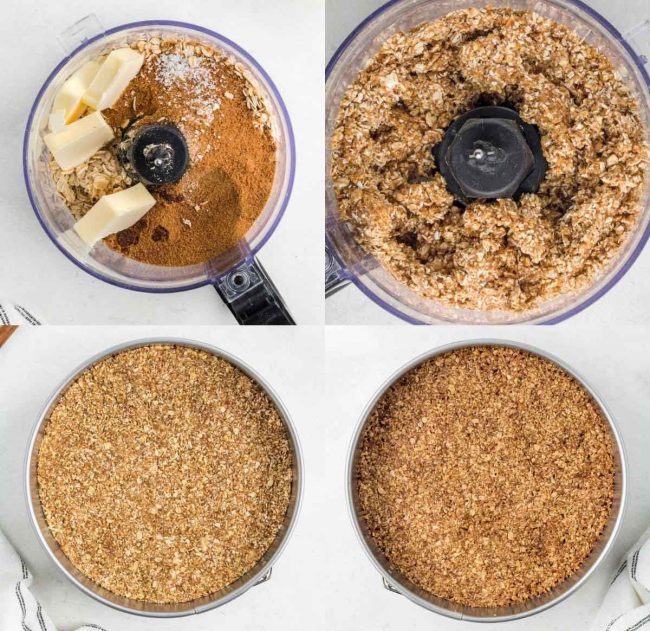
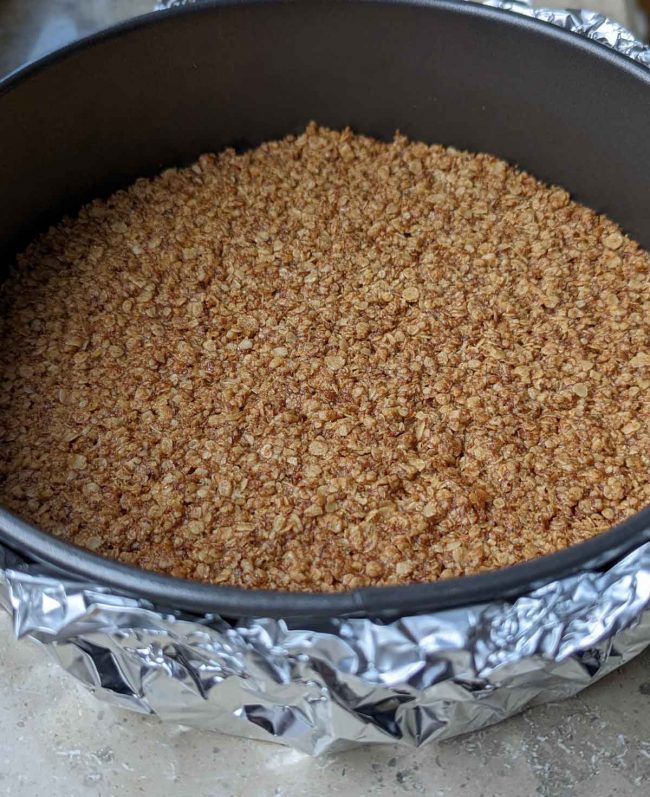
The photo below was how the crust looks when you use quick oats rather than rolled oats. If you want to use a bowl rather than a food processor, you must use quick oats.
If using a food processor, you can use either.
Why use a water bath
A water bath is a pan of hot water that surrounds your cheesecake pan. It buffers the heat so the cheesecake bakes evenly without drying or cracking.
Cheesecake batter is like a custard. Without the extra moisture, a cheesecake can become rubbery in texture.
The water surrounding the pan won’t get hotter than 212 °F (100 °C), which allows the cheesecake to bake slowly and evenly without burning the top.
Tips for a water bath
- First, ensure the pan is deep and wide enough to hold the cheesecake pan.
- To avoid water seeping into a springform pan, wrap it in foil to keep it from leaking.
- Always use hot water in the water bath. Using cold water will change the oven temperature and bake time, so always start with hot water.
- Don’t overfill the water bath. A large cheesecake pan will disperse the water, and you don’t want it to overflow. You can pour hot water into the pan once you’ve set the cheesecake in it, but an inch of hot water will be about right.
- Don’t splash the water! You don’t want any water getting into the cheesecake batter, so be careful when you fill it and when placing the cheesecake in the pan inside the bath.
Live outside the US?
If you live outside of the US, you probably have a different type of cream cheese than in the US. US cream cheese is firmer and meant for baking, rather than the kind for toast, like in Europe – and I believe the rest of the world.
For 8 ounces (225 grams) of cream cheese, you can buy a 300-gram package (the stuff at Aldi, Lidl, etc. works just as well as Philadelphia) and put it in the center of a clean tea towel or cheesecloth. Then squeeze out the liquid until you have 225 grams of cream cheese. So for this recipe, buy 900 grams of cream cheese and squeeze out the liquid until you have 680 grams of cream cheese left.
If you don’t do this and use the cream cheese as is, then your cheesecake will be too watery and won’t bake through.
You’ll keep baking and baking, then it’ll dry out and you’ll have a lousy cheesecake. It’ll also probably crack.
Don’t like pumpkin?
First, I’d have to advise you not to make a pumpkin cheesecake. ;)
If you’ve been tasked to make a pumpkin cheesecake against your will, there’s hope you might like this one!
My photographer said:
That pumpkin cheesecake is AMAZING! I’m not really a pumpkin or pumpkin spice fan, but that cheesecake might have me changing my mind! The texture is super creamy, and it’s not too sweet, just perfect.
It definitely has a nice pumpkin and pumpkin spice flavor, though. I can’t really understand why she likes it if she doesn’t like pumpkin. But I’m taking it as a compliment. :)
Other gluten-free pumpkin recipes
All of the fall recipes listed below are gluten-free or have an easy gluten-free option.
- Gluten-free Pumpkin Muffins
- Pumpkin Cupcakes
- Pumpkin Smoothie
- Pumpkin Margarita
- Pumpkin Cake with Maple Mascarpone Frosting
- Easy Pumpkin Pancakes
I would love to hear from you if you try this gluten-free pumpkin cheesecake! Please leave a comment below or on social media, mention @texanerinbaking or tag #texanerin so I can be sure to see them. Thank you!
Gluten-free Pumpkin Cheesecake
- Prep Time:
- Cook Time:
- Ready in:
- Yield: 12-16 slices
Please read all the notes before beginning or buying ingredients!
Ingredients
- 1 2/3 cups (153 grams) gluten-free oats1
- 1/3 cup (66 grams) tightly packed coconut sugar2 or brown sugar3
- 1/2 teaspoon ground cinnamon
- 1/4 teaspoon salt
- 1/3 cup (75 grams) unsalted butter, softened
- 1/4 teaspoon vanilla extract
- 3 8-oz packages (680 grams) cream cheese4, room temperature
- 1 15-oz (425-gram) can pumpkin puree
- 3/4 cup (150 grams) granulated sugar
- 1/2 cup (100 grams) dark brown sugar
- 1 tablespoon pumpkin pie spice5
- 2 teaspoons vanilla extract
- 1/8 teaspoon salt
- 1/3 cup (80 ml) sour cream, room temp
- 3 large (50 grams each, out of shell) eggs, room temperature
Oatmeal cookie crust:
For the filling:
Directions
- Grease a 9" springform pan on the bottom.6 Preheat the oven to 350 °F (175 °C).
- If not using a food processor, add everything but the butter to a large bowl, stir, and use a pastry cutter to incorporate the butter. You might need to use your hands to get it combined properly.
- If using a food processor, all you do is put everything into the bowl of a food processor. Process for about 30 seconds or until it easily holds together when pinched together.
- Pat over the bottom of the prepared springform pan. Make sure to get the mixture over the lip at the bottom of the pan (if your type of pan has one).
- Bake for 14 minutes or until lightly brown (prepare the filling while the crust bakes). Remove from the oven and let cool on a cooling rack while preparing the filling.
- In a large mixing bowl using an electric hand mixer, beat together the cream cheese, pumpkin, granulated sugar, brown sugar, pumpkin pie spice, vanilla and salt at medium speed until well combined. Beat in the sour cream on low.
- Beat in the eggs, one by one, on low until combined, being sure not to overmix. Set aside for now.
- Do this once your cheesecake crust has cooled enough for you to handle the pan (about 10 minutes). Using heavy-duty, extra-wide foil, cut three pieces that are at least 14" long for your 9" springform pan.
- Put one piece on a flat surface and put the cheesecake pan in the center of the foil piece.
- Tightly wrap the foil around the sides. If any foil goes above the pan's edges, then fold those down a bit.
- Repeat with the other 2 foil sheets for a total of 3 foil layers.
- Get out a roasting pan large enough for your foiled-wrapped cheesecake pan.
- Bring a kettle of water to a boil. How much you'll need depends on the size of your roasting pan. It's better to boil too much than boil too little, and then have to boil more. Should you not have a kettle, then bring water to a boil and then pour it into something that has a spout, which allows for easy pouring and will prevent water from splashing into the cheesecake.
- Place the foil-covered pan into the empty roasting pan. Pour the cheesecake batter over the top of the pre-baked crust. Use a silicone spatula to smooth out the top.
- Right as the water starts boiling, move the waterless roasting pan with the cheesecake in it onto the oven rack.
- Very, very carefully pour the just boiled water into the roasting pan, pouring only about halfway up the sides of the cheesecake pan. Be careful that it doesn't splash onto the cheesecake batter.
- Bake at 350 °F (175 °C) for 50 minutes. When you tap the pan, it won't be totally set but won't be super jiggly.
- Turn off the oven. Open the oven door halfway, and let the cheesecake sit in there for 45 minutes to prevent cracks from forming (that is the purpose of the water bath, but this is an easy step that will also help).
- Remove from the oven, place on a cooling rack, and let the cheesecake come to room temperature, about 2 hours, before chilling for 8+ hours.
- I let the cheesecake chill for 8+ hours and only then cover it up in order to prevent condensation from building up and dropping back down onto the cheesecake. Cover and keep refrigerated for up to 4 days. Can also be frozen for up to 3 months.
Prepare the crust:
Prepare the filling:
Prepare the water bath pan:
Prepare the water bath:
Bake:
Notes
- For the oatmeal cookie crust, if using a food processor, you can use rolled or quick oats. If making the crust by hand, you need to use quick oats.
- Note that it's best to weigh coconut sugar! Some brands are light and coarse and some brands (like the one I use) are very fine and dense.
- The oatmeal cookie crust is more graham cracker-like when using coconut sugar. Brown sugar works and is still delicious.
- If you live outside of the US - you likely have a different type of cream cheese than in the US. US cream cheese is firmer and meant for baking, rather than the kind for toast, like in Europe. For 8 ounces (225 grams) of cream cheese, buy a 300-gram package (the stuff at Aldi, Lidl, etc. works just as well as Philadelphia), put it in the center of a clean tea towel or cheesecloth, and squeeze out the liquid until you have 225 grams of cream cheese. So for this recipe, buy 900 grams of cream cheese and squeeze out the liquid until you have 680 grams of cream cheese left.
- If you don't have pumpkin pie spice, you can use 2 teaspoons ground cinnamon, 1/2 teaspoon ground ginger, 1/2 teaspoon ground nutmeg, and 1/8 teaspoon ground cloves or allspice
- I’ve made this crust several times and never had the butter leak out of the pan, but you might want to put a baking sheet on a rack on the bottom of the oven, just to be careful because a smoking oven is never fun.
Join over 12,400 readers and sweeten up
your inbox with new posts for free!
This subscription is free of charge and can be canceled at any time.


2 comments on “Gluten-free Pumpkin Cheesecake” — Add one!
1 comment is awaiting moderation!
Can you use less sugar for the crust or it wont hold together.i am not of fan of too much sugar.but if its needed then i can compromise a little as its not often.
You’re right – it won’t hold together as well because sugar is a binder. I wouldn’t recommend reducing the sugar, but if you’re just making this for yourself and don’t mind if the crust is crumbly, I think you could reduce it to 1/2 cup from 2/3 cup.